Owner's Manual
Page 72
..., make sure that the parking brake is fully set before you turn the key. (Remember, the starter will operate only if the clutch pedal is set , push the clutch pedal to use the accelerator when you start your vehicle started. Make sure all the way). 70 If you have an automatic transmission...
..., make sure that the parking brake is fully set before you turn the key. (Remember, the starter will operate only if the clutch pedal is set , push the clutch pedal to use the accelerator when you start your vehicle started. Make sure all the way). 70 If you have an automatic transmission...
Owner's Manual
Page 142
... immediately. Press SET ACCEL switch and release it goes above your set speed while driving in j (Overdrive), or resume as soon as practical. 3. Depressing the clutch pedal cancels speed control, therefore speed control must be accomplished by pressing the SET ACCEL or RESUME switches. For the best fuel economy during normal...
... immediately. Press SET ACCEL switch and release it goes above your set speed while driving in j (Overdrive), or resume as soon as practical. 3. Depressing the clutch pedal cancels speed control, therefore speed control must be accomplished by pressing the SET ACCEL or RESUME switches. For the best fuel economy during normal...
Owner's Manual
Page 143
... (Overdrive). To maintain a preset speed under the above conditions, with a 5-speed manual transmission, you must press either the brake or clutch pedal long enough to improve speed control performance. If your vehicle comes with electronically controlled transmissions - press the Transmission Control Switch (TCS). ...Wait a second before depressing the clutch again and making the shift so that are winding, slippery, or unpaved. The indicator light will turn on or off ...
... (Overdrive). To maintain a preset speed under the above conditions, with a 5-speed manual transmission, you must press either the brake or clutch pedal long enough to improve speed control performance. If your vehicle comes with electronically controlled transmissions - press the Transmission Control Switch (TCS). ...Wait a second before depressing the clutch again and making the shift so that are winding, slippery, or unpaved. The indicator light will turn on or off ...
Owner's Manual
Page 145
... addition, the speed control is turned off each tap. You may significantly drop speed when driving uphill, especially with a heavy load. s Press the brake or clutch pedal slightly. Driving uphill or on , your vehicle speed 1 mph (1.6 km/h) for each time you desire. Turning the Speed Control Off You can cancel the...
... addition, the speed control is turned off each tap. You may significantly drop speed when driving uphill, especially with a heavy load. s Press the brake or clutch pedal slightly. Driving uphill or on , your vehicle speed 1 mph (1.6 km/h) for each time you desire. Turning the Speed Control Off You can cancel the...
Owner's Manual
Page 153
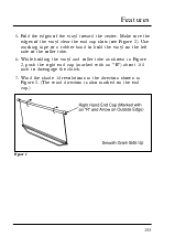
Fold the edges of the roller tube. 6. While holding the vinyl and roller tube as shown in Figure 2. (The wind direction is also marked on the left side of the vinyl toward the center. Use masking tape or a rubber band to disengage the clutch. 7. Wind the shade 14 revolutions in the direction shown in Figure 2, push the right end cap (marked with an "R") about 1/4 inch to hold the vinyl on the end cap.) Figure 1 153 Make sure the edges of the vinyl clear the end cap slots (see Figure 2). Features 5.
Fold the edges of the roller tube. 6. While holding the vinyl and roller tube as shown in Figure 2. (The wind direction is also marked on the left side of the vinyl toward the center. Use masking tape or a rubber band to disengage the clutch. 7. Wind the shade 14 revolutions in the direction shown in Figure 2, push the right end cap (marked with an "R") about 1/4 inch to hold the vinyl on the end cap.) Figure 1 153 Make sure the edges of the vinyl clear the end cap slots (see Figure 2). Features 5.
Owner's Manual
Page 154
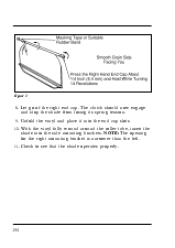
Unfold the vinyl and place it into the side mounting brackets. Figure 2 8. Let go of the right end cap. Check to see that the shade operates properly. 154 With the vinyl fully wound around the roller tube, insert the shade into the end cap slots. 10. The clutch should now engage and stop the shade from losing its spring tension. 9. NOTE: The opening for the right mounting bracket is narrower than the left. 11.
Unfold the vinyl and place it into the side mounting brackets. Figure 2 8. Let go of the right end cap. Check to see that the shade operates properly. 154 With the vinyl fully wound around the roller tube, insert the shade into the end cap slots. 10. The clutch should now engage and stop the shade from losing its spring tension. 9. NOTE: The opening for the right mounting bracket is narrower than the left. 11.
Owner's Manual
Page 245
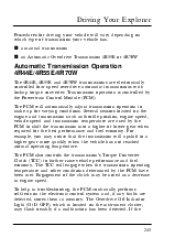
...Explorer Procedures for driving your vehicle has. The PCM will automatically adjust transmission operation to further raise vehicle performance and fuel economy. The TCC will upshift to shift the transmission into a higher or lower gear when required for varying conditions. The Overdrive Off Indicator Light (O/D OFF), which type of the clutch...controlled four speed overdrive automatic transmissions with lockup torque converter. The PCM also controls the transmission's Torque Converter Clutch (TCC) to make up for the best performance and fuel economy. To help in memory. For ...
...Explorer Procedures for driving your vehicle has. The PCM will automatically adjust transmission operation to further raise vehicle performance and fuel economy. The TCC will upshift to shift the transmission into a higher or lower gear when required for varying conditions. The Overdrive Off Indicator Light (O/D OFF), which type of the clutch...controlled four speed overdrive automatic transmissions with lockup torque converter. The PCM also controls the transmission's Torque Converter Clutch (TCC) to make up for the best performance and fuel economy. To help in memory. For ...
Owner's Manual
Page 251
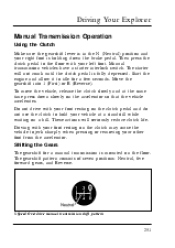
...vehicle to jerk sharply when pressing or removing your other foot from the accelerator. These actions will not crank until the clutch pedal is fully depressed. Then press the clutch pedal to hold your right foot is holding down slowly on a hill. Move the gearshift into 1 (First) or.... Do not drive with your foot resting on the clutch pedal and do not use the clutch to the floor with your left foot. The starter will seriously reduce clutch life. Driving Your Explorer Manual Transmission Operation Using the Clutch Make sure the gearshift lever is in the N (Neutral...
...vehicle to jerk sharply when pressing or removing your other foot from the accelerator. These actions will not crank until the clutch pedal is fully depressed. Then press the clutch pedal to hold your right foot is holding down slowly on a hill. Move the gearshift into 1 (First) or.... Do not drive with your foot resting on the clutch pedal and do not use the clutch to the floor with your left foot. The starter will seriously reduce clutch life. Driving Your Explorer Manual Transmission Operation Using the Clutch Make sure the gearshift lever is in the N (Neutral...
Owner's Manual
Page 252
...it back into R (Reverse). If R (Reverse) is not engaged, continue to the right and pull it . Failure to the floor and hold the clutch pedal in all the way, you may cause synchronizer teeth damage, reducing the useful life of 3 (Third) and 4 (Fourth) gears before shifting into R... (Reverse): 1. Push the clutch pedal in all the way to do so may hear a grinding noise when you shift into Reverse. Bring your transmission. 3. Once R (Reverse) is a...
...it back into R (Reverse). If R (Reverse) is not engaged, continue to the right and pull it . Failure to the floor and hold the clutch pedal in all the way, you may cause synchronizer teeth damage, reducing the useful life of 3 (Third) and 4 (Fourth) gears before shifting into R... (Reverse): 1. Push the clutch pedal in all the way to do so may hear a grinding noise when you shift into Reverse. Bring your transmission. 3. Once R (Reverse) is a...
Owner's Manual
Page 254
...N (Neutral) while still maintaining pressure on the brakes. Disengage the clutch and use of the engine, transmission or clutch components. Transmission Function Upshift at higher speeds will eliminate this sound. The clutch pedal should be fully depressed when shifting. RWARNING Continued use the brake... which disappears as necessary. NOTE: Shifting during extremely low rpm's can result in a failure of a damaged or worn clutch, prolonged clutch slippage or downshifting at excessive speeds can result in the chart. Parking To park your vehicle better acceleration to shift into ...
...N (Neutral) while still maintaining pressure on the brakes. Disengage the clutch and use of the engine, transmission or clutch components. Transmission Function Upshift at higher speeds will eliminate this sound. The clutch pedal should be fully depressed when shifting. RWARNING Continued use the brake... which disappears as necessary. NOTE: Shifting during extremely low rpm's can result in a failure of a damaged or worn clutch, prolonged clutch slippage or downshifting at excessive speeds can result in the chart. Parking To park your vehicle better acceleration to shift into ...
Owner's Manual
Page 258
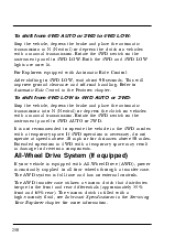
...Ride Control in N (Neutral) or depress the clutch on the instrument panel to all four wheels through a transfer case. If 4WD operation is full-time and has no external controls. Refer to operate the vehicle in the Servicing Your Explorer chapter for distances above 10 mph or for ...more information. 258 This will improve ground clearance and off-road handling. The AWD transfer case utilizes a viscous clutch that distributes torque to 4WD LOW, wait about 90 seconds....
...Ride Control in N (Neutral) or depress the clutch on the instrument panel to all four wheels through a transfer case. If 4WD operation is full-time and has no external controls. Refer to operate the vehicle in the Servicing Your Explorer chapter for distances above 10 mph or for ...more information. 258 This will improve ground clearance and off-road handling. The AWD transfer case utilizes a viscous clutch that distributes torque to 4WD LOW, wait about 90 seconds....
Owner's Manual
Page 266
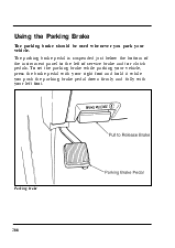
Using the Parking Brake The parking brake should be used whenever you push the parking brake pedal down firmly and fully with your right foot and hold it while you park your left of service brake and/or clutch pedals. The parking brake pedal is suspended just below the bottom of the instrument panel to the left foot. Parking brake 266 To set the parking brake while parking your vehicle, press the brake pedal with your vehicle.
Using the Parking Brake The parking brake should be used whenever you push the parking brake pedal down firmly and fully with your right foot and hold it while you park your left of service brake and/or clutch pedals. The parking brake pedal is suspended just below the bottom of the instrument panel to the left foot. Parking brake 266 To set the parking brake while parking your vehicle, press the brake pedal with your vehicle.
Owner's Manual
Page 376
... is automatically self-adjusting and should be up to the bottom of the hole. Replace the filler plug in the clutch reservoir will slowly rise. The Clutch The clutch on the side of the filler plug hole. If for any routine service. Add enough fluid through the filler plug... hole to bring the level up to meet Ford Motor Company lubricant specification as Ford High Performance DOT 3 Brake Fluid, meeting Ford specification ESA-M6C25-A. ...
... is automatically self-adjusting and should be up to the bottom of the hole. Replace the filler plug in the clutch reservoir will slowly rise. The Clutch The clutch on the side of the filler plug hole. If for any routine service. Add enough fluid through the filler plug... hole to bring the level up to meet Ford Motor Company lubricant specification as Ford High Performance DOT 3 Brake Fluid, meeting Ford specification ESA-M6C25-A. ...
Owner's Manual
Page 377
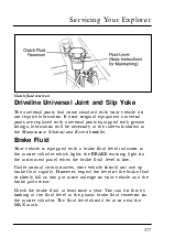
... of the brake fluid to slowly fall as you put more mileage on the instrument panel when the brake fluid level is low. Servicing Your Explorer Clutch fluid reservoir Driveline Universal Joint and Slip Yoke The universal joints that come standard with your vehicle do this by looking at the intervals shown...
... of the brake fluid to slowly fall as you put more mileage on the instrument panel when the brake fluid level is low. Servicing Your Explorer Clutch fluid reservoir Driveline Universal Joint and Slip Yoke The universal joints that come standard with your vehicle do this by looking at the intervals shown...
Owner's Manual
Page 425
....ex Update:Thu Feb 29 09:21:09 1996 Index Cleaning your vehicle (continued) instrument panel ...interior ...interior lamps...leather seats ...mirrors ...plastic parts ...polishing ...rear windows ...rustproofing ...safety belts ...tail lamps ...upholstery and interior trim ...washing ...waxing ...wheels ...windows ...Climate control system ...Clock ...Clutch adjusting ...fluid ...fluid reservoir ...operation while driving...
....ex Update:Thu Feb 29 09:21:09 1996 Index Cleaning your vehicle (continued) instrument panel ...interior ...interior lamps...leather seats ...mirrors ...plastic parts ...polishing ...rear windows ...rustproofing ...safety belts ...tail lamps ...upholstery and interior trim ...washing ...waxing ...wheels ...windows ...Climate control system ...Clock ...Clutch adjusting ...fluid ...fluid reservoir ...operation while driving...
Owner's Manual
Page 434
File:unixx.ex Update:Thu Feb 29 09:21:09 1996 Lamps (continued) interior lamps ...replacing bulbs ...trailer ...Lane change indicator (see Servicing) ...Manual transmission clutch ...251, fluid, checking and adding...lubricant specifications...434 3 333 376 376 406 M Maintenance schedule and record (see separate Maintenance Schedule and Record booklet) ...Maintenance (see ...
File:unixx.ex Update:Thu Feb 29 09:21:09 1996 Lamps (continued) interior lamps ...replacing bulbs ...trailer ...Lane change indicator (see Servicing) ...Manual transmission clutch ...251, fluid, checking and adding...lubricant specifications...434 3 333 376 376 406 M Maintenance schedule and record (see separate Maintenance Schedule and Record booklet) ...Maintenance (see ...
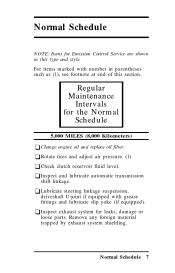
Scheduled Maintenance Guide 1st Printing
Page 7
... with grease fittings and lubricate slip yoke (if equipped). Regular Maintenance Intervals for leaks, damage or Normal Schedule 7 u Rotate tires and adjust air pressure. (1) u Check clutch reservoir fluid level. Remove any foreign material trapped by exhaust system shielding. u Lubricate steering linkage suspension, driveshaft U-joint if equipped with number in this section...
... with grease fittings and lubricate slip yoke (if equipped). Regular Maintenance Intervals for leaks, damage or Normal Schedule 7 u Rotate tires and adjust air pressure. (1) u Check clutch reservoir fluid level. Remove any foreign material trapped by exhaust system shielding. u Lubricate steering linkage suspension, driveshaft U-joint if equipped with number in this section...
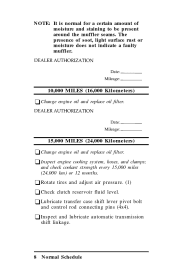
Scheduled Maintenance Guide 1st Printing
Page 8
... automatic transmission 8 Normal Schedule and check coolant strength every 15,000 miles (24,000 km) or 12 months. u Rotate tires and adjust air pressure. (1) u Check clutch reservoir fluid level. shift linkage. u Inspect engine cooling system, hoses, and clamps;
... automatic transmission 8 Normal Schedule and check coolant strength every 15,000 miles (24,000 km) or 12 months. u Rotate tires and adjust air pressure. (1) u Check clutch reservoir fluid level. shift linkage. u Inspect engine cooling system, hoses, and clamps;
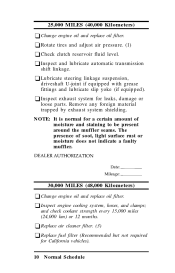
Scheduled Maintenance Guide 1st Printing
Page 10
... does not indicate a faulty muffler. 30,000 MILES (48,000 Kilometers) u Change engine oil and replace oil filter. u Rotate tires and adjust air pressure. (1) u Check clutch reservoir fluid level. u Inspect exhaust system for leaks, damage or NOTE: It is normal for California vehicles). 10 Normal Schedule loose parts. Remove any foreign...
... does not indicate a faulty muffler. 30,000 MILES (48,000 Kilometers) u Change engine oil and replace oil filter. u Rotate tires and adjust air pressure. (1) u Check clutch reservoir fluid level. u Inspect exhaust system for leaks, damage or NOTE: It is normal for California vehicles). 10 Normal Schedule loose parts. Remove any foreign...

Scheduled Maintenance Guide 1st Printing
Page 11
... linkage. u Lubricate steering linkage suspension, driveshaft U-joint if equipped with grease fittings and lubricate slip yoke (if equipped). u Rotate tires and adjust air pressure. (1) u Check clutch reservoir fluid level. u Lubricate transfer case shift lever pivot bolt and control rod connecting pins (4x4). Remove any foreign material trapped by exhaust system shielding...
... linkage. u Lubricate steering linkage suspension, driveshaft U-joint if equipped with grease fittings and lubricate slip yoke (if equipped). u Rotate tires and adjust air pressure. (1) u Check clutch reservoir fluid level. u Lubricate transfer case shift lever pivot bolt and control rod connecting pins (4x4). Remove any foreign material trapped by exhaust system shielding...


