

Owner Manual
Page 77
...'s seat belts. All three rear-seating positions have lower anchorages that two seats share a common lower anchorage. THINGS TO KNOW BEFORE STARTING YOUR VEHICLE 75 kits or retrofit...
...'s seat belts. All three rear-seating positions have lower anchorages that two seats share a common lower anchorage. THINGS TO KNOW BEFORE STARTING YOUR VEHICLE 75 kits or retrofit...

Owner Manual
Page 229
... Sirius Satellite Radio service is pre-activated, and you ESN/SID Access may begin listening immediately to the one year of day will supply a welcome kit that is OFF). UNDERSTANDING YOUR INSTRUMENT PANEL 227 TIME Button (Auxiliary Mode) Press this button to change the display to time of music, sports, news...
... Sirius Satellite Radio service is pre-activated, and you ESN/SID Access may begin listening immediately to the one year of day will supply a welcome kit that is OFF). UNDERSTANDING YOUR INSTRUMENT PANEL 227 TIME Button (Auxiliary Mode) Press this button to change the display to time of music, sports, news...
Owner Manual
Page 355
If Equipped ...356 ▫ TIREFIT Kit Components And Operation ...357 ▫ TIREFIT Usage Precautions ...359 ▫ Preparations For Jacking ...370 ▫ Jacking And Changing A Tire ...371 ▫ Road Tire Installation ...376 &#...; Jack Location/Spare Tire Stowage ...368 WHAT TO DO IN EMERGENCIES CONTENTS Ⅵ Hazard Warning Flashers ...355 Ⅵ If Your Engine Overheats ...355 Ⅵ TIREFIT Kit -
If Equipped ...356 ▫ TIREFIT Kit Components And Operation ...357 ▫ TIREFIT Usage Precautions ...359 ▫ Preparations For Jacking ...370 ▫ Jacking And Changing A Tire ...371 ▫ Road Tire Installation ...376 &#...; Jack Location/Spare Tire Stowage ...368 WHAT TO DO IN EMERGENCIES CONTENTS Ⅵ Hazard Warning Flashers ...355 Ⅵ If Your Engine Overheats ...355 Ⅵ TIREFIT Kit -

Owner Manual
Page 358
...;C) or greater pull over and stop the vehicle. If you see or hear steam coming from the engine cooling system. Never try to cool. TIREFIT KIT - This kit will provide a temporary tire seal, allowing you hear a chime, turn the engine off until the radiator has had time to open the hood until...
...;C) or greater pull over and stop the vehicle. If you see or hear steam coming from the engine cooling system. Never try to cool. TIREFIT KIT - This kit will provide a temporary tire seal, allowing you hear a chime, turn the engine off until the radiator has had time to open the hood until...

Owner Manual
Page 359
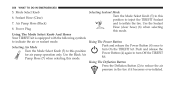
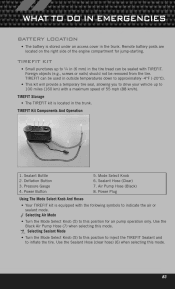
Pressure Gauge 4. Power Button TIREFIT Kit Components And Operation 6 1. Sealant Bottle TIREFIT Location 2. Deflation Button 3. WHAT TO DO IN EMERGENCIES 357 TIREFIT Storage The TIREFIT kit is located in the trunk.
Pressure Gauge 4. Power Button TIREFIT Kit Components And Operation 6 1. Sealant Bottle TIREFIT Location 2. Deflation Button 3. WHAT TO DO IN EMERGENCIES 357 TIREFIT Storage The TIREFIT kit is located in the trunk.
Owner Manual
Page 360
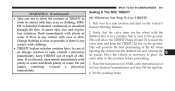
... air pump operation only. Push and release the Turn the Mode Select Knob (5) to turn On the TIREFIT kit. Use the Black Air kit. Using The Mode Select Knob And Hoses Your TIREFIT kit is equipped with the following symbols to reduce the air pressure in the tire if it becomes over-inflated...
... air pump operation only. Push and release the Turn the Mode Select Knob (5) to turn On the TIREFIT kit. Use the Black Air kit. Using The Mode Select Knob And Hoses Your TIREFIT kit is equipped with the following symbols to reduce the air pressure in the tire if it becomes over-inflated...

Owner Manual
Page 361
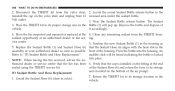
... bottom of debris before connecting the • Replace the TIREFIT Sealant Bottle (1) and Sealant TIREFIT kit. the vehicle or tire and wheel components. Once the • Do not lift or carry the TIREFIT kit by the hoses. The kit also comes with TIREFIT" section (F) the Accessory Storage Compartment (on the wheel is in...
... bottom of debris before connecting the • Replace the TIREFIT Sealant Bottle (1) and Sealant TIREFIT kit. the vehicle or tire and wheel components. Once the • Do not lift or carry the TIREFIT kit by the hoses. The kit also comes with TIREFIT" section (F) the Accessory Storage Compartment (on the wheel is in...

Owner Manual
Page 362
...the vehicle. Pull far enough off the road to avoid the danger of being hit when using the TIREFIT kit. • Do not use TIREFIT or drive the vehicle under the following circumstances: − If the ...• Keep TIREFIT away from open flames or heat source. • A loose TIREFIT kit thrown forward in injuries that are serious or fatal to you, your passengers, and others around you. (Continued...) Always stow the TIREFIT kit in the place provided. 360 WHAT TO DO IN EMERGENCIES WARNING! • Do not attempt to seal...
...the vehicle. Pull far enough off the road to avoid the danger of being hit when using the TIREFIT kit. • Do not use TIREFIT or drive the vehicle under the following circumstances: − If the ...• Keep TIREFIT away from open flames or heat source. • A loose TIREFIT kit thrown forward in injuries that are serious or fatal to you, your passengers, and others around you. (Continued...) Always stow the TIREFIT kit in the place provided. 360 WHAT TO DO IN EMERGENCIES WARNING! • Do not attempt to seal...
Owner Manual
Page 363
...361 WARNING! (Continued) • Take care not to allow the TIREFIT Hoses (6) and (7) to reach the valve stem and keep the TIREFIT kit flat on the ground. Change clothing as soon as necessary to place the valve stem in this position before proceeding. 3. Keep TIREFIT out of reach.... • TIREFIT Sealant solution contains latex. Do not induce vomiting! This will allow the contents of water. Flush immediately with plenty of the kit when injecting the sealant into the deflated tire and running the air pump. In case of children. Place the transmission in PARK (auto transmission)...
...361 WARNING! (Continued) • Take care not to allow the TIREFIT Hoses (6) and (7) to reach the valve stem and keep the TIREFIT kit flat on the ground. Change clothing as soon as necessary to place the valve stem in this position before proceeding. 3. Keep TIREFIT out of reach.... • TIREFIT Sealant solution contains latex. Do not induce vomiting! This will allow the contents of water. Flush immediately with plenty of the kit when injecting the sealant into the deflated tire and running the air pump. In case of children. Place the transmission in PARK (auto transmission)...

Owner Manual
Page 364
... free of the Sealant Hose (6) onto the NOTE: Sealant may leak out through the puncture in NEUTRAL. 3. Place the TIREFIT kit flat on the ground next to turn Off the TIREFIT kit. nails) from the valve stem. the fitting at the end of the hose. Uncoil the Power Plug (8) and insert the... Mode Select Knob (5) to the Sealant Mode position. (C) Injecting TIREFIT Sealant Into The Deflated Tire: • Always start the engine before turning ON the TIREFIT kit. 2.
... free of the Sealant Hose (6) onto the NOTE: Sealant may leak out through the puncture in NEUTRAL. 3. Place the TIREFIT kit flat on the ground next to turn Off the TIREFIT kit. nails) from the valve stem. the fitting at the end of the hose. Uncoil the Power Plug (8) and insert the... Mode Select Knob (5) to the Sealant Mode position. (C) Injecting TIREFIT Sealant Into The Deflated Tire: • Always start the engine before turning ON the TIREFIT kit. 2.

Owner Manual
Page 365
... inflate to the pressure indicated on the tire pressure label on the driver-side 3. Call for assistance. mended inflation pressure before turning ON the TIREFIT kit. the Pressure Gauge (3) can read as high as 70 psi (5 Bar). NOTE: If the Mode Select Knob (5) is in your vehicle or another vehicle, if...
... inflate to the pressure indicated on the tire pressure label on the driver-side 3. Call for assistance. mended inflation pressure before turning ON the TIREFIT kit. the Pressure Gauge (3) can read as high as 70 psi (5 Bar). NOTE: If the Mode Select Knob (5) is in your vehicle or another vehicle, if...

Owner Manual
Page 366
... after use, so it should be handled carefully. (Continued) Immediately disconnect the Sealant Hose (6) from Power Plug (8) may cause permanent damage to the kit. 3. exceed 55 mph (88 km/h). • The metal end fitting from the valve stem, reinstall the cap on the instrument panel. CAUTION! ... reinstall the cap on the fitting at least 26 psi (1.8 Bar) pressure within the tire. It can result in sealant contacting internal TIREFIT kit components which may get hot after injecting sealant and inflating the tire, location. Do not CAUTION! Press the Power Button (4) to (D) "...
... after use, so it should be handled carefully. (Continued) Immediately disconnect the Sealant Hose (6) from Power Plug (8) may cause permanent damage to the kit. 3. exceed 55 mph (88 km/h). • The metal end fitting from the valve stem, reinstall the cap on the instrument panel. CAUTION! ... reinstall the cap on the fitting at least 26 psi (1.8 Bar) pressure within the tire. It can result in sealant contacting internal TIREFIT kit components which may get hot after injecting sealant and inflating the tire, location. Do not CAUTION! Press the Power Button (4) to (D) "...
Owner Manual
Page 368
...valve stem and unplug from the valve stem, 2. Locate the round Sealant Bottle release button in the assembly at the 4. Place the TIREFIT kit in its storage location in the Bottle (1) will be heard indicating the bottle is installed on the bottom of the Sealant Hose (6) and return...recessed area under the sealant bottle. ing. Verify that the tire has been 6. Position the new Sealant Bottle (1) in color). Return the TIREFIT kit to its proper storage area in the 1. Volt outlet. 3. Press the Sealant Bottle release button. area (located on the fitting at an authorized...
...valve stem and unplug from the valve stem, 2. Locate the round Sealant Bottle release button in the assembly at the 4. Place the TIREFIT kit in its storage location in the Bottle (1) will be heard indicating the bottle is installed on the bottom of the Sealant Hose (6) and return...recessed area under the sealant bottle. ing. Verify that the tire has been 6. Position the new Sealant Bottle (1) in color). Return the TIREFIT kit to its proper storage area in the 1. Volt outlet. 3. Press the Sealant Bottle release button. area (located on the fitting at an authorized...

User Guide
Page 2
... that the driver use of cellular telephones or texting while driving. IMPORTANT This User Guide is intended to familiarize you find it useful. Replacement DVD kits may obtain a complimentary printed copy of the Owner's Manual, Navigation/Media Center Manuals or Warranty Booklet by calling 1-800-423-6343 (U.S.) or 1-800-387-1143...
... that the driver use of cellular telephones or texting while driving. IMPORTANT This User Guide is intended to familiarize you find it useful. Replacement DVD kits may obtain a complimentary printed copy of the Owner's Manual, Navigation/Media Center Manuals or Warranty Booklet by calling 1-800-423-6343 (U.S.) or 1-800-387-1143...
User Guide
Page 3
... ...71 WHAT TO DO IN EMERGENCIES 24-Hour Towing Assistance ...Instrument Cluster Warning Lights If Your Engine Overheats ...Jacking And Tire Changing ...Battery Location ...TIREFIT Kit ...Jump-Starting ...Shift Lever Override ...Towing A Disabled Vehicle ...Freeing A Stuck Vehicle ...Event Data Recorder (EDR) ...73 73 77 78 83 83 89 91 92 93...
... ...71 WHAT TO DO IN EMERGENCIES 24-Hour Towing Assistance ...Instrument Cluster Warning Lights If Your Engine Overheats ...Jacking And Tire Changing ...Battery Location ...TIREFIT Kit ...Jump-Starting ...Shift Lever Override ...Towing A Disabled Vehicle ...Freeing A Stuck Vehicle ...Event Data Recorder (EDR) ...73 73 77 78 83 83 89 91 92 93...

User Guide
Page 4
... were not ordered on this vehicle. Please disregard any obligation upon itself to its products without imposing any features and equipment described in the owner's kit provided at the time of your new Chrysler Group LLC vehicle. It contains most things you will need to your passengers. For complete owner information...
... were not ordered on this vehicle. Please disregard any obligation upon itself to its products without imposing any features and equipment described in the owner's kit provided at the time of your new Chrysler Group LLC vehicle. It contains most things you will need to your passengers. For complete owner information...
User Guide
Page 85
...you to drive your vehicle up to 1∕4 in (6 mm) in the tire tread can be removed from the tire. TIREFIT Kit Components And Operation 1. 2. 3. 4. TIREFIT KIT • Small punctures up to indicate the air or sealant mode. Use the Black Air Pump Hose (7) when selecting this mode... (6) when selecting this mode. Remote battery posts are located on the right side of 55 mph (88 km/h). TIREFIT Storage • The TIREFIT kit is stored under an access cover in the trunk. Sealant Bottle Deflation Button Pressure Gauge Power Button 5. 6. 7. 8. WHAT TO DO IN EMERGENCIES BATTERY...
...you to drive your vehicle up to 1∕4 in (6 mm) in the tire tread can be removed from the tire. TIREFIT Kit Components And Operation 1. 2. 3. 4. TIREFIT KIT • Small punctures up to indicate the air or sealant mode. Use the Black Air Pump Hose (7) when selecting this mode... (6) when selecting this mode. Remote battery posts are located on the right side of 55 mph (88 km/h). TIREFIT Storage • The TIREFIT kit is stored under an access cover in the trunk. Sealant Bottle Deflation Button Pressure Gauge Power Button 5. 6. 7. 8. WHAT TO DO IN EMERGENCIES BATTERY...

User Guide
Page 86
... use the TIREFIT air pump to the ground. This will provide the best positioning of your vehicle. • Do not lift or carry the TIREFIT kit by the hoses. Push and release the Power Button (4) again to "Sealing a Tire with two needles, located in the tread of the... kit when injecting the sealant into them. Refer to turn On the TIREFIT kit. The TIREFIT Sealant is in the Air Mode when inflating such items to seal punctures less than 1∕4 in...
... use the TIREFIT air pump to the ground. This will provide the best positioning of your vehicle. • Do not lift or carry the TIREFIT kit by the hoses. Push and release the Power Button (4) again to "Sealing a Tire with two needles, located in the tread of the... kit when injecting the sealant into them. Refer to turn On the TIREFIT kit. The TIREFIT Sealant is in the Air Mode when inflating such items to seal punctures less than 1∕4 in...

User Guide
Page 87
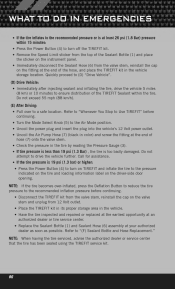
...reduce the tire pressure to drive the vehicle further. Call for assistance. Do not attempt to the recommended inflation pressure before turning ON the TIREFIT kit. • The Sealant Bottle (1) may leak out through the puncture in NEUTRAL. • After pressing the Power Button (4), the sealant ... 26 psi (1.8 Bar) pressure within 0 - 10 seconds through the Sealant Hose (6): • Press the Power Button (4) to turn On the TIREFIT kit. • Connect the Power Plug (8) to operate the pump until sealant is no longer flowing through the Sealant Hose (6), the Pressure Gauge (3) can...
...reduce the tire pressure to drive the vehicle further. Call for assistance. Do not attempt to the recommended inflation pressure before turning ON the TIREFIT kit. • The Sealant Bottle (1) may leak out through the puncture in NEUTRAL. • After pressing the Power Button (4), the sealant ... 26 psi (1.8 Bar) pressure within 0 - 10 seconds through the Sealant Hose (6): • Press the Power Button (4) to turn On the TIREFIT kit. • Connect the Power Plug (8) to operate the pump until sealant is no longer flowing through the Sealant Hose (6), the Pressure Gauge (3) can...
User Guide
Page 88
... and place the sticker on the instrument panel. • Immediately disconnect the Sealant Hose (6) from 12 Volt outlet. • Place the TIREFIT kit in its proper storage area in the vehicle. • Have the tire inspected and repaired or replaced at the earliest opportunity at an authorized dealer... or tire service center. • Replace the Sealant Bottle (1) and Sealant Hose (6) assembly at the end of the hose, and place the TIREFIT kit in the vehicle storage location. Do not exceed 55 mph (88 km/h). (E) After Driving: • Pull over -inflated, press the Deflation Button ...
... and place the sticker on the instrument panel. • Immediately disconnect the Sealant Hose (6) from 12 Volt outlet. • Place the TIREFIT kit in its proper storage area in the vehicle. • Have the tire inspected and repaired or replaced at the earliest opportunity at an authorized dealer... or tire service center. • Replace the Sealant Bottle (1) and Sealant Hose (6) assembly at the end of the hose, and place the TIREFIT kit in the vehicle storage location. Do not exceed 55 mph (88 km/h). (E) After Driving: • Pull over -inflated, press the Deflation Button ...


