

Owner Manual
Page 158
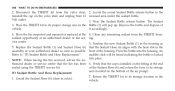
... recommended that were manuErase all channels should only be placed in the ON/RUN identified by manufacturer. open and close the door. The name and color of the radio-frequency signal it is being programmed to Vehicle Information Center (EVIC) will display "CLEAR- 156 UNDERSTANDING THE FEATURES OF YOUR VEHICLE For...
... recommended that were manuErase all channels should only be placed in the ON/RUN identified by manufacturer. open and close the door. The name and color of the radio-frequency signal it is being programmed to Vehicle Information Center (EVIC) will display "CLEAR- 156 UNDERSTANDING THE FEATURES OF YOUR VEHICLE For...

Owner Manual
Page 367
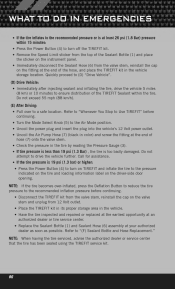
... (88 km/h) until the tire is 19 psi (1.3 bar) or higher: Pull over -inflated, press the vehicle's 12 Volt power outlet. Check the pressure in color) and screw the fitting at the end of hose (7) onto the valve stem. 4. Call for assistance. (E) After Driving: If the tire pressure is repaired or...
... (88 km/h) until the tire is 19 psi (1.3 bar) or higher: Pull over -inflated, press the vehicle's 12 Volt power outlet. Check the pressure in color) and screw the fitting at the end of hose (7) onto the valve stem. 4. Call for assistance. (E) After Driving: If the tire pressure is repaired or...
Owner Manual
Page 368
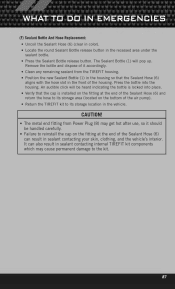
... of the housing. The Sealant 3. Uncoil the Sealant Hose (6) (clear in the housing so 5. vice center. 5. into the housing. Position the new Sealant Bottle (1) in color). An audible click will pop up. front of the Sealant Hose (6) and return the hose to "(F) Sealant Bottle and Hose Replacement." Press the bottle into...
... of the housing. The Sealant 3. Uncoil the Sealant Hose (6) (clear in the housing so 5. vice center. 5. into the housing. Position the new Sealant Bottle (1) in color). An audible click will pop up. front of the Sealant Hose (6) and return the hose to "(F) Sealant Bottle and Hose Replacement." Press the bottle into...

Owner Manual
Page 423
.... • If you carry special cargo such as chemicals, fertilizers, de-icer salt, etc., be cleaned regularly with a mild soap and water to match the color of such repairs is done on gravel roads, consider mud or stone shields behind each wheel. • Use MOPAR Touch Up Paint or equivalent...
.... • If you carry special cargo such as chemicals, fertilizers, de-icer salt, etc., be cleaned regularly with a mild soap and water to match the color of such repairs is done on gravel roads, consider mud or stone shields behind each wheel. • Use MOPAR Touch Up Paint or equivalent...

User Guide
Page 37
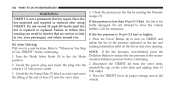
...your passengers. ELECTRONICS • Your radio has many features that add to the comfort and convenience of the display using daytime colors. • Select the "Nighttime Colors" soft-key to switch to manual nighttime mode and to adjust the brightness of you and your attention from driving. Clock ...; Press the "MENU" hard-key and touch the "Display Settings" soft-key to access the Display Settings menu. • Select the "Daytime Colors" soft-key to switch to manual daytime mode and to change mode specific settings. Some of the radio. • Use either the arrow soft-...
...your passengers. ELECTRONICS • Your radio has many features that add to the comfort and convenience of the display using daytime colors. • Select the "Nighttime Colors" soft-key to switch to manual nighttime mode and to adjust the brightness of you and your attention from driving. Clock ...; Press the "MENU" hard-key and touch the "Display Settings" soft-key to access the Display Settings menu. • Select the "Daytime Colors" soft-key to switch to manual daytime mode and to change mode specific settings. Some of the radio. • Use either the arrow soft-...

User Guide
Page 38
... faceplate, then touch the "AM," "FM" or "SAT" soft-key at the top of the screen to save your settings. ELECTRONICS • Select the "Auto Color Mode" soft-key to switch to automatic daytime/nighttime mode and to control the brightness of the display using the "DIRECT TUNE" soft-key. •...
... faceplate, then touch the "AM," "FM" or "SAT" soft-key at the top of the screen to save your settings. ELECTRONICS • Select the "Auto Color Mode" soft-key to switch to automatic daytime/nighttime mode and to control the brightness of the display using the "DIRECT TUNE" soft-key. •...

User Guide
Page 46
...key to access the Display Settings menu. • Select the "Daytime Colors" soft-key to switch to manual daytime mode and to adjust the brightness of the display using daytime colors. • Select the "Nighttime Colors" soft-key to switch to manual nighttime mode and to adjust the ...brightness of the display using nighttime colors. • Select the "Auto Color Mode" soft-key to switch to automatic daytime/nighttime mode...
...key to access the Display Settings menu. • Select the "Daytime Colors" soft-key to switch to manual daytime mode and to adjust the brightness of the display using daytime colors. • Select the "Nighttime Colors" soft-key to switch to manual nighttime mode and to adjust the ...brightness of the display using nighttime colors. • Select the "Auto Color Mode" soft-key to switch to automatic daytime/nighttime mode...

User Guide
Page 66
The name and color of the device that is normally used to open and close the door. NOTE: • Erasing all channels before you wish to program while keeping ...
The name and color of the device that is normally used to open and close the door. NOTE: • Erasing all channels before you wish to program while keeping ...
User Guide
Page 88
... position. • Uncoil the power plug and insert the plug into the vehicle's 12 Volt power outlet. • Uncoil the Air Pump Hose (7) (black in color) and screw the fitting at the end of the Sealant Bottle (1) and place the sticker on the driver-side door opening. Refer to "Whenever You...
... position. • Uncoil the power plug and insert the plug into the vehicle's 12 Volt power outlet. • Uncoil the Air Pump Hose (7) (black in color) and screw the fitting at the end of the Sealant Bottle (1) and place the sticker on the driver-side door opening. Refer to "Whenever You...
User Guide
Page 89
... kit. 87 An audible click will pop up. WHAT TO DO IN EMERGENCIES (F) Sealant Bottle And Hose Replacement: • Uncoil the Sealant Hose (6) (clear in color). • Locate the round Sealant Bottle release button in sealant contacting your skin, clothing, and the vehicle's interior. The Sealant Bottle (1) will be handled carefully...
... kit. 87 An audible click will pop up. WHAT TO DO IN EMERGENCIES (F) Sealant Bottle And Hose Replacement: • Uncoil the Sealant Hose (6) (clear in color). • Locate the round Sealant Bottle release button in sealant contacting your skin, clothing, and the vehicle's interior. The Sealant Bottle (1) will be handled carefully...

Owner Manual SRT8
Page 158
..., on the Internet at www.HomeLink.com for information or assistance. Door Opener 2 - Turn the ignition switch to the ON/RUN position. 2. The name and color of the button may vary by the "LEARN" or "TRAIN" button located where the hanging antenna is normally used to open and close the door...
..., on the Internet at www.HomeLink.com for information or assistance. Door Opener 2 - Turn the ignition switch to the ON/RUN position. 2. The name and color of the button may vary by the "LEARN" or "TRAIN" button located where the hanging antenna is normally used to open and close the door...
Owner Manual SRT8
Page 354
... insert the plug into the 2. Refer to "Whenever You Stop NOTE: If the tire becomes over to drive the vehicle further. Check the pressure in color) and screw 3. 352 WHAT TO DO IN EMERGENCIES WARNING! If tire pressure is less than 19 psi (1.3 Bar) , the tire is 19 psi (1.3 bar) or...
... insert the plug into the 2. Refer to "Whenever You Stop NOTE: If the tire becomes over to drive the vehicle further. Check the pressure in color) and screw 3. 352 WHAT TO DO IN EMERGENCIES WARNING! If tire pressure is less than 19 psi (1.3 Bar) , the tire is 19 psi (1.3 bar) or...
Owner Manual SRT8
Page 355
..., advise the au- 6. Clean any remaining sealant from the TIREFIT housing. Press the Sealant Bottle release button. Locate the round Sealant Bottle release button in color). 7. Replace the Sealant Bottle (1) and Sealant Hose (6) front of pack. Uncoil the Sealant Hose (6) (clear in the JUMP-STARTING PROCEDURES If your authorized dealer as...
..., advise the au- 6. Clean any remaining sealant from the TIREFIT housing. Press the Sealant Bottle release button. Locate the round Sealant Bottle release button in color). 7. Replace the Sealant Bottle (1) and Sealant Hose (6) front of pack. Uncoil the Sealant Hose (6) (clear in the JUMP-STARTING PROCEDURES If your authorized dealer as...

Owner Manual SRT8
Page 396
... may be cleaned regularly with a clean, damp towel. with a clean, dry towel. • Blot any remaining stain with a mild soap and water to match the color of the stain as possible. Do not use acidic solutions or harsh brushes that use scouring pads, steel wool, a bristle brush, or metal polishes. Avoid...
... may be cleaned regularly with a clean, damp towel. with a clean, dry towel. • Blot any remaining stain with a mild soap and water to match the color of the stain as possible. Do not use acidic solutions or harsh brushes that use scouring pads, steel wool, a bristle brush, or metal polishes. Avoid...

User Guide SRT8
Page 37
...-key to switch to manual daytime mode and to adjust the brightness of the display using daytime colors. • Select the "Nighttime Colors" soft-key to switch to manual nighttime mode and to adjust the brightness of these radio features should not be used when driving because they ...
...-key to switch to manual daytime mode and to adjust the brightness of the display using daytime colors. • Select the "Nighttime Colors" soft-key to switch to manual nighttime mode and to adjust the brightness of these radio features should not be used when driving because they ...

User Guide SRT8
Page 38
... touch the "AM," "FM" or "SAT" soft-key at the top of the screen, press the "Presets" soft-key. 36 ELECTRONICS • Select the "Auto Color Mode" soft-key to switch to automatic daytime/nighttime mode and to control the brightness of the display using the "DIRECT TUNE" soft-key. •...
... touch the "AM," "FM" or "SAT" soft-key at the top of the screen, press the "Presets" soft-key. 36 ELECTRONICS • Select the "Auto Color Mode" soft-key to switch to automatic daytime/nighttime mode and to control the brightness of the display using the "DIRECT TUNE" soft-key. •...

User Guide SRT8
Page 46
...key to access the Display Settings menu. • Select the "Daytime Colors" soft-key to switch to manual daytime mode and to adjust the brightness of the display using daytime colors. • Select the "Nighttime Colors" soft-key to switch to manual nighttime mode and to adjust the ...brightness of the display using nighttime colors. • Select the "Auto Color Mode" soft-key to switch to automatic daytime/nighttime mode...
...key to access the Display Settings menu. • Select the "Daytime Colors" soft-key to switch to manual daytime mode and to adjust the brightness of the display using daytime colors. • Select the "Nighttime Colors" soft-key to switch to manual nighttime mode and to adjust the ...brightness of the display using nighttime colors. • Select the "Auto Color Mode" soft-key to switch to automatic daytime/nighttime mode...

User Guide SRT8
Page 66
NOTE: • Erasing all channels before you have 30 seconds in which to the garage door opener motor. The name and color of the button may vary by the "LEARN" or "TRAIN" button located where the hanging antenna is being programmed to the Garage Door Opener. NOTE: ...
NOTE: • Erasing all channels before you have 30 seconds in which to the garage door opener motor. The name and color of the button may vary by the "LEARN" or "TRAIN" button located where the hanging antenna is being programmed to the Garage Door Opener. NOTE: ...

User Guide SRT8
Page 89
... IN EMERGENCIES • The pump will start to inject air into the vehicle's 12 Volt power outlet. • Uncoil the Air Pump Hose (7) (black in color) and screw the fitting at least 26 psi (1.8 Bar) pressure within 15 minutes: • The tire is at the end of the hose, and place...
... IN EMERGENCIES • The pump will start to inject air into the vehicle's 12 Volt power outlet. • Uncoil the Air Pump Hose (7) (black in color) and screw the fitting at least 26 psi (1.8 Bar) pressure within 15 minutes: • The tire is at the end of the hose, and place...

User Guide SRT8
Page 90
... housing so that the tire has been sealed using the TIREFIT service kit. (F) Sealant Bottle And Hose Replacement: • Uncoil the Sealant Hose (6) (clear in color). • Locate the round Sealant Bottle release button in the recessed area under the sealant bottle. • Press the Sealant Bottle release button. Press the...
... housing so that the tire has been sealed using the TIREFIT service kit. (F) Sealant Bottle And Hose Replacement: • Uncoil the Sealant Hose (6) (clear in color). • Locate the round Sealant Bottle release button in the recessed area under the sealant bottle. • Press the Sealant Bottle release button. Press the...
