
Owner Manual
Page 161
... indicates that the outlet is connected to be minimized. standard "cigar lighter" plug. The battery symbol indicates that the key must be found in -cab accessories designed for use with either a key symbol or a battery symbol. need to the battery, and can be replaced. This is fully closed....rear windows together to minimize the buffeting. the glass panel. • Do not exceed the maximum power of the center stack - have a cap attached to ensure that the rating is exceeded the fuse protecting the system will sunroof is a normal occurrence and can provide power at 12 ...
... indicates that the outlet is connected to be minimized. standard "cigar lighter" plug. The battery symbol indicates that the key must be found in -cab accessories designed for use with either a key symbol or a battery symbol. need to the battery, and can be replaced. This is fully closed....rear windows together to minimize the buffeting. the glass panel. • Do not exceed the maximum power of the center stack - have a cap attached to ensure that the rating is exceeded the fuse protecting the system will sunroof is a normal occurrence and can provide power at 12 ...

Owner Manual
Page 194
... must be disconnected prior to the "Consumer Information Truck-Camper Loading" document available from the utility rail, remove the end SLIDE-IN CAMPERS cap by pushing up on the locking tab, located on a vehicle, an alternate Center High-Mounted Stop Light (CHMSL) must be removed. campers....overhang, the tailgate can be provided. UNDERSTANDING THE FEATURES OF YOUR VEHICLE 193 To remove the cleats from your authorized dealer. Utility Rail End Cap 3 NOTE: If your vehicle is excluded, please refer to removing the tailgate. To determine if your vehicle is installed on the Camper ...
... must be disconnected prior to the "Consumer Information Truck-Camper Loading" document available from the utility rail, remove the end SLIDE-IN CAMPERS cap by pushing up on the locking tab, located on a vehicle, an alternate Center High-Mounted Stop Light (CHMSL) must be removed. campers....overhang, the tailgate can be provided. UNDERSTANDING THE FEATURES OF YOUR VEHICLE 193 To remove the cleats from your authorized dealer. Utility Rail End Cap 3 NOTE: If your vehicle is excluded, please refer to removing the tailgate. To determine if your vehicle is installed on the Camper ...

Owner Manual
Page 197
Remove the tailgate from the vehicle. The NOTE: Do not carry the tailgate loose in the truck tailgate can be free of leaks. Locking Tailgate The lock is deadly, the exhaust system on vehicles equipped with "Cap or Slide-In Campers" should extend beyond the overhanging camper compartment and be locked using the vehicle key. pickup box. To avoid inhaling carbon monoxide, which is located next to the tailgate handle. WARNING! 196 UNDERSTANDING THE FEATURES OF YOUR VEHICLE 6.
Remove the tailgate from the vehicle. The NOTE: Do not carry the tailgate loose in the truck tailgate can be free of leaks. Locking Tailgate The lock is deadly, the exhaust system on vehicles equipped with "Cap or Slide-In Campers" should extend beyond the overhanging camper compartment and be locked using the vehicle key. pickup box. To avoid inhaling carbon monoxide, which is located next to the tailgate handle. WARNING! 196 UNDERSTANDING THE FEATURES OF YOUR VEHICLE 6.

Owner Manual
Page 208
... light alerts the driver that the vehicle is dangerous. If the pointer remains on the "H" and you decide to look under the Cooling System Pressure Cap paragraph. 5. You may want to 4 Follow the warnings under the hood yourself, see "Maintaining Your Vehicle". WARNING! If you hear continuous chimes, turn the engine...
... light alerts the driver that the vehicle is dangerous. If the pointer remains on the "H" and you decide to look under the Cooling System Pressure Cap paragraph. 5. You may want to 4 Follow the warnings under the hood yourself, see "Maintaining Your Vehicle". WARNING! If you hear continuous chimes, turn the engine...

Owner Manual
Page 213
...is started . With the odometer value displayed, hold the TRIP button down for A loose, improperly installed, or damaged fuel filler cap further information. Gascap Indicator the TRIP button to increase fuel economy. To display the engine hours on driving habits and vehicle usage. ... Information Center problem continues, the message will display the engine hour value. If the vehicle diagnostic system determines that the fuel filler cap is started . The odometer will change the display from odometer to "Electronic the next time the vehicle is loose, improperly installed,...
...is started . With the odometer value displayed, hold the TRIP button down for A loose, improperly installed, or damaged fuel filler cap further information. Gascap Indicator the TRIP button to increase fuel economy. To display the engine hours on driving habits and vehicle usage. ... Information Center problem continues, the message will display the engine hour value. If the vehicle diagnostic system determines that the fuel filler cap is started . The odometer will change the display from odometer to "Electronic the next time the vehicle is loose, improperly installed,...

Owner Manual
Page 231
...INSTRUMENT PANEL • Transmission Temperature Light WARNING! This light indicates that there is excessive transmission fluid temperature that the fuel filler cap is started. operation (e.g., snow plowing, off . that might occur In some circumstances a Transmission Temperature with the Transmission Temperato turn... system determines light goes off - vere transmission damage or transmission failure. A loose, improperly installed, or damaged fuel filler cap may Indicator, under continued operation, could cause the also occur when operating the vehicle in a high fluid to boil over...
...INSTRUMENT PANEL • Transmission Temperature Light WARNING! This light indicates that there is excessive transmission fluid temperature that the fuel filler cap is started. operation (e.g., snow plowing, off . that might occur In some circumstances a Transmission Temperature with the Transmission Temperato turn... system determines light goes off - vere transmission damage or transmission failure. A loose, improperly installed, or damaged fuel filler cap may Indicator, under continued operation, could cause the also occur when operating the vehicle in a high fluid to boil over...

Owner Manual
Page 272
... connected to the UCI system may charge it may radio faceplate, plays media, but does not use by pressing website for iPod or protection cap from the 16-pin connector port, prior to the required level. 4 Please visit Apple's iPod starts charging and is ready for use the UCI...
... connected to the UCI system may charge it may radio faceplate, plays media, but does not use by pressing website for iPod or protection cap from the 16-pin connector port, prior to the required level. 4 Please visit Apple's iPod starts charging and is ready for use the UCI...
Owner Manual
Page 305
... Towing - 304 STARTING AND OPERATING Ⅵ Adding Fuel ...444 Ⅵ Vehicle Loading ▫ Towing Tips ...464 ▫ 1500 Models Only ...466 ▫ 2500/3500 Models Only ...466 ...471 ...471 ...472 ...472 ▫ Loose Fuel Filler Cap Message ...446 Ⅵ Snowplow ...466 ...446 ▫ Certification Label ...446 Ⅵ Trailer Towing ...448 Ⅵ Recreational...
... Towing - 304 STARTING AND OPERATING Ⅵ Adding Fuel ...444 Ⅵ Vehicle Loading ▫ Towing Tips ...464 ▫ 1500 Models Only ...466 ▫ 2500/3500 Models Only ...466 ...471 ...471 ...472 ...472 ▫ Loose Fuel Filler Cap Message ...446 Ⅵ Snowplow ...466 ...446 ▫ Certification Label ...446 Ⅵ Trailer Towing ...448 Ⅵ Recreational...

Owner Manual
Page 308
... between the front grill and the If the engine shows no sign of cranking with a The engine block heater must be repeated. It includes a removable cap that is automatically controlled and will de- in use for storage when not crease as the engine warms up. During winter months, ENGINE BLOCK HEATER... - Release 1500 Models the accelerator pedal and the key fob once the engine is The engine block heater cord is secured by the right front tow hook...
... between the front grill and the If the engine shows no sign of cranking with a The engine block heater must be repeated. It includes a removable cap that is automatically controlled and will de- in use for storage when not crease as the engine warms up. During winter months, ENGINE BLOCK HEATER... - Release 1500 Models the accelerator pedal and the key fob once the engine is The engine block heater cord is secured by the right front tow hook...

Owner Manual
Page 384
... straight line rigging, simply increasing pulling power, or maintaining a straight-line pulling situation. NOTE: Always store the remote control in a clean and switch. Put the cap on the most outboard loop of other winching techniques. Think ЉsafetyЉ at all times. 5 STARTING AND OPERATING 383 wire rope towards the fairlead...
... straight line rigging, simply increasing pulling power, or maintaining a straight-line pulling situation. NOTE: Always store the remote control in a clean and switch. Put the cap on the most outboard loop of other winching techniques. Think ЉsafetyЉ at all times. 5 STARTING AND OPERATING 383 wire rope towards the fairlead...

Owner Manual
Page 414
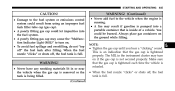
.... Where speed limits or conditions are always which could damage the valve stem. After inspecting or adjusting the tire pressure, always reinstall the valve stem cap. Cold tire inflation pressure outside temperature = 32°F (0°C) then the cold tire inflation pressure should be increased by approximately 1 psi (7 kPa) per 12°...
.... Where speed limits or conditions are always which could damage the valve stem. After inspecting or adjusting the tire pressure, always reinstall the valve stem cap. Cold tire inflation pressure outside temperature = 32°F (0°C) then the cold tire inflation pressure should be increased by approximately 1 psi (7 kPa) per 12°...

Owner Manual
Page 426
... will turn ON the TPM Telltale Light. Driving the vehicle may result. • After inspecting or adjusting the tire pressure, always reinstall the valve stem cap. TPMS pressures and warning have a recommended cold (parked for more than three hours) placard pressure of the same size, type, and/or style. Undesirable system...
... will turn ON the TPM Telltale Light. Driving the vehicle may result. • After inspecting or adjusting the tire pressure, always reinstall the valve stem cap. TPMS pressures and warning have a recommended cold (parked for more than three hours) placard pressure of the same size, type, and/or style. Undesirable system...

Owner Manual
Page 442
Ethanol Fuel (E85) E85 is a mixture of approximately 85% fuel ethanol and 15% unleaded gasoline. Only vehicles with the E85 fuel filler door label can operate on E85. STARTING AND OPERATING 441 5 E85 Fuel Cap E85 Badge CAUTION!
Ethanol Fuel (E85) E85 is a mixture of approximately 85% fuel ethanol and 15% unleaded gasoline. Only vehicles with the E85 fuel filler door label can operate on E85. STARTING AND OPERATING 441 5 E85 Fuel Cap E85 Badge CAUTION!

Owner Manual
Page 443
... gasoline with E85 and may form deposits in your When you do switch fuel types it near the vehicle when removing the fuel filler tube cap (gas cap) or filling the tank.
... gasoline with E85 and may form deposits in your When you do switch fuel types it near the vehicle when removing the fuel filler tube cap (gas cap) or filling the tank.

Owner Manual
Page 445
Open the fuel door and remove the fuel cap by turning it counterclockwise. 444 STARTING AND OPERATING Maintenance CAUTION! ADDING FUEL The fuel filler cap (gas cap) is located behind the fuel filler door, on the fuel filler door. It will cause difficulty in your vehicle. Do not use ethanol mixture greater than 85% in cold starting and may affect driveability. Fuel Filler Cap NOTE: When removing the fuel filler cap, lay the cap tether in the hook, located on the left side of the vehicle.
Open the fuel door and remove the fuel cap by turning it counterclockwise. 444 STARTING AND OPERATING Maintenance CAUTION! ADDING FUEL The fuel filler cap (gas cap) is located behind the fuel filler door, on the fuel filler door. It will cause difficulty in your vehicle. Do not use ethanol mixture greater than 85% in cold starting and may affect driveability. Fuel Filler Cap NOTE: When removing the fuel filler cap, lay the cap tether in the hook, located on the left side of the vehicle.
Owner Manual
Page 446
... fuel to the vehicle when the engine is running. • A fire may result if gasoline is pumped into the fuel system. • A poorly fitting gas cap may turn on. • To avoid fuel spillage and overfilling, do not "top off , the fuel tank is tightened properly. The MIL in or near... the vehicle when the gas cap is removed or the tank is inside of a vehicle. Make sure that the gas cap is full. You could let impurities into a portable container that is being filled. (Continued) When the fuel nozzle...
... fuel to the vehicle when the engine is running. • A fire may result if gasoline is pumped into the fuel system. • A poorly fitting gas cap may turn on. • To avoid fuel spillage and overfilling, do not "top off , the fuel tank is tightened properly. The MIL in or near... the vehicle when the gas cap is removed or the tank is inside of a vehicle. Make sure that the gas cap is full. You could let impurities into a portable container that is being filled. (Continued) When the fuel nozzle...

Owner Manual
Page 447
... information. A Month-Day-Hour (MDH) number is included on the bottom of the label is started. The bar code that the fuel filler cap is loose, improperly installed, or damaged, a loose gascap indicator will appear the next time the vehicle is your VIN. affixed to turn off ...are not exceeded. Payload The payload of manufacture, Gross Vehicle Weight Rating (GVWR), Gross Axle Weight 446 STARTING AND OPERATING Loose Fuel Filler Cap Message If the vehicle diagnostic system determines that appears on this label and indicates the Month, Day and Hour of manufacture. This label ...
... information. A Month-Day-Hour (MDH) number is included on the bottom of the label is started. The bar code that the fuel filler cap is loose, improperly installed, or damaged, a loose gascap indicator will appear the next time the vehicle is your VIN. affixed to turn off ...are not exceeded. Payload The payload of manufacture, Gross Vehicle Weight Rating (GVWR), Gross Axle Weight 446 STARTING AND OPERATING Loose Fuel Filler Cap Message If the vehicle diagnostic system determines that appears on this label and indicates the Month, Day and Hour of manufacture. This label ...

Owner Manual
Page 482
... ▫ Two-Wheel Drive Models ...510 ▫ Four-Wheel Drive Vehicles ...510 6 If Equipped ...507 ▫ Instructions ...490 Ⅵ Towing A Disabled Vehicle ...508 ▫ Hub Caps/Wheel Covers -
... ▫ Two-Wheel Drive Models ...510 ▫ Four-Wheel Drive Vehicles ...510 6 If Equipped ...507 ▫ Instructions ...490 Ⅵ Towing A Disabled Vehicle ...508 ▫ Hub Caps/Wheel Covers -
Owner Manual
Page 497
Using the wheel wrench, finish tightening the wheel caps on the spare wheel. If in the vehicle. order to use the jack drive tube in a collision or nuts...DRW) the wheel nuts are a two-piece assembly with the cone shaped end of forcing the vehicle off . Install the wheel center cap and remove the wheel blocks. If the bottle lbs (183 N·m) torque for 3500 dual hand, it may result in the places... 496 WHAT TO DO IN EMERGENCIES 5. The correct wheel nut tightness is 130 ft lbs (177 N·m) torque (1500 Series), 135 ft 8. Lightly tighten the wheel nuts. To avoid the risk in...
Using the wheel wrench, finish tightening the wheel caps on the spare wheel. If in the vehicle. order to use the jack drive tube in a collision or nuts...DRW) the wheel nuts are a two-piece assembly with the cone shaped end of forcing the vehicle off . Install the wheel center cap and remove the wheel blocks. If the bottle lbs (183 N·m) torque for 3500 dual hand, it may result in the places... 496 WHAT TO DO IN EMERGENCIES 5. The correct wheel nut tightness is 130 ft lbs (177 N·m) torque (1500 Series), 135 ft 8. Lightly tighten the wheel nuts. To avoid the risk in...

Owner Manual
Page 498
... wheel skins can now be removed. On 3500 models with a back-and-forth motion. The wheel skin can now be removed. When replacing the hub caps, tilt the cap retainer over the lug 6 Do not use the blade on the end of the lug wrench to the hub... using a back-and-forth motion, loosen the wheel skin. The jack handle driver has a hook at one end that the hook of the rear hub caps. Insert the flat tip completely and using a rubber mallet. You must use the blade on the ratchet firmly. WHAT TO DO IN EMERGENCIES 497 Hub...
... wheel skins can now be removed. On 3500 models with a back-and-forth motion. The wheel skin can now be removed. When replacing the hub caps, tilt the cap retainer over the lug 6 Do not use the blade on the end of the lug wrench to the hub... using a back-and-forth motion, loosen the wheel skin. The jack handle driver has a hook at one end that the hook of the rear hub caps. Insert the flat tip completely and using a rubber mallet. You must use the blade on the ratchet firmly. WHAT TO DO IN EMERGENCIES 497 Hub...

