
Owner Manual
Page 4
INTRODUCTION CONTENTS Ⅵ Introduction ...4 Ⅵ How To Use This Manual ...4 Ⅵ Warnings And Cautions ...6 Ⅵ Vehicle Identification Number ...6 Ⅵ Vehicle Modifications / Alterations ...7 1
INTRODUCTION CONTENTS Ⅵ Introduction ...4 Ⅵ How To Use This Manual ...4 Ⅵ Warnings And Cautions ...6 Ⅵ Vehicle Identification Number ...6 Ⅵ Vehicle Modifications / Alterations ...7 1

Owner Manual
Page 5
... operation and maintenance of your satisfaction. The detailed index at the back of this Owner's Manual: NOTE: After you read these publications carefully. HOW TO USE THIS MANUAL Consult the table of contents to determine which section contains the information you desire. It is... interested in this manual will be used on your vehicle. Following the instructions and recommendations in your new vehicle. 4 INTRODUCTION INTRODUCTION This manual has been prepared with the assistance of service and engineering specialists to ...
... operation and maintenance of your satisfaction. The detailed index at the back of this Owner's Manual: NOTE: After you read these publications carefully. HOW TO USE THIS MANUAL Consult the table of contents to determine which section contains the information you desire. It is... interested in this manual will be used on your vehicle. Following the instructions and recommendations in your new vehicle. 4 INTRODUCTION INTRODUCTION This manual has been prepared with the assistance of service and engineering specialists to ...

Owner Manual
Page 7
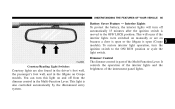
... and the title. VEHICLE IDENTIFICATION NUMBER The vehicle identification number (VIN) is on your vehicle. 6 INTRODUCTION WARNINGS AND CAUTIONS This manual contains WARNINGS against procedures, which could result in an accident or bodily injury. This number also appears on the Automobile Information Disclosure Label... affixed to remove the VIN. If you do not read this entire manual, you may miss important information. The VIN is illegal to a window on the left front corner of the instrument panel. Vehicle...
... and the title. VEHICLE IDENTIFICATION NUMBER The vehicle identification number (VIN) is on your vehicle. 6 INTRODUCTION WARNINGS AND CAUTIONS This manual contains WARNINGS against procedures, which could result in an accident or bodily injury. This number also appears on the Automobile Information Disclosure Label... affixed to remove the VIN. If you do not read this entire manual, you may miss important information. The VIN is illegal to a window on the left front corner of the instrument panel. Vehicle...

Owner Manual
Page 11
10 THINGS TO KNOW BEFORE STARTING YOUR VEHICLE Ⅵ Door Locks ...23 ▫ Manual Door Lock ...24 ▫ Power Door Locks ...24 Ⅵ Windows ...26 ▫ Power Windows ...26 ▫ Auto Down Feature ...27 ▫ Wind Buffeting ...27 Ⅵ ...
10 THINGS TO KNOW BEFORE STARTING YOUR VEHICLE Ⅵ Door Locks ...23 ▫ Manual Door Lock ...24 ▫ Power Door Locks ...24 Ⅵ Windows ...26 ▫ Power Windows ...26 ▫ Auto Down Feature ...27 ▫ Wind Buffeting ...27 Ⅵ ...

Owner Manual
Page 25
24 THINGS TO KNOW BEFORE STARTING YOUR VEHICLE Manual Door Lock The driver's door can be locked or unlocked with the key. Power Door Locks A power door lock switch is on the outside door panel beneath the mirror. Power Door Lock Switch Mechanical Door Lock NOTE: To prevent you from accidentally locking your keys in the vehicle, the power door locks will not operate if the key is in the ignition and the driver's door is located on each door trim panel. The door lock is open. Use this switch to lock or unlock the doors.
24 THINGS TO KNOW BEFORE STARTING YOUR VEHICLE Manual Door Lock The driver's door can be locked or unlocked with the key. Power Door Locks A power door lock switch is on the outside door panel beneath the mirror. Power Door Lock Switch Mechanical Door Lock NOTE: To prevent you from accidentally locking your keys in the vehicle, the power door locks will not operate if the key is in the ignition and the driver's door is located on each door trim panel. The door lock is open. Use this switch to lock or unlock the doors.
Owner Manual
Page 41
... Passenger Supplemental Restraint System (SRS) - You may allow less forceful deployment. The airbags work with airbags for the airbag cushions are designed to open them manually. This may damage the airbags and you have airbags. • Being too close to have a multi stage inflator design. These protective covers for the driver...
... Passenger Supplemental Restraint System (SRS) - You may allow less forceful deployment. The airbags work with airbags for the airbag cushions are designed to open them manually. This may damage the airbags and you have airbags. • Being too close to have a multi stage inflator design. These protective covers for the driver...
Owner Manual
Page 43
... with your child restraint to make sure that the power adjustable pedals allow the airbags room to place the shoulder belt behind them in this manual for details.
... with your child restraint to make sure that the power adjustable pedals allow the airbags room to place the shoulder belt behind them in this manual for details.
Owner Manual
Page 52
...the vehicle. A rearward facing infant restraint may be struck by the lap/shoulder belt. 2 WARNING! Use the restraint that is correct for your Viper unless the passenger airbag has been turned off. Two types of child restraints can be used in the forward-facing direction are for children who...or fatal injury to about 20 lbs (9 kg). Both types of restraints for an adult safety belt. Always check the child seat Owner's Manual to the child almost large enough for children from newborn size to ensure you have a higher weight limit in the rearward-facing direction than infant...
...the vehicle. A rearward facing infant restraint may be struck by the lap/shoulder belt. 2 WARNING! Use the restraint that is correct for your Viper unless the passenger airbag has been turned off. Two types of child restraints can be used in the forward-facing direction are for children who...or fatal injury to about 20 lbs (9 kg). Both types of restraints for an adult safety belt. Always check the child seat Owner's Manual to the child almost large enough for children from newborn size to ensure you have a higher weight limit in the rearward-facing direction than infant...

Owner Manual
Page 62
... Storage ...72 Ⅵ Mirrors ...75 ▫ Inside Day/Night Mirror ...75 ▫ Outside Mirrors ...75 ▫ Power Remote Control Mirrors ...76 Ⅵ Seats ...77 ▫ Manual Seat Adjustments ...77 Ⅵ To Open And Close The Hood ...79 Ⅵ Lights ...81 ▫ Exterior & Interior Lighting Control ...81 ▫ Headlights & Parking Lights ...81...
... Storage ...72 Ⅵ Mirrors ...75 ▫ Inside Day/Night Mirror ...75 ▫ Outside Mirrors ...75 ▫ Power Remote Control Mirrors ...76 Ⅵ Seats ...77 ▫ Manual Seat Adjustments ...77 Ⅵ To Open And Close The Hood ...79 Ⅵ Lights ...81 ▫ Exterior & Interior Lighting Control ...81 ▫ Headlights & Parking Lights ...81...

Owner Manual
Page 66
Close the trunk. Press downward on the convertible top and then press the lever behind the driver seat to release the downstack latch. 5. UNDERSTANDING THE FEATURES OF YOUR VEHICLE 65 4. Manually raise the convertible top until it meets the windshield header. 3 Raising Convertible Top Convertible Top Latch 6.
Close the trunk. Press downward on the convertible top and then press the lever behind the driver seat to release the downstack latch. 5. UNDERSTANDING THE FEATURES OF YOUR VEHICLE 65 4. Manually raise the convertible top until it meets the windshield header. 3 Raising Convertible Top Convertible Top Latch 6.

Owner Manual
Page 78
Pull the bar upward to move forward and rearward on the seat to prevent accidental mirror movement. Then, using body pressure, move the seat forward or rearward. SEATS Manual Seat Adjustments Forward & Rearward Adjustment The adjusting bar is in use, return the power mirror switch to the neutral (off) position to be sure that the seat adjusters have latched. 3 Seat Adjusting Bar Release the bar once the seat is at the front of the seat, near the floor. UNDERSTANDING THE FEATURES OF YOUR VEHICLE 77 NOTE: When not in the desired position.
Pull the bar upward to move forward and rearward on the seat to prevent accidental mirror movement. Then, using body pressure, move the seat forward or rearward. SEATS Manual Seat Adjustments Forward & Rearward Adjustment The adjusting bar is in use, return the power mirror switch to the neutral (off) position to be sure that the seat adjusters have latched. 3 Seat Adjusting Bar Release the bar once the seat is at the front of the seat, near the floor. UNDERSTANDING THE FEATURES OF YOUR VEHICLE 77 NOTE: When not in the desired position.
Owner Manual
Page 86
Interior Lights To protect the battery, the interior lights will occur if the interior lights were switched on manually or are also found in the driver's foot well, the passenger's foot well, and in the Multi-Function Lever. It controls the operation of the ...
Interior Lights To protect the battery, the interior lights will occur if the interior lights were switched on manually or are also found in the driver's foot well, the passenger's foot well, and in the Multi-Function Lever. It controls the operation of the ...

Owner Manual
Page 118
... Hands Free Phone (If Equipped) Refer to the Satellite Radio section of the Owner's Manual. Operating Instructions - Satellite Radio Mode (If Equipped) Refer to Hands Free Phone section of the Owner's Manual. Video Entertainment System (VES) (If Equipped) Refer to coast. IF EQUIPPED Satellite...direct satellite to receiver broadcasting technology to provide clear digital sound, coast to 6 Disc CD/DVD Changer (RDV) section of the Owner's Manual. Operating Instructions - UNDERSTANDING YOUR INSTRUMENT PANEL 117 RW/FF (CD Mode For MP3 Play) Press the FF side of the button to ...
... Hands Free Phone (If Equipped) Refer to the Satellite Radio section of the Owner's Manual. Operating Instructions - Satellite Radio Mode (If Equipped) Refer to Hands Free Phone section of the Owner's Manual. Video Entertainment System (VES) (If Equipped) Refer to coast. IF EQUIPPED Satellite...direct satellite to receiver broadcasting technology to provide clear digital sound, coast to 6 Disc CD/DVD Changer (RDV) section of the Owner's Manual. Operating Instructions - UNDERSTANDING YOUR INSTRUMENT PANEL 117 RW/FF (CD Mode For MP3 Play) Press the FF side of the button to ...

Owner Manual
Page 127
Summer Operation The engine cooling system in water is recommended. A 50% solution of this manual for proper coolant selection. This will heat faster in the fresh air and high blower setting. Winter Operation • Use the Defrost mode to direct ...
Summer Operation The engine cooling system in water is recommended. A 50% solution of this manual for proper coolant selection. This will heat faster in the fresh air and high blower setting. Winter Operation • Use the Defrost mode to direct ...
Owner Manual
Page 134
... ignition key fully into the ignition switch 5 STARTING AND OPERATING 133 CAUTION! Do not leave your vehicle. Place the gear selector in Section 2 of this manual • Normal Starting of engine idling, especially at high engine speeds, can cause excessive exhaust temperatures, which can damage your vehicle unattended with the engine...
... ignition key fully into the ignition switch 5 STARTING AND OPERATING 133 CAUTION! Do not leave your vehicle. Place the gear selector in Section 2 of this manual • Normal Starting of engine idling, especially at high engine speeds, can cause excessive exhaust temperatures, which can damage your vehicle unattended with the engine...

Owner Manual
Page 136
... be used to 15 seconds before trying again. 5 If the vehicle has a discharged battery, booster cables may be dangerous if done improperly, so follow this manual for more than 15 seconds at a time. This could enter the catalytic converter and once the engine has started . Unburned fuel could result in another...
... be used to 15 seconds before trying again. 5 If the vehicle has a discharged battery, booster cables may be dangerous if done improperly, so follow this manual for more than 15 seconds at a time. This could enter the catalytic converter and once the engine has started . Unburned fuel could result in another...
Owner Manual
Page 139
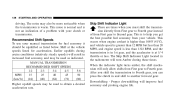
...MPH (km/h) 5-6 50 (80) Higher upshift speeds may also be upshifted as indicated. Downshifting - This noise is normal and is to another forward gear. MANUAL TRANSMISSION RECOMMENDED SHIFT SPEEDS 1-2 2-3 3-4 4-5 15 25 40 45 (24) (40) (64) (72) Skip Shift Indicator Light There are times when you...is less than 1322 RPM, and the transmission is in and shift to help you get the best possible fuel economy from your manual transmission for acceleration. 138 STARTING AND OPERATING driving. Proper downshifting will only allow shifts from First gear to obtain a desired acceleration ...
...MPH (km/h) 5-6 50 (80) Higher upshift speeds may also be upshifted as indicated. Downshifting - This noise is normal and is to another forward gear. MANUAL TRANSMISSION RECOMMENDED SHIFT SPEEDS 1-2 2-3 3-4 4-5 15 25 40 45 (24) (40) (64) (72) Skip Shift Indicator Light There are times when you...is less than 1322 RPM, and the transmission is in and shift to help you get the best possible fuel economy from your manual transmission for acceleration. 138 STARTING AND OPERATING driving. Proper downshifting will only allow shifts from First gear to obtain a desired acceleration ...

Owner Manual
Page 155
... weight of the driver and passengers that will not exceed the tire's load carrying capacity if you adhere to the "Vehicle Loading" section of this manual. Locate the statement "The combined weight of occupants and cargo should never exceed XXX kg or XXX lbs." Determine the combined weight of the driver... Load Limit 1. 154 STARTING AND OPERATING Loading The vehicle maximum load on the tire must not be riding in the "Vehicle Loading" section of this manual. You will be exceeded.
... weight of the driver and passengers that will not exceed the tire's load carrying capacity if you adhere to the "Vehicle Loading" section of this manual. Locate the statement "The combined weight of occupants and cargo should never exceed XXX kg or XXX lbs." Determine the combined weight of the driver... Load Limit 1. 154 STARTING AND OPERATING Loading The vehicle maximum load on the tire must not be riding in the "Vehicle Loading" section of this manual. You will be exceeded.
Owner Manual
Page 156
and there will be transferred to determine how this manual to your vehicle, the amount of available cargo and luggage load capacity is for illustration purposes only and may not safely exceed the available cargo ...
and there will be transferred to determine how this manual to your vehicle, the amount of available cargo and luggage load capacity is for illustration purposes only and may not safely exceed the available cargo ...

Owner Manual
Page 159
... wear or visible damage at least once a month. Tire Placard Location The pressure should be found in the "Supplemental Tire Pressure Information" section of this manual. 158 STARTING AND OPERATING 2. These abnormal wear patterns will be checked and adjusted as well as inspecting for vehicle loads that are less than the...
... wear or visible damage at least once a month. Tire Placard Location The pressure should be found in the "Supplemental Tire Pressure Information" section of this manual. 158 STARTING AND OPERATING 2. These abnormal wear patterns will be checked and adjusted as well as inspecting for vehicle loads that are less than the...
