
Owner Manual
Page 2
SECTION 1 2 3 4 5 6 7 8 9 10 INTRODUCTION TABLE OF CONTENTS PAGE ...3 1 ...9 2 THINGS TO KNOW BEFORE STARTING YOUR VEHICLE UNDERSTANDING THE FEATURES OF YOUR VEHICLE UNDERSTANDING YOUR INSTRUMENT PANEL STARTING AND OPERATING ...61 3 ...93 4 ...129 5 ...175 6 ...191 7 WHAT TO DO IN EMERGENCIES MAINTAINING YOUR VEHICLE MAINTENANCE SCHEDULES ...255 8 ...275 9 IF YOU NEED CONSUMER ASSISTANCE INDEX ...285 10
SECTION 1 2 3 4 5 6 7 8 9 10 INTRODUCTION TABLE OF CONTENTS PAGE ...3 1 ...9 2 THINGS TO KNOW BEFORE STARTING YOUR VEHICLE UNDERSTANDING THE FEATURES OF YOUR VEHICLE UNDERSTANDING YOUR INSTRUMENT PANEL STARTING AND OPERATING ...61 3 ...93 4 ...129 5 ...175 6 ...191 7 WHAT TO DO IN EMERGENCIES MAINTAINING YOUR VEHICLE MAINTENANCE SCHEDULES ...255 8 ...275 9 IF YOU NEED CONSUMER ASSISTANCE INDEX ...285 10

Owner Manual
Page 11
... VEHICLE Ⅵ Door Locks ...23 ▫ Manual Door Lock ...24 ▫ Power Door Locks ...24 Ⅵ Windows ...26 ▫ Power Windows ...26 ▫ Auto Down Feature ...27 ▫ Wind Buffeting ...27 Ⅵ Liftgate - Convertible Models Only ...29 Ⅵ Trunk Safety Warning -
... VEHICLE Ⅵ Door Locks ...23 ▫ Manual Door Lock ...24 ▫ Power Door Locks ...24 Ⅵ Windows ...26 ▫ Power Windows ...26 ▫ Auto Down Feature ...27 ▫ Wind Buffeting ...27 Ⅵ Liftgate - Convertible Models Only ...29 Ⅵ Trunk Safety Warning -

Owner Manual
Page 14
...opening the driver's door will also sound the horn and flash the park lights, the taillights, and the fog lights. It will cancel this feature. To Arm the System: Remove the key from the ignition switch and either press a power door lock switch while the driver or passenger ... for unauthorized operation. THINGS TO KNOW BEFORE STARTING YOUR VEHICLE 13 NOTE: The Power Accessory Delay feature allows you to remove the key. Your dealership can enable or disable the Power Accessory Delay feature as desired. If something triggers the alarm, and no action is placed in the ignition, a...
...opening the driver's door will also sound the horn and flash the park lights, the taillights, and the fog lights. It will cancel this feature. To Arm the System: Remove the key from the ignition switch and either press a power door lock switch while the driver or passenger ... for unauthorized operation. THINGS TO KNOW BEFORE STARTING YOUR VEHICLE 13 NOTE: The Power Accessory Delay feature allows you to remove the key. Your dealership can enable or disable the Power Accessory Delay feature as desired. If something triggers the alarm, and no action is placed in the ignition, a...
Owner Manual
Page 18
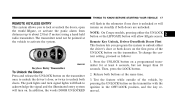
... to about 23 feet (7 meters) using a hand held radio transmitter. To change the current setting, proceed as follows: 1. Then, press the LOCK button. 2. Test the feature while outside of the UNLOCK button on steadily if both doors. Remote Key Unlock, Driver Door/Both Doors First This... feature lets you to lock or unlock the doors, open the trunk/liftgate, or activate the panic alarm from distances up to activate the system. Release ...
... to about 23 feet (7 meters) using a hand held radio transmitter. To change the current setting, proceed as follows: 1. Then, press the LOCK button. 2. Test the feature while outside of the UNLOCK button on steadily if both doors. Remote Key Unlock, Driver Door/Both Doors First This... feature lets you to lock or unlock the doors, open the trunk/liftgate, or activate the panic alarm from distances up to activate the system. Release ...

Owner Manual
Page 19
... and release the LOCK button on a programmed transmitter for at the same time. 3. Then, press the TRUNK/LIFTGATE button. 2. This feature can be turned on the transmitter with the Security Alarm activated will activate the Security Alarm. Opening a door with the transmitter. Repeat these... steps if you want to return this feature to its previous setting. Repeat these steps if you want to return this feature to its previous setting. Press the LOCK button on the transmitter to deactivate the Security Alarm...
... and release the LOCK button on a programmed transmitter for at the same time. 3. Then, press the TRUNK/LIFTGATE button. 2. This feature can be turned on the transmitter with the Security Alarm activated will activate the Security Alarm. Opening a door with the transmitter. Repeat these... steps if you want to return this feature to its previous setting. Repeat these steps if you want to return this feature to its previous setting. Press the LOCK button on the transmitter to deactivate the Security Alarm...
Owner Manual
Page 20
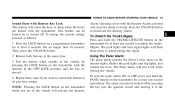
...off by pressing the LOCK button on the transmitter while you want to return this feature to acknowledge the signal. Release both buttons at least 4 seconds, but no longer then 10 seconds. Test the feature while outside of the vehicle, by inserting the key into the ignition switch and turning...Repeat these steps if you are locked with the transmitter. THINGS TO KNOW BEFORE STARTING YOUR VEHICLE 19 Sound Horn with Remote Key Lock This feature will cause the horn to unlatch the trunk/ liftgate. To turn signal lights will flash three times to its previous setting. To change the...
...off by pressing the LOCK button on the transmitter while you want to return this feature to acknowledge the signal. Release both buttons at least 4 seconds, but no longer then 10 seconds. Test the feature while outside of the vehicle, by inserting the key into the ignition switch and turning...Repeat these steps if you are locked with the transmitter. THINGS TO KNOW BEFORE STARTING YOUR VEHICLE 19 Sound Horn with Remote Key Lock This feature will cause the horn to unlatch the trunk/ liftgate. To turn signal lights will flash three times to its previous setting. To change the...
Owner Manual
Page 21
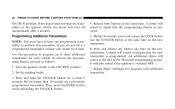
If not deactivated through 6 to three additional transmitters for details. Use this procedure. To activate the programming feature, proceed as follows: 1. Turn the ignition switch to perform this procedure to program up to program each additional transmitter. A chime will turn ... holing the UNLOCK button. 4. Repeat Steps 3 through the transmitter or the ignition switch, the alarm will sound to indicate that the programming feature is programmed. Within 30 seconds, press and release the LOCK button and the UNLOCK button at the same time. Release both buttons at the...
If not deactivated through 6 to three additional transmitters for details. Use this procedure. To activate the programming feature, proceed as follows: 1. Turn the ignition switch to perform this procedure to program up to program each additional transmitter. A chime will turn ... holing the UNLOCK button. 4. Repeat Steps 3 through the transmitter or the ignition switch, the alarm will sound to indicate that the programming feature is programmed. Within 30 seconds, press and release the LOCK button and the UNLOCK button at the same time. Release both buttons at the...
Owner Manual
Page 26
... if you want to return this display will turn off approximately 40 seconds after switching off the ignition, or if the Power Accessory Delay feature is active, it will indicate the completion of the programming. 5. A door is considered unlocked if the inside door handle is pulled. NOTE... mph. THINGS TO KNOW BEFORE STARTING YOUR VEHICLE 25 Electronic Door Lock This vehicle is equipped with local laws. 2 Automatic Door Locks This feature locks the doors automatically once vehicle speed reaches 18 mph (29 km/h). Door Lock Messaging The words "DOOR UNLOCKED" will flash in the ...
... if you want to return this display will turn off approximately 40 seconds after switching off the ignition, or if the Power Accessory Delay feature is active, it will indicate the completion of the programming. 5. A door is considered unlocked if the inside door handle is pulled. NOTE... mph. THINGS TO KNOW BEFORE STARTING YOUR VEHICLE 25 Electronic Door Lock This vehicle is equipped with local laws. 2 Automatic Door Locks This feature locks the doors automatically once vehicle speed reaches 18 mph (29 km/h). Door Lock Messaging The words "DOOR UNLOCKED" will flash in the ...
Owner Manual
Page 27
... switch. WARNING! Occupants, particularly unattended children, can enable or disable the Power Accessory Delay feature as desired. • Windows cannot be driven up . • The window will cancel this feature. Furthermore, opening the door will stop the window movement immediately if the window is in ...the process of the parking brake. Never leave children in a vehicle, with a door open. NOTE: • The Power Accessory Delay feature allows you to its fully closed completely when opening the door. Removing the key from the ignition switch and opening the driver's door will...
... switch. WARNING! Occupants, particularly unattended children, can enable or disable the Power Accessory Delay feature as desired. • Windows cannot be driven up . • The window will cancel this feature. Furthermore, opening the door will stop the window movement immediately if the window is in ...the process of the parking brake. Never leave children in a vehicle, with a door open. NOTE: • The Power Accessory Delay feature allows you to its fully closed completely when opening the door. Removing the key from the ignition switch and opening the driver's door will...

Owner Manual
Page 28
... as the perception of pressure on the ears or a helicopter-type sound in the ears. THINGS TO KNOW BEFORE STARTING YOUR VEHICLE 27 Auto Down Feature Both windows have an auto down slightly. 2 Power Window Switches Release the switch when you want the window to the second detent, release, and the...
... as the perception of pressure on the ears or a helicopter-type sound in the ears. THINGS TO KNOW BEFORE STARTING YOUR VEHICLE 27 Auto Down Feature Both windows have an auto down slightly. 2 Power Window Switches Release the switch when you want the window to the second detent, release, and the...
Owner Manual
Page 29
NOTE: Pressing the UNLOCK button on the transmitter will turn off the ignition, or if the Power Accessory Delay feature is active, it will also allow liftgate access. Refer to acknowledge the signal. Coupe" under the following conditions: • When the ignition is in the... The liftgate can be opened or closed. The park lights and turn off approximately 40 seconds after switching off approximately 40 seconds after the delay feature times out. The word "DECK" will flash three times to "Entering the liftgate with the RKE transmitter, press the LIFTGATE button on the door ...
NOTE: Pressing the UNLOCK button on the transmitter will turn off the ignition, or if the Power Accessory Delay feature is active, it will also allow liftgate access. Refer to acknowledge the signal. Coupe" under the following conditions: • When the ignition is in the... The liftgate can be opened or closed. The park lights and turn off approximately 40 seconds after switching off approximately 40 seconds after the delay feature times out. The word "DECK" will flash three times to "Entering the liftgate with the RKE transmitter, press the LIFTGATE button on the door ...
Owner Manual
Page 30
...props support the liftgate in the ignition switch, this display will turn off approximately 40 seconds after switching off approximately 40 seconds after the delay feature times out. 2 However, because the gas pressure drops with temperature, it will turn signal lights will flash three times to assist the ... word "DECK" will pop open. TRUNK LOCK AND RELEASE - The park lights and turn off the ignition, or if the Power Accessory Delay feature is active, it may be injured by pressing the TRUNK button on the trunk lid. THINGS TO KNOW BEFORE STARTING YOUR VEHICLE 29 WARNING! &#...
...props support the liftgate in the ignition switch, this display will turn off approximately 40 seconds after switching off approximately 40 seconds after the delay feature times out. 2 However, because the gas pressure drops with temperature, it will turn signal lights will flash three times to assist the ... word "DECK" will pop open. TRUNK LOCK AND RELEASE - The park lights and turn off the ignition, or if the Power Accessory Delay feature is active, it may be injured by pressing the TRUNK button on the trunk lid. THINGS TO KNOW BEFORE STARTING YOUR VEHICLE 29 WARNING! &#...
Owner Manual
Page 32
...people are buckled up even though you and your passenger can be a poor driver and cause a collision that seat belts save lives. This feature allows the shoulder portion of the belt to move freely with you . Please pay close attention to keep you and your passenger as section...use your restraint properly to the information section. THINGS TO KNOW BEFORE STARTING YOUR VEHICLE 31 OCCUPANT RESTRAINTS Some of the most important safety features in your vehicle are an excellent driver, even on your street. Research has shown that includes you under normal conditions. The belt webbing...
...people are buckled up even though you and your passenger can be a poor driver and cause a collision that seat belts save lives. This feature allows the shoulder portion of the belt to move freely with you . Please pay close attention to keep you and your passenger as section...use your restraint properly to the information section. THINGS TO KNOW BEFORE STARTING YOUR VEHICLE 31 OCCUPANT RESTRAINTS Some of the most important safety features in your vehicle are an excellent driver, even on your street. Research has shown that includes you under normal conditions. The belt webbing...

Owner Manual
Page 62
UNDERSTANDING THE FEATURES OF YOUR VEHICLE CONTENTS Ⅵ Convertible Top Operation - Convertible Models Only ...63 ▫ To Lower The Top ...63 ▫ To Raise The Top ...64 ▫ ...
UNDERSTANDING THE FEATURES OF YOUR VEHICLE CONTENTS Ⅵ Convertible Top Operation - Convertible Models Only ...63 ▫ To Lower The Top ...63 ▫ To Raise The Top ...64 ▫ ...
Owner Manual
Page 63
... YOUR VEHICLE ▫ Daytime Running Lights ...82 ▫ Lights-On Reminder ...82 ▫ Battery Saver Feature - Exterior Lights ...82 ▫ Fog Lights ...82 ▫ Turn Signals ...82 ▫ Highbeam/Lowbeam Select Switch ...83 ▫ Flash To Pass ......84 ▫ Interior Lights ...84 Ⅵ Windshield Wipers And Washers ...87 ▫ Intermittent Wiper System ...87 ▫ Mist Feature ...88 ▫ Windshield Washers ...88 ▫ Adding Washer Fluid ...89 Ⅵ Tilt Steering Column ...89 Ⅵ Adjustable Pedals ...90 ▫ Adjustable Foot Rest...
... YOUR VEHICLE ▫ Daytime Running Lights ...82 ▫ Lights-On Reminder ...82 ▫ Battery Saver Feature - Exterior Lights ...82 ▫ Fog Lights ...82 ▫ Turn Signals ...82 ▫ Highbeam/Lowbeam Select Switch ...83 ▫ Flash To Pass ......84 ▫ Interior Lights ...84 Ⅵ Windshield Wipers And Washers ...87 ▫ Intermittent Wiper System ...87 ▫ Mist Feature ...88 ▫ Windshield Washers ...88 ▫ Adding Washer Fluid ...89 Ⅵ Tilt Steering Column ...89 Ⅵ Adjustable Pedals ...90 ▫ Adjustable Foot Rest...
Owner Manual
Page 64
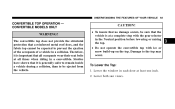
... ONLY CAUTION! • To insure that the vehicle is generally safer to remain inside a vehicle during a collision, than to the top may occur. UNDERSTANDING THE FEATURES OF YOUR VEHICLE 63 CONVERTIBLE TOP OPERATION -
... ONLY CAUTION! • To insure that the vehicle is generally safer to remain inside a vehicle during a collision, than to the top may occur. UNDERSTANDING THE FEATURES OF YOUR VEHICLE 63 CONVERTIBLE TOP OPERATION -

Owner Manual
Page 65
Depress the button located at least one inch. 2. Open the trunk. 8. To Raise the Top: Unlatching Convertible Top 1. 64 UNDERSTANDING THE FEATURES OF YOUR VEHICLE 3. Disengage the latch hook from the windshield header. 6. Raise both sun visors. 3. Pull the convertible top all the way back to engage ...
Depress the button located at least one inch. 2. Open the trunk. 8. To Raise the Top: Unlatching Convertible Top 1. 64 UNDERSTANDING THE FEATURES OF YOUR VEHICLE 3. Disengage the latch hook from the windshield header. 6. Raise both sun visors. 3. Pull the convertible top all the way back to engage ...

Owner Manual
Page 66
Press downward on the convertible top and then press the lever behind the driver seat to release the downstack latch. 5. Manually raise the convertible top until it meets the windshield header. 3 Raising Convertible Top Convertible Top Latch 6. Close the trunk. UNDERSTANDING THE FEATURES OF YOUR VEHICLE 65 4.
Press downward on the convertible top and then press the lever behind the driver seat to release the downstack latch. 5. Manually raise the convertible top until it meets the windshield header. 3 Raising Convertible Top Convertible Top Latch 6. Close the trunk. UNDERSTANDING THE FEATURES OF YOUR VEHICLE 65 4.

Owner Manual
Page 67
Ensure that the latch hook engages the windshield receiver rod. 8. From inside the vehicle, grasp the handles and pull the convertible top toward the windshield header. Then, push the latch handle forward so that the outboard locating pins are in their respective receiving holes in the windshield header and then push the latch handle forward all the way to close the latch. Aligning Convertible Top Engaging Convertible Top 66 UNDERSTANDING THE FEATURES OF YOUR VEHICLE 7.
Ensure that the latch hook engages the windshield receiver rod. 8. From inside the vehicle, grasp the handles and pull the convertible top toward the windshield header. Then, push the latch handle forward so that the outboard locating pins are in their respective receiving holes in the windshield header and then push the latch handle forward all the way to close the latch. Aligning Convertible Top Engaging Convertible Top 66 UNDERSTANDING THE FEATURES OF YOUR VEHICLE 7.

Owner Manual
Page 68
... the convertible top. Adjust the windows as desired. However, several weeks of normal convertible top usage will reduce these efforts. 9. Open the trunk. 2. UNDERSTANDING THE FEATURES OF YOUR VEHICLE 67 NOTE: Until the convertible top system has had adequate time to break-in the detent stow position. 3. Lay the unfolded boot...
... the convertible top. Adjust the windows as desired. However, several weeks of normal convertible top usage will reduce these efforts. 9. Open the trunk. 2. UNDERSTANDING THE FEATURES OF YOUR VEHICLE 67 NOTE: Until the convertible top system has had adequate time to break-in the detent stow position. 3. Lay the unfolded boot...
