
Owner Manual
Page 40
... slack, pull the 40 THINGS TO KNOW BEFORE STARTING YOUR VEHICLE Automatic Locking Mode - Once the automatic locking mode has been activated, you will prefer a lower position, and if you are taller than average, you hear a "click." The adjuster has an easy up (EZ Up) feature, which will not be moved...
... slack, pull the 40 THINGS TO KNOW BEFORE STARTING YOUR VEHICLE Automatic Locking Mode - Once the automatic locking mode has been activated, you will prefer a lower position, and if you are taller than average, you hear a "click." The adjuster has an easy up (EZ Up) feature, which will not be moved...

Owner Manual
Page 61
... LATCH system provides for the installation of the child restraint without using the vehicle's seat belts, instead securing the child restraint using lower anchorages and upper tether straps from the vehicle. If the seat belt has a cinching latch plate, pulling up on tether strap kits...'s instructions tell you. • When your child restraint in the vehicle with the child restraint anchorage system called LATCH, which stands for Lower Anchors and Tethers for installation using the vehicle's seat belts. The cinching latch plate will keep the belt tight, however, any vehicle. ...
... LATCH system provides for the installation of the child restraint without using the vehicle's seat belts, instead securing the child restraint using lower anchorages and upper tether straps from the vehicle. If the seat belt has a cinching latch plate, pulling up on tether strap kits...'s instructions tell you. • When your child restraint in the vehicle with the child restraint anchorage system called LATCH, which stands for Lower Anchors and Tethers for installation using the vehicle's seat belts. The cinching latch plate will keep the belt tight, however, any vehicle. ...

Owner Manual
Page 62
...adjacent rear seating positions, you must be installed in the outboard positions only. If you are capable of lower attachment, NEVER install LATCH compatible child seats such that two seats share a common lower anchorage. 62 THINGS TO KNOW BEFORE STARTING YOUR VEHICLE Club Cab • The Club Cab front and ...rear right (if equipped with fixed lower attachments must use the LATCH anchors or the vehicle's seat belt for the outboard position, but you can only install the child restraints ...
...adjacent rear seating positions, you must be installed in the outboard positions only. If you are capable of lower attachment, NEVER install LATCH compatible child seats such that two seats share a common lower anchorage. 62 THINGS TO KNOW BEFORE STARTING YOUR VEHICLE Club Cab • The Club Cab front and ...rear right (if equipped with fixed lower attachments must use the LATCH anchors or the vehicle's seat belt for the outboard position, but you can only install the child restraints ...

Owner Manual
Page 63
... (see section on the tether strap so that were provided with a tether strap, a hook for attachment to the lower anchorage and a means of the seatback and seat cushion surfaces. The rear seat lower anchorages are round bars, located at the rear of the seat cushion where it meets the seat back, and... strap anchorage and a means of adjusting the tension of the strap. Many, but not all child restraint systems will first loosen the adjusters on the lower straps and on Child Restraint Tether Anchor). Next attach the...
... (see section on the tether strap so that were provided with a tether strap, a hook for attachment to the lower anchorage and a means of the seatback and seat cushion surfaces. The rear seat lower anchorages are round bars, located at the rear of the seat cushion where it meets the seat back, and... strap anchorage and a means of adjusting the tension of the strap. Many, but not all child restraint systems will first loosen the adjusters on the lower straps and on Child Restraint Tether Anchor). Next attach the...

Owner Manual
Page 67
...) 1. Route the child restraint tether strap up and over the front passenger seat back and under the head restraint. 2. Connect the tether strap to the lower anchor. 3.
...) 1. Route the child restraint tether strap up and over the front passenger seat back and under the head restraint. 2. Connect the tether strap to the lower anchor. 3.

Owner Manual
Page 85
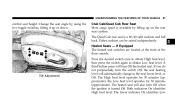
... the level of the head restraint and push down , forward or rearward, or tilt. UNDERSTANDING THE FEATURES OF YOUR VEHICLE 85 Adjustable Head Restraints - To lower the head restraint, depress the release button located at least to move the seat up or push down on the restraints so that the upper...
... the level of the head restraint and push down , forward or rearward, or tilt. UNDERSTANDING THE FEATURES OF YOUR VEHICLE 85 Adjustable Head Restraints - To lower the head restraint, depress the release button located at least to move the seat up or push down on the restraints so that the upper...
Owner Manual
Page 87
... not purposefully turn the switch Off, the seat heating level will turn Off when the ignition is a 60/40 split cushion and full back. The lower indicator On identifies Low 3 Tilt Adjustment Club Cab/Quad Cab Rear Seat More cargo space is available by using the two toggle switches, tilting it... Quad Cab rear seat is turned Off. Press the desired switch once to obtain High heat level, then press the switch again to the next lower level, or Off. UNDERSTANDING THE FEATURES OF YOUR VEHICLE 87 control seat height. Heated Seats - Change the seat angle by lifting up or down. The...
... not purposefully turn the switch Off, the seat heating level will turn Off when the ignition is a 60/40 split cushion and full back. The lower indicator On identifies Low 3 Tilt Adjustment Club Cab/Quad Cab Rear Seat More cargo space is available by using the two toggle switches, tilting it... Quad Cab rear seat is turned Off. Press the desired switch once to obtain High heat level, then press the switch again to the next lower level, or Off. UNDERSTANDING THE FEATURES OF YOUR VEHICLE 87 control seat height. Heated Seats - Change the seat angle by lifting up or down. The...

Owner Manual
Page 128
... Certain truck models are not recommended for slide-in your Owner's Manual packet or available from between the cable guides and the tailgate bumpers and lower the tailgate. CAUTION! • Care should not exceed 400 lbs (181 kg) of material suspended above the wheelhouse and partially open tailgate or vehicle damage...
... Certain truck models are not recommended for slide-in your Owner's Manual packet or available from between the cable guides and the tailgate bumpers and lower the tailgate. CAUTION! • Care should not exceed 400 lbs (181 kg) of material suspended above the wheelhouse and partially open tailgate or vehicle damage...
Owner Manual
Page 129
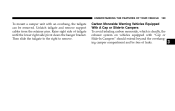
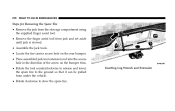
... avoid inhaling carbon monoxide, which is deadly, the exhaust system on vehicles equipped with an overhang, the tailgate can be free of tailgate until the lower right side pivot clears the hanger bracket. Unlatch tailgate and remove support cables from the retainer pins. Raise right side of leaks. 3
... avoid inhaling carbon monoxide, which is deadly, the exhaust system on vehicles equipped with an overhang, the tailgate can be free of tailgate until the lower right side pivot clears the hanger bracket. Unlatch tailgate and remove support cables from the retainer pins. Raise right side of leaks. 3
Owner Manual
Page 146
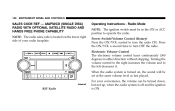
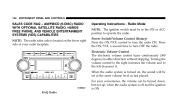
... faceplate. AM/FM/CD (SINGLE DISC) RADIO WITH OPTIONAL SATELLITE RADIO AND HANDS FREE PHONE CAPABILITY NOTE: The radio sales code is located on the lower right side of your convenience, the volume can be turned down, but not up, when the audio system is off and the ignition is turned...
... faceplate. AM/FM/CD (SINGLE DISC) RADIO WITH OPTIONAL SATELLITE RADIO AND HANDS FREE PHONE CAPABILITY NOTE: The radio sales code is located on the lower right side of your convenience, the volume can be turned down, but not up, when the audio system is off and the ignition is turned...
Owner Manual
Page 154
... is turned on, the sound will be turned down, but not up, when the audio system is off and the ignition is located on the lower right side of your convenience, the volume can be set at the same volume level as last played. 154 INSTRUMENT PANEL AND CONTROLS SALES CODE...
... is turned on, the sound will be turned down, but not up, when the audio system is off and the ignition is located on the lower right side of your convenience, the volume can be set at the same volume level as last played. 154 INSTRUMENT PANEL AND CONTROLS SALES CODE...
Owner Manual
Page 180
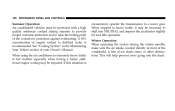
... using the air conditioner in extremely heavy traffic in hot weather especially when towing a trailer, additional engine cooling may be required. See "Cooling System" in a lower gear. When stopped in heavy traffic, it may be necessary to raise the boiling point of the windshield, is encountered, operate the transmission in the...
... using the air conditioner in extremely heavy traffic in hot weather especially when towing a trailer, additional engine cooling may be required. See "Cooling System" in a lower gear. When stopped in heavy traffic, it may be necessary to raise the boiling point of the windshield, is encountered, operate the transmission in the...

Owner Manual
Page 198
... addition, downshifting at a time to resume speed. Failure to follow the recommended downshifting speeds may cause the engine to preserve brakes when driving down to a lower gear is recommended to over speed and / or damage the clutch disc even if the clutch pedal is recommended. 198 STARTING AND OPERATING Downshifting Moving...
... addition, downshifting at a time to resume speed. Failure to follow the recommended downshifting speeds may cause the engine to preserve brakes when driving down to a lower gear is recommended to over speed and / or damage the clutch disc even if the clutch pedal is recommended. 198 STARTING AND OPERATING Downshifting Moving...

Owner Manual
Page 199
... positions on the instrument cluster. NOTE: The transfer case Neutral (N) position is to the desired position - see Shifting Procedure section for specific procedures on the lower left hand corner of Neutral (N). See Recreational Towing section for specific shifting instructions. The NV233/243 transfer case is designed to be used to lock...
... positions on the instrument cluster. NOTE: The transfer case Neutral (N) position is to the desired position - see Shifting Procedure section for specific procedures on the lower left hand corner of Neutral (N). See Recreational Towing section for specific shifting instructions. The NV233/243 transfer case is designed to be used to lock...

Owner Manual
Page 205
... Operating Information / Precautions The NV 244 Generation II is an electric shift transfer case and is operated by depressing the recessed button located on the lower left hand corner of the 4WD Control Switch. 5 Normal four-wheel-drive (4WD) high range, four-wheel-drive lock (4WD LOCK), four-wheel-drive low...
... Operating Information / Precautions The NV 244 Generation II is an electric shift transfer case and is operated by depressing the recessed button located on the lower left hand corner of the 4WD Control Switch. 5 Normal four-wheel-drive (4WD) high range, four-wheel-drive lock (4WD LOCK), four-wheel-drive low...
Owner Manual
Page 212
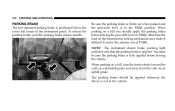
212 STARTING AND OPERATING PARKING BRAKE The foot operated parking brake is positioned below the lower left corner of PARK. When parking on a hill you should be sure the parking brake is not in the vehicle. NOTE: The instrument cluster brake ...
212 STARTING AND OPERATING PARKING BRAKE The foot operated parking brake is positioned below the lower left corner of PARK. When parking on a hill you should be sure the parking brake is not in the vehicle. NOTE: The instrument cluster brake ...
Owner Manual
Page 236
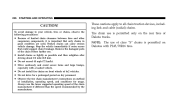
... on dry pavement. Observe the tire chain manufacturer's instructions on method of installation, operating speed, and conditions for a prolonged period on Dakotas with a loaded vehicle. Do not exceed 45 mph (72 km/h). Install chains as tightly as possible and then retighten after driving about.... 236 STARTING AND OPERATING CAUTION! Broken chains can cause serious vehicle damage. Always use the lower suggested operating speed of the chain before further use of Dakota trucks. Remove the damaged parts of the chain manufacturer if different than the speed recommended by the...
... on dry pavement. Observe the tire chain manufacturer's instructions on method of installation, operating speed, and conditions for a prolonged period on Dakotas with a loaded vehicle. Do not exceed 45 mph (72 km/h). Install chains as tightly as possible and then retighten after driving about.... 236 STARTING AND OPERATING CAUTION! Broken chains can cause serious vehicle damage. Always use the lower suggested operating speed of the chain before further use of Dakota trucks. Remove the damaged parts of the chain manufacturer if different than the speed recommended by the...

Owner Manual
Page 266
... engine OFF. 3. Manual Transmissions must be placed in gear (for example, 4th gear) for recreational towing. Bring vehicle to Neutral (N) or depress clutch on the lower left hand corner of transfer case Neutral (N) can cause severe transmission and/or transfer case damage. It is fully in the ON position. 4. Depress brake...
... engine OFF. 3. Manual Transmissions must be placed in gear (for example, 4th gear) for recreational towing. Bring vehicle to Neutral (N) or depress clutch on the lower left hand corner of transfer case Neutral (N) can cause severe transmission and/or transfer case damage. It is fully in the ON position. 4. Depress brake...
Owner Manual
Page 276
... tool extension rod into the access hole in the direction of the arrow on the bumper trim. • Rotate the tool counterclockwise to release and lower the spare tire to the ground so that it can be pulled from under the vehicle. • Rotate clockwise to stow the spare tire.
... tool extension rod into the access hole in the direction of the arrow on the bumper trim. • Rotate the tool counterclockwise to release and lower the spare tire to the ground so that it can be pulled from under the vehicle. • Rotate clockwise to stow the spare tire.

Owner Manual
Page 279
... changed, block the left rear wheel. • Passengers should not remain in the Operate the jack using the jack drive tube and the wheel wrench - Lower and remove the spare wheel, jack, and tools from stowage. 2. Locate the jack as far forward as shown.
... changed, block the left rear wheel. • Passengers should not remain in the Operate the jack using the jack drive tube and the wheel wrench - Lower and remove the spare wheel, jack, and tools from stowage. 2. Locate the jack as far forward as shown.
