
Owner Manual
Page 118
NOTE: If a turn signal has been left on until the lever is defective. If a defective bulb or wiring circuit is detected for at a faster rate. If an indicator fails to turn signal lights. Passing Light You can signal a lane change by ...
NOTE: If a turn signal has been left on until the lever is defective. If a defective bulb or wiring circuit is detected for at a faster rate. If an indicator fails to turn signal lights. Passing Light You can signal a lane change by ...

Owner Manual
Page 152
... is operating satisfactorily. If the temperature reading does not return to the "H" mark, stop the vehicle, shift into N (Neutral), and increase engine speed for a defective bulb. These indicators also indicate proper operation of fuel in tank when ignition switch is activated, a right-pointing or left-pointing arrow lights up and flashes...
... is operating satisfactorily. If the temperature reading does not return to the "H" mark, stop the vehicle, shift into N (Neutral), and increase engine speed for a defective bulb. These indicators also indicate proper operation of fuel in tank when ignition switch is activated, a right-pointing or left-pointing arrow lights up and flashes...
Owner Manual
Page 153
... 2 to normal, seek authorized service immediately. 4 If Equipped This light shows when the fog lights are on as long as a reminder to "buckle up." For a bulb check, this light will remain on high beam. 6. Fog Light Indicator - If the light turns on the side of this light flashes, it indicates a fault...
... 2 to normal, seek authorized service immediately. 4 If Equipped This light shows when the fog lights are on as long as a reminder to "buckle up." For a bulb check, this light will remain on high beam. 6. Fog Light Indicator - If the light turns on the side of this light flashes, it indicates a fault...

Owner Manual
Page 155
... is not functioning and that service is turned On. To toggle between the odometer and the trip odometer, press the Odometer/Trip Odometer Button. For a bulb check, this light will place a box around the selected transmission range (PRND21). Gear Selector The electronic gear selector display is described elsewhere in trip mode...
... is not functioning and that service is turned On. To toggle between the odometer and the trip odometer, press the Odometer/Trip Odometer Button. For a bulb check, this light will place a box around the selected transmission range (PRND21). Gear Selector The electronic gear selector display is described elsewhere in trip mode...
Owner Manual
Page 157
...service. Malfunction Indicator Light This light is necessary. If brake failure is indicated, immediate repair is part of park for service as soon as a bulb check, until fluid is added and ignition switch is started . In this case, the light will come on when the washer fluid level falls below... your dealer for automatic transmissions. Operating the vehicle in this light comes on and remains on until the condition has been corrected. If the bulb does not come on when the ignition is started . If this condition is at the full mark on when the parking brake has been ...
...service. Malfunction Indicator Light This light is necessary. If brake failure is indicated, immediate repair is part of park for service as soon as a bulb check, until fluid is added and ignition switch is started . In this case, the light will come on when the washer fluid level falls below... your dealer for automatic transmissions. Operating the vehicle in this light comes on and remains on until the condition has been corrected. If the bulb does not come on when the ignition is started . If this condition is at the full mark on when the parking brake has been ...
Owner Manual
Page 300
... Lubricating Grease ...332 ▫ Appearance Care And Protection From Corrosion ...333 Ⅵ Power Distribution Center (Fuse/Relay) ...337 Ⅵ Vehicle Storage ...340 Ⅵ Replacement Light Bulbs ...341 Ⅵ Bulb Replacement ...342 ▫ Headlamps ...342 ▫ Front Park And Turn Signal Lamp...346 ▫ Rear Side Marker, Taillamps/Stoplamp, And Turn Signal...
... Lubricating Grease ...332 ▫ Appearance Care And Protection From Corrosion ...333 Ⅵ Power Distribution Center (Fuse/Relay) ...337 Ⅵ Vehicle Storage ...340 Ⅵ Replacement Light Bulbs ...341 Ⅵ Bulb Replacement ...342 ▫ Headlamps ...342 ▫ Front Park And Turn Signal Lamp...346 ▫ Rear Side Marker, Taillamps/Stoplamp, And Turn Signal...

Owner Manual
Page 306
... happen: a. As soon as you should see your key to the I /M station. Regardless of two things will not be covered by the use of a normal bulb check. 4. This means that the system is turned off . A recheck with the engine running. This means that your vehicle's OBD system is illuminated during normal...
... happen: a. As soon as you should see your key to the I /M station. Regardless of two things will not be covered by the use of a normal bulb check. 4. This means that the system is turned off . A recheck with the engine running. This means that your vehicle's OBD system is illuminated during normal...

Owner Manual
Page 341
Reading Light ...Bulb No. Headlight ...H13 Front Park/Turn/Sidemarker ...3157NA Back-Up ...3157 Center High Mounted Stoplight ...921 Fog Lamp ...9145 Rear Sidemarker ...168 License Plate Light ...... the above steps you may disconnect the negative cable from the battery. Interior Dome Light ...Cargo Light ...Overhead Console Lights . . WL212-2 ...567 ...192 WL212-2 LIGHT BULBS - MAINTAINING YOUR VEHICLE 341 I.O.D. Outside Bulb No. REPLACEMENT LIGHT BULBS LIGHT BULBS -
Reading Light ...Bulb No. Headlight ...H13 Front Park/Turn/Sidemarker ...3157NA Back-Up ...3157 Center High Mounted Stoplight ...921 Fog Lamp ...9145 Rear Sidemarker ...168 License Plate Light ...... the above steps you may disconnect the negative cable from the battery. Interior Dome Light ...Cargo Light ...Overhead Console Lights . . WL212-2 ...567 ...192 WL212-2 LIGHT BULBS - MAINTAINING YOUR VEHICLE 341 I.O.D. Outside Bulb No. REPLACEMENT LIGHT BULBS LIGHT BULBS -

Owner Manual
Page 343
Grasp the headlamp and pull firmly to the inner panel. 3. Twist 1/4 turn and remove headlamp bulb and socket from the fender panel. 4. Remove the 3 screws attaching the headlamp housing to disengage the headlamp housing from housing and replace. While firmly holding the headlamp housing in your hands unlock and disconnect Headlamp bulb connector. 5. Removing Headlamp Assembly 7 MAINTAINING YOUR VEHICLE 343 1. Open the hood. 2.
Grasp the headlamp and pull firmly to the inner panel. 3. Twist 1/4 turn and remove headlamp bulb and socket from the fender panel. 4. Remove the 3 screws attaching the headlamp housing to disengage the headlamp housing from housing and replace. While firmly holding the headlamp housing in your hands unlock and disconnect Headlamp bulb connector. 5. Removing Headlamp Assembly 7 MAINTAINING YOUR VEHICLE 343 1. Open the hood. 2.

Owner Manual
Page 344
344 MAINTAINING YOUR VEHICLE Removing Headlamp Bulb Unlocking Connector
344 MAINTAINING YOUR VEHICLE Removing Headlamp Bulb Unlocking Connector

Owner Manual
Page 346
Reverse procedure to touch the bulb with your fingers could cause excessive heat buildup which reduces bulb life. Take care not to install new Headlamp bulb into the headlamp assembly. If the bulb socket needs replacement disconnect the connector. NOTE: These are Halogen bulbs. Disconnecting Headlamp Bulb Connector 6. NOTE: It is not necessary to disconnect the connector...
Reverse procedure to touch the bulb with your fingers could cause excessive heat buildup which reduces bulb life. Take care not to install new Headlamp bulb into the headlamp assembly. If the bulb socket needs replacement disconnect the connector. NOTE: These are Halogen bulbs. Disconnecting Headlamp Bulb Connector 6. NOTE: It is not necessary to disconnect the connector...

Owner Manual
Page 347
MAINTAINING YOUR VEHICLE 347 • Reverse procedure to install new turn and remove socket from housing. • Pull bulb straight from socket. Removing Turn Signal Bulb • Rotate bulb socket 1/4 turn signal bulb. Disconnecting Turn Signal Connector 7
MAINTAINING YOUR VEHICLE 347 • Reverse procedure to install new turn and remove socket from housing. • Pull bulb straight from socket. Removing Turn Signal Bulb • Rotate bulb socket 1/4 turn signal bulb. Disconnecting Turn Signal Connector 7

Owner Manual
Page 348
348 MAINTAINING YOUR VEHICLE Rear Side Marker, Taillamps/Stoplamp, and Turn Signal Bulbs - Pull the taillamp housing straight out from the body. Remove the two (2) screws that pass through the bed sheetmetal. Removing the Two (2) Screws Replacement 1. Pulling Housing From Body 2.
348 MAINTAINING YOUR VEHICLE Rear Side Marker, Taillamps/Stoplamp, and Turn Signal Bulbs - Pull the taillamp housing straight out from the body. Remove the two (2) screws that pass through the bed sheetmetal. Removing the Two (2) Screws Replacement 1. Pulling Housing From Body 2.

Owner Manual
Page 349
Pull bulb straight out of socket. Rotating Bulb Socket From Housing Pulling Bulb From Socket 7 Rotate the bulb socket from the housing. 4. MAINTAINING YOUR VEHICLE 349 3.
Pull bulb straight out of socket. Rotating Bulb Socket From Housing Pulling Bulb From Socket 7 Rotate the bulb socket from the housing. 4. MAINTAINING YOUR VEHICLE 349 3.

Owner Manual
Page 350
Center High-Mounted Stoplamp And Cargo Lamp 1. Remove the two (2) screws holding the housing/lens to install bulb and housing. Place the two raised blocks passed the body. Sliding Raised Blocks Past Body Removing Screws Reverse Procedure to the body as shown. 350 MAINTAINING YOUR VEHICLE 5.
Center High-Mounted Stoplamp And Cargo Lamp 1. Remove the two (2) screws holding the housing/lens to install bulb and housing. Place the two raised blocks passed the body. Sliding Raised Blocks Past Body Removing Screws Reverse Procedure to the body as shown. 350 MAINTAINING YOUR VEHICLE 5.

Owner Manual
Page 352
Pull desired bulb straight from housing. 5. Pulling Bulb From Socket Removing Socket From Housing • Outside Bulbs: Cargo Lamps • Inside Bulb: Center High Mount Stop Lamp Turn desired bulb socket 1⁄4 turn and remove socket and bulb from the socket. 352 MAINTAINING YOUR VEHICLE 4.
Pull desired bulb straight from housing. 5. Pulling Bulb From Socket Removing Socket From Housing • Outside Bulbs: Cargo Lamps • Inside Bulb: Center High Mount Stop Lamp Turn desired bulb socket 1⁄4 turn and remove socket and bulb from the socket. 352 MAINTAINING YOUR VEHICLE 4.

Owner Manual
Page 353
Rotate the socket 1/4 turn counterclockwise. Rotating Socket 7 Removing Housing From Bumper Reverse procedure for installation of bulbs and housing. License Lamps 1. MAINTAINING YOUR VEHICLE 353 6. Using a screw driver pry black rubber housing from the bumper. 2.
Rotate the socket 1/4 turn counterclockwise. Rotating Socket 7 Removing Housing From Bumper Reverse procedure for installation of bulbs and housing. License Lamps 1. MAINTAINING YOUR VEHICLE 353 6. Using a screw driver pry black rubber housing from the bumper. 2.

Owner Manual
Page 354
Disconnect connector from fog lamp housing. 3. Pulling Bulb From Socket 4. Fog Lamps 1. Reverse Procedure to remove from fog lamp by raising wire harness lock tab and pulling on wire harness connector. 2. Reverse procedure for installation. 354 MAINTAINING YOUR VEHICLE 3. Rotate fog lamp bulb 1/4 turn counterclockwise and pull to install. Pull bulb from socket.
Disconnect connector from fog lamp housing. 3. Pulling Bulb From Socket 4. Fog Lamps 1. Reverse Procedure to remove from fog lamp by raising wire harness lock tab and pulling on wire harness connector. 2. Reverse procedure for installation. 354 MAINTAINING YOUR VEHICLE 3. Rotate fog lamp bulb 1/4 turn counterclockwise and pull to install. Pull bulb from socket.
Owner Manual
Page 391
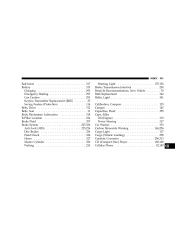
... Fluid Check ...326 Hoses ...327 Master Cylinder ...326 Parking ...224 Warning Light ...155,156 Brake/Transmission Interlock ...204 Break-In Recommendations, New Vehicle ...70 Bulb Replacement ...342 Bulbs, Light ...341 Calibration, Compass ...129 Camper ...145 Capacities, Fluid ...355 Caps, Filler Oil (Engine) ...310 Power Steering ...317 Car Washes ...333 Carbon Monoxide Warning...
... Fluid Check ...326 Hoses ...327 Master Cylinder ...326 Parking ...224 Warning Light ...155,156 Brake/Transmission Interlock ...204 Break-In Recommendations, New Vehicle ...70 Bulb Replacement ...342 Bulbs, Light ...341 Calibration, Compass ...129 Camper ...145 Capacities, Fluid ...355 Caps, Filler Oil (Engine) ...310 Power Steering ...317 Car Washes ...333 Carbon Monoxide Warning...
Owner Manual
Page 397
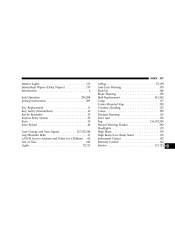
... and Tether for CHildren) . 60 Life of Tires ...245 Lights ...72,113 Airbag ...53,158 Anti-Lock Warning ...155 Back-Up ...348 Brake Warning ...156 Bulb Replacement ...341,342 Cargo ...117 Center Mounted Stop ...350 Courtesy/Reading ...125 Cruise ...158 Daytime Running ...116 Door Ajar ...156 Fog ...116,153,354 Hazard...
... and Tether for CHildren) . 60 Life of Tires ...245 Lights ...72,113 Airbag ...53,158 Anti-Lock Warning ...155 Back-Up ...348 Brake Warning ...156 Bulb Replacement ...341,342 Cargo ...117 Center Mounted Stop ...350 Courtesy/Reading ...125 Cruise ...158 Daytime Running ...116 Door Ajar ...156 Fog ...116,153,354 Hazard...
