Owner Manual
Page 5
... satisfaction. This Owner's Manual has been prepared with the assistance of service and engineering specialists to determine which section contains the information you desire. HOW TO USE THIS MANUAL Consult the Table of Contents to acquaint you read these publications carefully. 4 INTRODUCTION ...comes to read the manual, it represents precision workmanship, distinctive styling, and high quality - Since the specification of your new Chrysler Group LLC vehicle. Be assured that are traditional to our vehicles. all essentials that it should be stored symbols that the ...
... satisfaction. This Owner's Manual has been prepared with the assistance of service and engineering specialists to determine which section contains the information you desire. HOW TO USE THIS MANUAL Consult the Table of Contents to acquaint you read these publications carefully. 4 INTRODUCTION ...comes to read the manual, it represents precision workmanship, distinctive styling, and high quality - Since the specification of your new Chrysler Group LLC vehicle. Be assured that are traditional to our vehicles. all essentials that it should be stored symbols that the ...
Owner Manual
Page 7
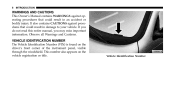
... contains CAUTIONS against operating procedures that could result in damage to your vehicle. If you do not read this entire manual, you may miss important information. This number also appears on the driver's front corner of the instrument panel, visible through the windshield. Observe all Warnings and Cautions. 6 INTRODUCTION WARNINGS AND...
... contains CAUTIONS against operating procedures that could result in damage to your vehicle. If you do not read this entire manual, you may miss important information. This number also appears on the driver's front corner of the instrument panel, visible through the windshield. Observe all Warnings and Cautions. 6 INTRODUCTION WARNINGS AND...

Owner Manual
Page 10
...; Steering Wheel Lock - If Equipped ...15 Ⅵ Sentry Key - If Equipped ...15 ▫ Replacement Keys ...16 ▫ Sentry Key Programming ...17 ▫ General Information ...18 Ⅵ Vehicle Security Alarm - If Equipped ...18 ▫ To Set The Alarm ...18 ▫ To Disarm The Alarm ...19 ▫ Security System Manual Override...
...; Steering Wheel Lock - If Equipped ...15 Ⅵ Sentry Key - If Equipped ...15 ▫ Replacement Keys ...16 ▫ Sentry Key Programming ...17 ▫ General Information ...18 Ⅵ Vehicle Security Alarm - If Equipped ...18 ▫ To Set The Alarm ...18 ▫ To Disarm The Alarm ...19 ▫ Security System Manual Override...

Owner Manual
Page 11
... ▫ To Lock The Doors And Liftgate ...21 ▫ To Turn Off "Flash Lights With Lock" ...22 ▫ Panic Alarm ...22 Ⅵ Liftgate ▫ General Information ...25 ▫ Transmitter Battery Replacement ...25 Ⅵ Door Locks ...26 ▫ Manual Door Locks ...26 ▫ Power Door Locks ...28 ▫ Child Protection Door Lock...
... ▫ To Lock The Doors And Liftgate ...21 ▫ To Turn Off "Flash Lights With Lock" ...22 ▫ Panic Alarm ...22 Ⅵ Liftgate ▫ General Information ...25 ▫ Transmitter Battery Replacement ...25 Ⅵ Door Locks ...26 ▫ Manual Door Locks ...26 ▫ Power Door Locks ...28 ▫ Child Protection Door Lock...
Owner Manual
Page 19
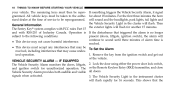
for another 15 minutes. Then General Information the exterior lights will flash rapidly for unauthorized operation. The Sentry Key system complies with FCC rules Part 15 and with RSS-210 of ...
for another 15 minutes. Then General Information the exterior lights will flash rapidly for unauthorized operation. The Sentry Key system complies with FCC rules Part 15 and with RSS-210 of ...

Owner Manual
Page 21
...can also be programmed to unlock all the doors and liftgate. The RKE transmitter does not need to be blocked with Electronic Vehicle Information Center (EVIC). For Three Button Remote Keyless Entry (RKE) Transmitter NOTE: The line of the UNLOCK button. To Unlock the Doors ...This system allows you to unlock all doors on the first press of transmission must not be pointed at the vehicle to "Electronic Vehicle Information Center (EVIC)/Personal Settings (Customer-Programmable Features)" in "Understanding Your Instrument Panel" for this feature is pressed, the illuminated entry will...
...can also be programmed to unlock all the doors and liftgate. The RKE transmitter does not need to be blocked with Electronic Vehicle Information Center (EVIC). For Three Button Remote Keyless Entry (RKE) Transmitter NOTE: The line of the UNLOCK button. To Unlock the Doors ...This system allows you to unlock all doors on the first press of transmission must not be pointed at the vehicle to "Electronic Vehicle Information Center (EVIC)/Personal Settings (Customer-Programmable Features)" in "Understanding Your Instrument Panel" for this feature is pressed, the illuminated entry will...
Owner Manual
Page 22
...EVIC-equipped vehicles, perform the following steps: Security Alarm. Opening a door with the Security Alarm activated will chirp once to sound. "Electronic Vehicle Information Center (EVIC) - If the desired programming was not achieved or to hold the UNLOCK button. Press the LOCK button for further... information. For non-EVICequipped vehicles, perform the following steps: mitter. Press and release the LOCK button on a programmed To Lock the Doors and ...
...EVIC-equipped vehicles, perform the following steps: Security Alarm. Opening a door with the Security Alarm activated will chirp once to sound. "Electronic Vehicle Information Center (EVIC) - If the desired programming was not achieved or to hold the UNLOCK button. Press the LOCK button for further... information. For non-EVICequipped vehicles, perform the following steps: mitter. Press and release the LOCK button on a programmed To Lock the Doors and ...
Owner Manual
Page 23
...: The "Flash Lights with Lock" feature can be Alarm. For EVIC-equipped vehicles refer to sound. Press the UNLOCK button "Electronic Vehicle Information Center (EVIC) - Press the UNLOCK button for 4 to deactivate the Security Alarm. 22 THINGS TO KNOW BEFORE STARTING YOUR VEHICLE 2. Equipped...The "Flash Lights on the press the PANIC button. seconds) press the LOCK button. Release both buttons. If to 10 seconds. further information. For non-EVIC-equipped vehicles, Panic Alarm perform the following steps: The Panic Alarm mode flashes the park lights, and 1. NOTE:...
...: The "Flash Lights with Lock" feature can be Alarm. For EVIC-equipped vehicles refer to sound. Press the UNLOCK button "Electronic Vehicle Information Center (EVIC) - Press the UNLOCK button for 4 to deactivate the Security Alarm. 22 THINGS TO KNOW BEFORE STARTING YOUR VEHICLE 2. Equipped...The "Flash Lights on the press the PANIC button. seconds) press the LOCK button. Release both buttons. If to 10 seconds. further information. For non-EVIC-equipped vehicles, Panic Alarm perform the following steps: The Panic Alarm mode flashes the park lights, and 1. NOTE:...
Owner Manual
Page 26
THINGS TO KNOW BEFORE STARTING YOUR VEHICLE 25 If your RKE transmitter fails to operate from a normal General Information This device complies with Part 15 of the FCC rules and distance, check for compliance could The recommended replacement battery is subject to the 1. Closeness ...
THINGS TO KNOW BEFORE STARTING YOUR VEHICLE 25 If your RKE transmitter fails to operate from a normal General Information This device complies with Part 15 of the FCC rules and distance, check for compliance could The recommended replacement battery is subject to the 1. Closeness ...

Owner Manual
Page 29
... or disabled. Press The doors will lock automatically on each front door panel. The transmission is on vehicles with power either switch to "Electronic Vehicle Information Center (EVIC) - If Equipped A door lock switch is in "Understanding Your Instrument Panel" for further...
... or disabled. Press The doors will lock automatically on each front door panel. The transmission is on vehicles with power either switch to "Electronic Vehicle Information Center (EVIC) - If Equipped A door lock switch is in "Understanding Your Instrument Panel" for further...
Owner Manual
Page 30
... or disabled. The driver door is enabled. 2. Refer to lock the doors. If Equipped The doors will indicate the completion of the further information. The vehicle speed is in "Understanding Your Instrument Panel" for 4. The shift lever is 0 mph (0 km/h). 2. Features)" in NEUTRAL or... PARK. procedure: 5. programming. Press the power door LOCK switch to "Electronic Vehicle Information Center (EVIC) - For vehicles not equipped with the EVIC, the Auto Lock 3. THINGS TO KNOW BEFORE STARTING YOUR VEHICLE 29 For vehicles not...
... or disabled. The driver door is enabled. 2. Refer to lock the doors. If Equipped The doors will indicate the completion of the further information. The vehicle speed is in "Understanding Your Instrument Panel" for 4. The shift lever is 0 mph (0 km/h). 2. Features)" in NEUTRAL or... PARK. procedure: 5. programming. Press the power door LOCK switch to "Electronic Vehicle Information Center (EVIC) - For vehicles not equipped with the EVIC, the Auto Lock 3. THINGS TO KNOW BEFORE STARTING YOUR VEHICLE 29 For vehicles not...
Owner Manual
Page 36
... the seat belt webbing into position by extending the belt all the way out and then adjusting the belt to the desired length to the information in this section. Someone on the road may be used to have a multistage Buckle up . This allows the airbag to hold infant and child restraint...
... the seat belt webbing into position by extending the belt all the way out and then adjusting the belt to the desired length to the information in this section. Someone on the road may be used to have a multistage Buckle up . This allows the airbag to hold infant and child restraint...

Owner Manual
Page 49
.... and Seat Track Position Sensors 48 THINGS TO KNOW BEFORE STARTING YOUR VEHICLE Airbag System Components • Occupant Classification System (OCS) Your vehicle may receive information from the front impact sensors. • Passenger Advanced Front Airbag The first stage inflator is expended.
.... and Seat Track Position Sensors 48 THINGS TO KNOW BEFORE STARTING YOUR VEHICLE Airbag System Components • Occupant Classification System (OCS) Your vehicle may receive information from the front impact sensors. • Passenger Advanced Front Airbag The first stage inflator is expended.
Owner Manual
Page 52
... wear the vehicle seat belt properly (refer to "Child Restraints") should be secured in the rear seat in the rear seat. AssistanceЉ for further information. (Refer to "Child Restraints") You should read the instructions provided with your vehicle has side airbags, and deployment occurs, the side airbags will inflate forcefully...
... wear the vehicle seat belt properly (refer to "Child Restraints") should be secured in the rear seat in the rear seat. AssistanceЉ for further information. (Refer to "Child Restraints") You should read the instructions provided with your vehicle has side airbags, and deployment occurs, the side airbags will inflate forcefully...
Owner Manual
Page 58
This indicates that information to inflate based on the severity and type of The (OCM) is located beneath the front passenger seat. If there is a fault present in certain ...
This indicates that information to inflate based on the severity and type of The (OCM) is located beneath the front passenger seat. If there is a fault present in certain ...

Owner Manual
Page 67
If the child cannot sit with knees bent over the vehicle's cushion while the child's back is for additional information. It could be badly injured or killed. Canadian residents, should use a Belt Positioning Booster Seat. A rearward-facing child restraint in a collision. http://... an infant or child restraint. • A rearward-facing child restraint should only be struck by the lap/ shoulder belt. NOTE: For additional information, refer to failure of an infant or child restraint. The child and booster seat are still too small to the infant. The child could come...
If the child cannot sit with knees bent over the vehicle's cushion while the child's back is for additional information. It could be badly injured or killed. Canadian residents, should use a Belt Positioning Booster Seat. A rearward-facing child restraint in a collision. http://... an infant or child restraint. • A rearward-facing child restraint should only be struck by the lap/ shoulder belt. NOTE: For additional information, refer to failure of an infant or child restraint. The child and booster seat are still too small to the infant. The child could come...

Owner Manual
Page 76
... the belt system periodically, checking for cuts, feel the air directed against the windshield. Rear seat belt assemblies must be replaced after a Floor Mat Safety Information collision. If there is any question regarding belt area unobstructed and that are firmly secured so that leave the pedal torn webbing, etc.). If the...
... the belt system periodically, checking for cuts, feel the air directed against the windshield. Rear seat belt assemblies must be replaced after a Floor Mat Safety Information collision. If there is any question regarding belt area unobstructed and that are firmly secured so that leave the pedal torn webbing, etc.). If the...
Owner Manual
Page 82
...; Rear Window Defroster ...135 3 ▫ Wind Buffeting ...123 Ⅵ Rear Window Features ...134 If Equipped ...129 ▫ Security ...120 ▫ Troubleshooting Tips ...120 ▫ General Information ...120 Ⅵ Power Sunroof - UNDERSTANDING THE FEATURES OF YOUR VEHICLE 81 ▫ Using Electronic Speed Control On Hills ...114 Ⅵ Garage Door Opener - If Equipped...
...; Rear Window Defroster ...135 3 ▫ Wind Buffeting ...123 Ⅵ Rear Window Features ...134 If Equipped ...129 ▫ Security ...120 ▫ Troubleshooting Tips ...120 ▫ General Information ...120 Ⅵ Power Sunroof - UNDERSTANDING THE FEATURES OF YOUR VEHICLE 81 ▫ Using Electronic Speed Control On Hills ...114 Ⅵ Garage Door Opener - If Equipped...

Owner Manual
Page 93
... with the seat latches disengaged could result in serious or fatal injury. • It is extremely dangerous to Know Before Starting Your Vehicle" for further information. Riding with seats and seat belts. • Be sure that the seatback is fully latched. • If the seatback is properly latched and the rear...
... with the seat latches disengaged could result in serious or fatal injury. • It is extremely dangerous to Know Before Starting Your Vehicle" for further information. Riding with seats and seat belts. • Be sure that the seatback is fully latched. • If the seatback is properly latched and the rear...

Owner Manual
Page 99
... the rear seat. 98 UNDERSTANDING THE FEATURES OF YOUR VEHICLE EMERGENCY SEATBACK RELEASE WARNING! If trapped in "Understanding the Features of Your Vehicle" for further information. Always close the liftgate when your vehicle is built into the interior of the vehicle. Refer to escape, even if they entered through the inside...
... the rear seat. 98 UNDERSTANDING THE FEATURES OF YOUR VEHICLE EMERGENCY SEATBACK RELEASE WARNING! If trapped in "Understanding the Features of Your Vehicle" for further information. Always close the liftgate when your vehicle is built into the interior of the vehicle. Refer to escape, even if they entered through the inside...

