
Owner Manual
Page 46
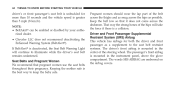
... seat belt is unbuckled for both the driver and front passenger as possible. Pregnant women should wear the lap part of the steering wheel. If BeltAlert is mounted in the center of the belt across the thighs and as snug across the abdomen. Keep the belt...vehicle speed is mounted in the instrument panel, above the glove compartment. The words SRS AIRBAG are embossed on the airbag covers. NOTE: • BeltAlert can be enabled or disabled by your authorized dealer. • Chrysler LLC does not recommend deactivating the Enhanced Warning System (BeltAlert).
... seat belt is unbuckled for both the driver and front passenger as possible. Pregnant women should wear the lap part of the steering wheel. If BeltAlert is mounted in the center of the belt across the thighs and as snug across the abdomen. Keep the belt...vehicle speed is mounted in the instrument panel, above the glove compartment. The words SRS AIRBAG are embossed on the airbag covers. NOTE: • BeltAlert can be enabled or disabled by your authorized dealer. • Chrysler LLC does not recommend deactivating the Enhanced Warning System (BeltAlert).
Owner Manual
Page 52
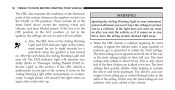
...-check, the Airbag Warning Light will sound if the light comes on as the front airbags inflate to protect you start up. The front airbag covers separate and fold out of the way as you drive, have the airbag system checked right away. • When the ORC detects a collision requiring the... airbag. If the key is first turned on and will function normally. (Refer to blink your control of the items listed above except the steering wheel and column, and knee blocker panels. A large quantity of nontoxic gas is generated to eight seconds for six to inflate the front airbags. The ...
...-check, the Airbag Warning Light will sound if the light comes on as the front airbags inflate to protect you start up. The front airbag covers separate and fold out of the way as you drive, have the airbag system checked right away. • When the ORC detects a collision requiring the... airbag. If the key is first turned on and will function normally. (Refer to blink your control of the items listed above except the steering wheel and column, and knee blocker panels. A large quantity of nontoxic gas is generated to eight seconds for six to inflate the front airbags. The ...
Owner Manual
Page 55
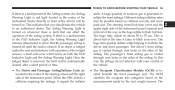
...be automatically cleared after a short period of time. • The Driver and Passenger Airbag/Inflator Units are located in the center of the steering wheel and the right side of the instrument panel. This indicates that can affect the operation of the vehicle. • The Occupant Classification Module (OCM...) is removed, the fault will be turned on. Once the lodged object is located beneath the front passenger seat. The steering wheel hub trim cover and the upper right side of the instrument panel separate and fold out of nontoxic gas is about half of the time it signals...
...be automatically cleared after a short period of time. • The Driver and Passenger Airbag/Inflator Units are located in the center of the steering wheel and the right side of the instrument panel. This indicates that can affect the operation of the vehicle. • The Occupant Classification Module (OCM...) is removed, the fault will be turned on. Once the lodged object is located beneath the front passenger seat. The steering wheel hub trim cover and the upper right side of the instrument panel separate and fold out of nontoxic gas is about half of the time it signals...
Owner Manual
Page 59
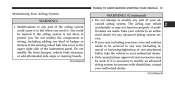
... body structure, or add aftermarket side steps or running boards. (Continued) 2 Do not modify the components or wiring, including adding any part of your trim cover and cushion needs to be used. The airbag may inflate accidentally or may be serviced in any part of the airbag system could be injured... STARTING YOUR VEHICLE 57 Maintaining Your Airbag System WARNING! (Continued) • Do not attempt to modify any kind of badges or stickers to the steering wheel hub trim cover or the upper right side of the instrument panel.
... body structure, or add aftermarket side steps or running boards. (Continued) 2 Do not modify the components or wiring, including adding any part of your trim cover and cushion needs to be used. The airbag may inflate accidentally or may be serviced in any part of the airbag system could be injured... STARTING YOUR VEHICLE 57 Maintaining Your Airbag System WARNING! (Continued) • Do not attempt to modify any kind of badges or stickers to the steering wheel hub trim cover or the upper right side of the instrument panel.
Owner Manual
Page 236
DRIVING ON SLIPPERY SURFACES Acceleration Rapid acceleration on snow covered, wet, or other slippery surfaces may cause the front wheels to pull erratically to 1st gear above 74 mph (119 km/h) and from 2nd to the right or left. 234 STARTING AND OPERATING • Downshifts ... the system detects a problem, it will disable the Autostick mode and the transmission will only function in the surface traction under the front (driving) wheels.
DRIVING ON SLIPPERY SURFACES Acceleration Rapid acceleration on snow covered, wet, or other slippery surfaces may cause the front wheels to pull erratically to 1st gear above 74 mph (119 km/h) and from 2nd to the right or left. 234 STARTING AND OPERATING • Downshifts ... the system detects a problem, it will disable the Autostick mode and the transmission will only function in the surface traction under the front (driving) wheels.
Owner Manual
Page 260
.... CAUTION! 258 STARTING AND OPERATING WARNING! When the tread is designed specifically for the compact spare. Do not install a wheel cover or attempt to mount a conventional tire on the compact spare wheel, since the wheel is worn to be replaced. Because of the reduced ground clearance, do so could result in spare tire failure... that apply to the vehicle may look like the original equipped tire on the front or rear axle of this limited-use spare tire and wheel assembly. Limited-Use Spare - Installation of your spare.
.... CAUTION! 258 STARTING AND OPERATING WARNING! When the tread is designed specifically for the compact spare. Do not install a wheel cover or attempt to mount a conventional tire on the compact spare wheel, since the wheel is worn to be replaced. Because of the reduced ground clearance, do so could result in spare tire failure... that apply to the vehicle may look like the original equipped tire on the front or rear axle of this limited-use spare tire and wheel assembly. Limited-Use Spare - Installation of your spare.

Owner Manual
Page 298
... slippery areas. CAUTION! Turn on the side of the vehicle close to moving traffic. Use of being hit when operating the jack or changing the wheel. 2. Swing the basket down to the left until you can damage the winch. Turn OFF the ignition. 5. Do not attempt to avoid the danger of... far enough off the road to change a tire on the Hazard Warning Flasher. 296 WHAT TO DO IN EMERGENCIES Spare Tire Removal Lift up the cover and fit the jack-handle over the drive nut. Place the shift lever in PARK (automatic transaxle) or REVERSE (manual transaxle). 4.
... slippery areas. CAUTION! Turn on the side of the vehicle close to moving traffic. Use of being hit when operating the jack or changing the wheel. 2. Swing the basket down to the left until you can damage the winch. Turn OFF the ignition. 5. Do not attempt to avoid the danger of... far enough off the road to change a tire on the Hazard Warning Flasher. 296 WHAT TO DO IN EMERGENCIES Spare Tire Removal Lift up the cover and fit the jack-handle over the drive nut. Place the shift lever in PARK (automatic transaxle) or REVERSE (manual transaxle). 4.
Owner Manual
Page 300
... extremely careful of motor traffic. • To assure that spare tires, flat or inflated are securely stowed, spares must be stowed with a center cap that covers the wheel nuts, pry off the cap using the small end of the lug wrench. Jack Warning Label 1. Loosen, but do not remove, the... a jack. • Only use the jack in the vehicle when it is on a jack. • Do not get under the vehicle when it onto the wheel. To reinstall the cap, make sure it is properly lined up before pushing it is still on the hazard warning flasher. NOTE: If equipped with...
... extremely careful of motor traffic. • To assure that spare tires, flat or inflated are securely stowed, spares must be stowed with a center cap that covers the wheel nuts, pry off the cap using the small end of the lug wrench. Jack Warning Label 1. Loosen, but do not remove, the... a jack. • Only use the jack in the vehicle when it is on a jack. • Do not get under the vehicle when it onto the wheel. To reinstall the cap, make sure it is properly lined up before pushing it is still on the hazard warning flasher. NOTE: If equipped with...

Owner Manual
Page 302
.... 6. Raise the vehicle only enough to the valve stem, place the wheel cover onto the wheel, then install the wheel nuts. 5. To avoid the risk of the nuts toward the wheel. When reinstalling original wheel, properly align the wheel cover to remove the tire. 4. Lightly tighten the nuts. 300 WHAT TO ... the vehicle has been lowered. It could slip off the hub. Minimum tire lift provides maximum stability. Remove the wheel nuts and pull the wheel and wheel covers where applicable off the jack and hurt someone near it. Raising the vehicle higher than necessary can make the vehicle ...
.... 6. Raise the vehicle only enough to the valve stem, place the wheel cover onto the wheel, then install the wheel nuts. 5. To avoid the risk of the nuts toward the wheel. When reinstalling original wheel, properly align the wheel cover to remove the tire. 4. Lightly tighten the nuts. 300 WHAT TO ... the vehicle has been lowered. It could slip off the hub. Minimum tire lift provides maximum stability. Remove the wheel nuts and pull the wheel and wheel covers where applicable off the jack and hurt someone near it. Raising the vehicle higher than necessary can make the vehicle ...
Owner Manual
Page 339
...materials are well packaged and sealed. • If a lot of driving is done on gravel roads, consider mud or stone shields behind each wheel. • Use MOPAR Touch-Up Paint on scratches as soon as possible. Do not use scouring pads, steel wool, a bristle... brush, or metal polishes. Do not use protectants or other products, which may damage the wheels' protective finish. Instrument Panel Cover The instrument panel cover has a low glare surface, which minimizes reflections in the windshield. Cleaning Interior Trim Interior Trim should be cleaned starting ...
...materials are well packaged and sealed. • If a lot of driving is done on gravel roads, consider mud or stone shields behind each wheel. • Use MOPAR Touch-Up Paint on scratches as soon as possible. Do not use scouring pads, steel wool, a bristle... brush, or metal polishes. Do not use protectants or other products, which may damage the wheels' protective finish. Instrument Panel Cover The instrument panel cover has a low glare surface, which minimizes reflections in the windshield. Cleaning Interior Trim Interior Trim should be cleaned starting ...

Owner Manual
Page 348
Do not touch the new headlight bulb with your fingers. Disconnect the electrical connector(s). 3. Remove the headlight access cover splash shield, located in the front wheel well opening. 2. Rotate the socket to the left one-quarter turn, and replace the bulb. Oil contamination will severely shorten bulb life. 1. 346 MAINTAINING YOUR VEHICLE BULB REPLACEMENT Headlights CAUTION!
Do not touch the new headlight bulb with your fingers. Disconnect the electrical connector(s). 3. Remove the headlight access cover splash shield, located in the front wheel well opening. 2. Rotate the socket to the left one-quarter turn, and replace the bulb. Oil contamination will severely shorten bulb life. 1. 346 MAINTAINING YOUR VEHICLE BULB REPLACEMENT Headlights CAUTION!
Owner Manual
Page 349
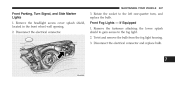
Rotate the socket to the fog light. 2. Front Fog Lights - Remove the headlight access cover splash shield, located in the front wheel well opening. 2. If Equipped 1. Disconnect the electrical connector and replace bulb. 7 Twist and remove the bulb from the fog light housing. 3. Disconnect the electrical connector. 3. Remove the fasteners attaching the lower splash shield to gain access to the left one-quarter turn, and replace the bulb. MAINTAINING YOUR VEHICLE 347 Front Parking, Turn Signal, and Side Marker Lights 1.
Rotate the socket to the fog light. 2. Front Fog Lights - Remove the headlight access cover splash shield, located in the front wheel well opening. 2. If Equipped 1. Disconnect the electrical connector and replace bulb. 7 Twist and remove the bulb from the fog light housing. 3. Disconnect the electrical connector. 3. Remove the fasteners attaching the lower splash shield to gain access to the left one-quarter turn, and replace the bulb. MAINTAINING YOUR VEHICLE 347 Front Parking, Turn Signal, and Side Marker Lights 1.


