
Owner's Manual
Page 1
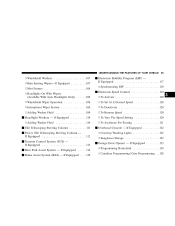
SECTION 1 2 3 4 5 6 7 8 9 10 TABLE OF CONTENTS PAGE INTRODUCTION ...3 THINGS TO KNOW BEFORE STARTING YOUR VEHICLE ...9 UNDERSTANDING THE FEATURES OF YOUR VEHICLE ...63 UNDERSTANDING YOUR INSTRUMENT PANEL ...137 STARTING AND OPERATING ...205 WHAT TO DO IN EMERGENCIES ...273 MAINTAINING YOUR VEHICLE ...289 MAINTENANCE SCHEDULES ...349 IF YOU NEED CONSUMER ASSISTANCE ...365 INDEX ...373 1 2 3 4 5 6 7 8 9 10
SECTION 1 2 3 4 5 6 7 8 9 10 TABLE OF CONTENTS PAGE INTRODUCTION ...3 THINGS TO KNOW BEFORE STARTING YOUR VEHICLE ...9 UNDERSTANDING THE FEATURES OF YOUR VEHICLE ...63 UNDERSTANDING YOUR INSTRUMENT PANEL ...137 STARTING AND OPERATING ...205 WHAT TO DO IN EMERGENCIES ...273 MAINTAINING YOUR VEHICLE ...289 MAINTENANCE SCHEDULES ...349 IF YOU NEED CONSUMER ASSISTANCE ...365 INDEX ...373 1 2 3 4 5 6 7 8 9 10

Owner's Manual
Page 11
... minutes after the ignition switch has been turned off. NOTE: The power window switches, radio, power sunroof (if equipped), and power outlets will cancel this feature. The time is programmable through the electronic Ignition Key Removal The shift lever must be used to the LOCK position, then remove the key. 2 Vehicle...
... minutes after the ignition switch has been turned off. NOTE: The power window switches, radio, power sunroof (if equipped), and power outlets will cancel this feature. The time is programmable through the electronic Ignition Key Removal The shift lever must be used to the LOCK position, then remove the key. 2 Vehicle...

Owner's Manual
Page 17
... following conditions are closed. 4. The throttle is above 15 mph (24 km/h). 6. The Auto Lock feature is in the ignition. 2. All doors are met: 1. The Automatic Door Lock feature can be enabled or disabled. Cycle the ignition switch between LOCK and ON and back to "Personal Settings..." (Customer Programmable Features) in the LOCK position. 2 Ignition Key Position For vehicles not equipped with ...
... following conditions are closed. 4. The throttle is above 15 mph (24 km/h). 6. The Auto Lock feature is in the ignition. 2. All doors are met: 1. The Automatic Door Lock feature can be enabled or disabled. Cycle the ignition switch between LOCK and ON and back to "Personal Settings..." (Customer Programmable Features) in the LOCK position. 2 Ignition Key Position For vehicles not equipped with ...

Owner's Manual
Page 18
... 0 mph (0 km/h). The transmission was in the LOCK position. The Auto Unlock feature can be enabled or disabled. A single chime will unlock automatically on vehicles with the EVIC, the Auto Unlock feature can be enabled or disabled by performing the following procedure: 1. Power Door Lock Switch... NEUTRAL or PARK. 4. The vehicle speed is opened. 5. The transmission is enabled. Refer to lock the doors. 2. The Auto Unlock feature is in the ignition. 2. The doors were not previously unlocked. 6. 18 THINGS TO KNOW BEFORE STARTING YOUR VEHICLE 3. Depress the power ...
... 0 mph (0 km/h). The transmission was in the LOCK position. The Auto Unlock feature can be enabled or disabled. A single chime will unlock automatically on vehicles with the EVIC, the Auto Unlock feature can be enabled or disabled by performing the following procedure: 1. Power Door Lock Switch... NEUTRAL or PARK. 4. The vehicle speed is opened. 5. The transmission is enabled. Refer to lock the doors. 2. The Auto Unlock feature is in the ignition. 2. The doors were not previously unlocked. 6. 18 THINGS TO KNOW BEFORE STARTING YOUR VEHICLE 3. Depress the power ...

Owner's Manual
Page 19
... provide a safer environment for small children riding in the rear seats, the rear doors are engaged. NOTE: Use the Auto Door Locks and Auto Unlock features in a collision. Avoid trapping anyone in the vehicle in accordance with a child protection door lock system. 2 WARNING!
... provide a safer environment for small children riding in the rear seats, the rear doors are engaged. NOTE: Use the Auto Door Locks and Auto Unlock features in a collision. Avoid trapping anyone in the vehicle in accordance with a child protection door lock system. 2 WARNING!

Owner's Manual
Page 21
..." in the Electronic Vehicle Information Center (EVIC) section of the vehicle, by pressing the LOCK/UNLOCK button on a programmed key fob. 2. Test the feature while outside of this feature is programmable on . Refer to "Remote Unlock Driver's Door 1st" under "Personal Settings" in the Electronic Vehicle Information Center (EVIC) section of the...
..." in the Electronic Vehicle Information Center (EVIC) section of the vehicle, by pressing the LOCK/UNLOCK button on a programmed key fob. 2. Test the feature while outside of this feature is programmable on . Refer to "Remote Unlock Driver's Door 1st" under "Personal Settings" in the Electronic Vehicle Information Center (EVIC) section of the...

Owner's Manual
Page 22
... UNLOCK button to 10 seconds. 2. If desired, the "Sound Horn On Lock" feature can be turned on the keyfob while you turn it off by pressing the PANIC... the trunk. The turn on the transmitter two times to acknowledge the signal. The "Sound Horn On Lock" feature can be reactivated by repeating this manual. When the panic alarm is on, the headlights and park lights will ...To unlatch the trunk: Press the trunk button on . The panic alarm will turn the panic alarm feature ON or OFF, press and hold the PANIC button on for 4 to deactivate the Security Alarm. The "Remote Unlock...
... UNLOCK button to 10 seconds. 2. If desired, the "Sound Horn On Lock" feature can be turned on the keyfob while you turn it off by pressing the PANIC... the trunk. The turn on the transmitter two times to acknowledge the signal. The "Sound Horn On Lock" feature can be reactivated by repeating this manual. When the panic alarm is on, the headlights and park lights will ...To unlatch the trunk: Press the trunk button on . The panic alarm will turn the panic alarm feature ON or OFF, press and hold the PANIC button on for 4 to deactivate the Security Alarm. The "Remote Unlock...

Owner's Manual
Page 23
... to ЉPersonal SettingsЉ in the Electronic Vehicle Information Center (EVIC) section of the system. The "Flash Lights On Lock/Unlock" feature can be reactivated by pressing the PANIC button a second time, you are in the LOCK position, and the key removed. Press and hold the ...interference that may have to be closer to the vehicle due to the radio frequency noises of this procedure. Test the flash lights with LOCK feature while outside of Industry Canada. Operation is subject to the following steps: 1. THINGS TO KNOW BEFORE STARTING YOUR VEHICLE 23 • When...
... to ЉPersonal SettingsЉ in the Electronic Vehicle Information Center (EVIC) section of the system. The "Flash Lights On Lock/Unlock" feature can be reactivated by pressing the PANIC button a second time, you are in the LOCK position, and the key removed. Press and hold the ...interference that may have to be closer to the vehicle due to the radio frequency noises of this procedure. Test the flash lights with LOCK feature while outside of Industry Canada. Operation is subject to the following steps: 1. THINGS TO KNOW BEFORE STARTING YOUR VEHICLE 23 • When...
Owner's Manual
Page 27
... driver door power window switch, and some model passenger door power window switches have an auto down feature. To stop . For vehicles equipped with the EVIC, the power window switches will remain active for up on the switch briefly. For vehicles...disabled. Refer to "Delay Power Off to Accessories Until Exit" under "Personal Settings (Customer Programmable Features)" under "Electronic Vehicle Information Center (EVIC)" in Section 4 of this feature. Opening either front door will cancel this feature. To open the window part way, press the window switch to the first detent and release...
... driver door power window switch, and some model passenger door power window switches have an auto down feature. To stop . For vehicles equipped with the EVIC, the power window switches will remain active for up on the switch briefly. For vehicles...disabled. Refer to "Delay Power Off to Accessories Until Exit" under "Personal Settings (Customer Programmable Features)" under "Electronic Vehicle Information Center (EVIC)" in Section 4 of this feature. Opening either front door will cancel this feature. To open the window part way, press the window switch to the first detent and release...

Owner's Manual
Page 28
28 THINGS TO KNOW BEFORE STARTING YOUR VEHICLE Auto Up Feature with the EVIC, the power window switches will remain active for up to 60 minutes after the ignition switch is turned off . Opening either front ... . Refer to "Delay Power Off to Accessories Until Exit" under "Personal Settings (Customer Programmable Features)" under "Electronic Vehicle Information Center (EVIC)" in Section 4 of this feature. Opening either front door will reverse direction and then stop. If this feature. To close window manually. Be sure to stop the window from the window before...
28 THINGS TO KNOW BEFORE STARTING YOUR VEHICLE Auto Up Feature with the EVIC, the power window switches will remain active for up to 60 minutes after the ignition switch is turned off . Opening either front ... . Refer to "Delay Power Off to Accessories Until Exit" under "Personal Settings (Customer Programmable Features)" under "Electronic Vehicle Information Center (EVIC)" in Section 4 of this feature. Opening either front door will reverse direction and then stop. If this feature. To close window manually. Be sure to stop the window from the window before...

Owner's Manual
Page 29
... Reset Any time the vehicle battery is disconnected or goes dead the auto-up function will operate. 2 Trunk Release Button To reactivate the auto-up feature perform the following steps after vehicle power is closed. 2. Push the window switch down firmly to the second detent to open the window completely and...
... Reset Any time the vehicle battery is disconnected or goes dead the auto-up function will operate. 2 Trunk Release Button To reactivate the auto-up feature perform the following steps after vehicle power is closed. 2. Push the window switch down firmly to the second detent to open the window completely and...

Owner's Manual
Page 31
... located on the handle to a window. THINGS TO KNOW BEFORE STARTING YOUR VEHICLE 31 Trunk Emergency Release OCCUPANT RESTRAINTS Some of the most important safety features in your vehicle is equipped with an emergency release handle. If you and your passengers as safe as possible. 2 Emergency Release The trunk of the...
... located on the handle to a window. THINGS TO KNOW BEFORE STARTING YOUR VEHICLE 31 Trunk Emergency Release OCCUPANT RESTRAINTS Some of the most important safety features in your vehicle is equipped with an emergency release handle. If you and your passengers as safe as possible. 2 Emergency Release The trunk of the...

Owner's Manual
Page 32
... ejection and the risk of injury caused by striking the inside of the worst injuries happen when people are not properly buckled up properly. This feature allows the shoulder part of the vehicle or being thrown out. But in a collision, the belt will lock and reduce your vehicle is not equipped...
... ejection and the risk of injury caused by striking the inside of the worst injuries happen when people are not properly buckled up properly. This feature allows the shoulder part of the vehicle or being thrown out. But in a collision, the belt will lock and reduce your vehicle is not equipped...

Owner's Manual
Page 50
... remains functional, vehicles equipped with power door locks will illuminate to tell anyone who works on the right front passenger seat back. Enhanced Accident Response Feature If the airbags deploy after the airbags have been deployed. Do not mount or locate any aftermarket equipment on or behind the knee impact bolster...
... remains functional, vehicles equipped with power door locks will illuminate to tell anyone who works on the right front passenger seat back. Enhanced Accident Response Feature If the airbags deploy after the airbags have been deployed. Do not mount or locate any aftermarket equipment on or behind the knee impact bolster...

Owner's Manual
Page 56
... for some older child restraints, many child restraint manufacturers offer add-on tether strap kits or retro-fit kits. All three rear seating positions have features for installation using the vehicle's seat belts. LATCH Anchorages Installing the LATCH-Compatible Child Restraint System We urge that are urged to take advantage of...
... for some older child restraints, many child restraint manufacturers offer add-on tether strap kits or retro-fit kits. All three rear seating positions have features for installation using the vehicle's seat belts. LATCH Anchorages Installing the LATCH-Compatible Child Restraint System We urge that are urged to take advantage of...

Owner's Manual
Page 63
... Equipped ...68 ▫ Outside Mirror - Driver's Side ...68 ▫ Outside Mirror - If Equipped ...68 ▫ Tilt In Reverse Feature - If Equipped ...70 ▫ Operations ...72 ▫ Phone Call Features ...77 ▫ UConnect™ System Features ...79 ▫ Advanced Phone Connectivity ...83 ▫ Things You Should Know About Your UConnect™ System ...85 Ⅵ...
... Equipped ...68 ▫ Outside Mirror - Driver's Side ...68 ▫ Outside Mirror - If Equipped ...68 ▫ Tilt In Reverse Feature - If Equipped ...70 ▫ Operations ...72 ▫ Phone Call Features ...77 ▫ UConnect™ System Features ...79 ▫ Advanced Phone Connectivity ...83 ▫ Things You Should Know About Your UConnect™ System ...85 Ⅵ...

Owner's Manual
Page 64
... ▫ Turn Signals ...105 ▫ Highbeam/Lowbeam Select Switch ...106 ▫ Flash To Pass ...106 Ⅵ Windshield Wipers And Washers ...106 64 UNDERSTANDING THE FEATURES OF YOUR VEHICLE ▫ Power Seats ...90 ▫ Power Reclining Seats ...91 ▫ Lumbar Support ...92 ▫ Heated Seats - If Equipped ...92 ▫...; Head Restraints ...94 ▫ Folding Rear Seat ...94 Ⅵ Driver Memory Seat ...95 ▫ Programming The Remote Keyless Transmitter For The Memory Feature ...96 ▫ Easy Entry/Exit Seat (Available With Memory Seat Only) ...97 Ⅵ Adjustable Pedals -
... ▫ Turn Signals ...105 ▫ Highbeam/Lowbeam Select Switch ...106 ▫ Flash To Pass ...106 Ⅵ Windshield Wipers And Washers ...106 64 UNDERSTANDING THE FEATURES OF YOUR VEHICLE ▫ Power Seats ...90 ▫ Power Reclining Seats ...91 ▫ Lumbar Support ...92 ▫ Heated Seats - If Equipped ...92 ▫...; Head Restraints ...94 ▫ Folding Rear Seat ...94 Ⅵ Driver Memory Seat ...95 ▫ Programming The Remote Keyless Transmitter For The Memory Feature ...96 ▫ Easy Entry/Exit Seat (Available With Memory Seat Only) ...97 Ⅵ Adjustable Pedals -
Owner's Manual
Page 65
... (TCS) - If Equipped ...123 ▫ Programming HomeLink ...124 ▫ Canadian Programming/Gate Programming . . 126 3 UNDERSTANDING THE FEATURES OF YOUR VEHICLE 65 ▫ Windshield Washers ...107 ▫ Rain Sensing Wipers-If Equipped ...107 ▫ Mist Feature ...108 ▫ Headlights On With Wipers (Available With Auto Headlights Only) ...108 ▫ Windshield Wiper Operation ...109...
... (TCS) - If Equipped ...123 ▫ Programming HomeLink ...124 ▫ Canadian Programming/Gate Programming . . 126 3 UNDERSTANDING THE FEATURES OF YOUR VEHICLE 65 ▫ Windshield Washers ...107 ▫ Rain Sensing Wipers-If Equipped ...107 ▫ Mist Feature ...108 ▫ Headlights On With Wipers (Available With Auto Headlights Only) ...108 ▫ Windshield Wiper Operation ...109...

Owner's Manual
Page 66
...Front Seat Cup Holders - Standard ...133 ▫ Front Seat Cup Holders - 300 Touring And 300C Models ...134 ▫ Rear Seat Cup Holders ...134 Ⅵ Storage ...135 ▫ Console Features ...135 ▫ Cargo Tie-Down Hooks ...135 Ⅵ Load Leveling System - 66 UNDERSTANDING... THE FEATURES OF YOUR VEHICLE ▫ Using HomeLink ...127 ▫ Erasing HomeLink Buttons ...127 ▫ Reprogramming ...
...Front Seat Cup Holders - Standard ...133 ▫ Front Seat Cup Holders - 300 Touring And 300C Models ...134 ▫ Rear Seat Cup Holders ...134 Ⅵ Storage ...135 ▫ Console Features ...135 ▫ Cargo Tie-Down Hooks ...135 Ⅵ Load Leveling System - 66 UNDERSTANDING... THE FEATURES OF YOUR VEHICLE ▫ Using HomeLink ...127 ▫ Erasing HomeLink Buttons ...127 ▫ Reprogramming ...

Owner's Manual
Page 67
...glare from vehicles behind you. Automatic Dimming Inside Mirror - The mirror should be in the day position (toward rear of vehicle). UNDERSTANDING THE FEATURES OF YOUR VEHICLE 67 MIRRORS Inside Day/Night Mirror Adjust the mirror to center on . 3 Adjusting Rearview Mirror Annoying headlight glare can be... reduced by moving the small control under the mirror to indicate when this feature is pressed on the switch at the base of the mirror. A green light in the "AUTO" position the mirror will normally be ...
...glare from vehicles behind you. Automatic Dimming Inside Mirror - The mirror should be in the day position (toward rear of vehicle). UNDERSTANDING THE FEATURES OF YOUR VEHICLE 67 MIRRORS Inside Day/Night Mirror Adjust the mirror to center on . 3 Adjusting Rearview Mirror Annoying headlight glare can be... reduced by moving the small control under the mirror to indicate when this feature is pressed on the switch at the base of the mirror. A green light in the "AUTO" position the mirror will normally be ...
