
Owner's Manual
Page 16
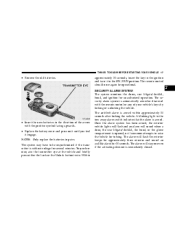
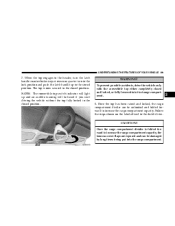
... Panic Alarm: Press and hold the Panic button or unlock the door with FCC rules part 15. The key folds out. • Press the battery cover (1) in the direction of the arrow.
... Panic Alarm: Press and hold the Panic button or unlock the door with FCC rules part 15. The key folds out. • Press the battery cover (1) in the direction of the arrow.
Owner's Manual
Page 17
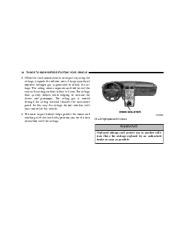
... system is automatically armed or disarmed with the remote control or any of the arrow with the positive symbol facing upwards. • Replace the battery cover and press on even if the activating element is without voltage for unauthorized operation. The alarm will stay on it until you feel it to...
... system is automatically armed or disarmed with the remote control or any of the arrow with the positive symbol facing upwards. • Replace the battery cover and press on even if the activating element is without voltage for unauthorized operation. The alarm will stay on it until you feel it to...

Owner's Manual
Page 28
... airbags for the driver and passenger. These airbags inflate in the instrument panel, under a cover marked SRS/AIRBAG. WARNING! • Do not put anything on or around the front airbag covers or attempt to provide improved protection for the driver and passenger as a supplement to improve ...frontal airbag is mounted in higher speed frontal impacts. Airbag The vehicle is mounted in the driver and passenger doors. These protective covers are designed to open only when the airbags are not there to protect you could be pushed into occupants, causing serious injury. ...
... airbags for the driver and passenger. These airbags inflate in the instrument panel, under a cover marked SRS/AIRBAG. WARNING! • Do not put anything on or around the front airbag covers or attempt to provide improved protection for the driver and passenger as a supplement to improve ...frontal airbag is mounted in higher speed frontal impacts. Airbag The vehicle is mounted in the driver and passenger doors. These protective covers are designed to open only when the airbags are not there to protect you could be pushed into occupants, causing serious injury. ...

Owner's Manual
Page 31
...your instrument panel could be injured because the airbags are in the center of the system, it comes on as you . These protective covers are designed to manually open only when the airbags are embossed on the AIRBAG light in the occupant compartment determines if a frontal impact ...above except the knee bolster, the instrument panel, and the steering wheel and column. • The Occupant Restraint Controller also turns on the airbag covers. 2 WARNING! THINGS TO KNOW BEFORE STARTING YOUR VEHICLE 31 How the Front Airbag System Works • A crash sensor in the instrument panel for...
...your instrument panel could be injured because the airbags are in the center of the system, it comes on as you . These protective covers are designed to manually open only when the airbags are embossed on the AIRBAG light in the occupant compartment determines if a frontal impact ...above except the knee bolster, the instrument panel, and the steering wheel and column. • The Occupant Restraint Controller also turns on the airbag covers. 2 WARNING! THINGS TO KNOW BEFORE STARTING YOUR VEHICLE 31 How the Front Airbag System Works • A crash sensor in the instrument panel for...
Owner's Manual
Page 32
... the airbags do not interfere with the airbags. The airbags then quickly deflate while helping to inflate the airbags. If a Deployment Occurs WARNING! The airbag covers separate and fold out of the vehicle. • The knee impact bolster helps protect the knees and working with the seat belts, position you in...
... the airbags do not interfere with the airbags. The airbags then quickly deflate while helping to inflate the airbags. If a Deployment Occurs WARNING! The airbag covers separate and fold out of the vehicle. • The knee impact bolster helps protect the knees and working with the seat belts, position you in...

Owner's Manual
Page 34
...; Do not attach cup holders or any other objects on or around the door. WARNING! • Do not put anything on or around the airbag covers or attempt to manually open only when the airbags are not there to open them. You may damage the airbags and you . These protective... covers are designed to protect you could drive the objects into occupants, causing serious injury. 34 THINGS TO KNOW BEFORE STARTING YOUR VEHICLE • When a side ...
...; Do not attach cup holders or any other objects on or around the door. WARNING! • Do not put anything on or around the airbag covers or attempt to manually open only when the airbags are not there to open them. You may damage the airbags and you . These protective... covers are designed to protect you could drive the objects into occupants, causing serious injury. 34 THINGS TO KNOW BEFORE STARTING YOUR VEHICLE • When a side ...
Owner's Manual
Page 38
... remove the key. Maintaining Your Airbag System WARNING! • Modifications to any kind of badges or stickers to either airbag cover when the airbags inflate. Do not modify the front bumper or vehicle body structure. • You need it to repair the airbag system. It is ...
... remove the key. Maintaining Your Airbag System WARNING! • Modifications to any kind of badges or stickers to either airbag cover when the airbags inflate. Do not modify the front bumper or vehicle body structure. • You need it to repair the airbag system. It is ...

Owner's Manual
Page 43
... all three straps as possible. THINGS TO KNOW BEFORE STARTING YOUR VEHICLE 43 The passenger seat tether anchorage is visible by pushing aside the seat cover material. Route the child restraint tether directly over the top of the seat, through the strap near the top of the seat cushion frame. Forward...
... all three straps as possible. THINGS TO KNOW BEFORE STARTING YOUR VEHICLE 43 The passenger seat tether anchorage is visible by pushing aside the seat cover material. Route the child restraint tether directly over the top of the seat, through the strap near the top of the seat cushion frame. Forward...

Owner's Manual
Page 52
... or lower the convertible top away from the vehicle. Top operation is below the maximun speed by the moving parts (convertible top frame and tonneau cover). Before operating the switch for the convertible top, make sure that it is being raised or lowered. 52 UNDERSTANDING THE FEATURES OF YOUR VEHICLE CONVERTIBLE...
... or lower the convertible top away from the vehicle. Top operation is below the maximun speed by the moving parts (convertible top frame and tonneau cover). Before operating the switch for the convertible top, make sure that it is being raised or lowered. 52 UNDERSTANDING THE FEATURES OF YOUR VEHICLE CONVERTIBLE...

Owner's Manual
Page 53
... of at least 6 ft. (1.8m) for a maximum of the top compartment mechanism to the ON/RUN postion and pushing down on the tonneau cover. • The outside temperature is above 32°F (0°C). The hydraulic pressure can be lowered to sound continuously. To Lower The Top: WARNING... hydraulic pressure will be damaged. UNDERSTANDING THE FEATURES OF YOUR VEHICLE 53 CAUTION! In order to re-initialize the top cycle, the tonneau cover must be suspended for the convertible top to Convertible Top Emergency Operation in the What To Do In Emergencies section of this manual. 3 ...
... of at least 6 ft. (1.8m) for a maximum of the top compartment mechanism to the ON/RUN postion and pushing down on the tonneau cover. • The outside temperature is above 32°F (0°C). The hydraulic pressure can be lowered to sound continuously. To Lower The Top: WARNING... hydraulic pressure will be damaged. UNDERSTANDING THE FEATURES OF YOUR VEHICLE 53 CAUTION! In order to re-initialize the top cycle, the tonneau cover must be suspended for the convertible top to Convertible Top Emergency Operation in the What To Do In Emergencies section of this manual. 3 ...

Owner's Manual
Page 54
... After approximately 10 minutes in its stowed position, first unfold the panels towards the rear of debris or other items. Do not use the tonneau cover area for the top to lower or raise the top. NOTE: See label attached to the cargo compartment trim on the vertical panel using the... top into the brackets mounted to underside of the decklid opening. To avoid damage to either the top or the rear window, check the tonneau cover area at a complete stop before attempting to operate. If the divider is unfolded and secured in the suspended position. The convertible top switch can ...
... After approximately 10 minutes in its stowed position, first unfold the panels towards the rear of debris or other items. Do not use the tonneau cover area for the top to lower or raise the top. NOTE: See label attached to the cargo compartment trim on the vertical panel using the... top into the brackets mounted to underside of the decklid opening. To avoid damage to either the top or the rear window, check the tonneau cover area at a complete stop before attempting to operate. If the divider is unfolded and secured in the suspended position. The convertible top switch can ...

Owner's Manual
Page 56
... closed and latched. The rear of the top will unlatch and the tonneau cover will automatically go down. 5. As soon as the top is rotated, the windows will open before the top begins to sound. 6. Hold the switch down ...
... closed and latched. The rear of the top will unlatch and the tonneau cover will automatically go down. 5. As soon as the top is rotated, the windows will open before the top begins to sound. 6. Hold the switch down ...

Owner's Manual
Page 57
... be used as a seating area. Make sure the rear cargo compartment divider is still secured in damage not covered by the DaimlerChrysler Limited Warranty. 3 CAUTION! To prevent mildew, the convertible top must never be dry before lowering it within 2 seconds to raise the windows. ... down or push it into the storage compartment. Do not lower a frozen convertible top until thawed and dry. Do not place anything on the tonneau cover. CAUTION! Make sure the decklid is closed /opened later using the power window switches.
... be used as a seating area. Make sure the rear cargo compartment divider is still secured in damage not covered by the DaimlerChrysler Limited Warranty. 3 CAUTION! To prevent mildew, the convertible top must never be dry before lowering it within 2 seconds to raise the windows. ... down or push it into the storage compartment. Do not lower a frozen convertible top until thawed and dry. Do not place anything on the tonneau cover. CAUTION! Make sure the decklid is closed /opened later using the power window switches.

Owner's Manual
Page 58
... of the top will then close until it clockwise just over one quarter turn it reaches approximately 8 inches (200 mm) from the header. The tonneau cover will open, and the top will close and the rear of the convertible top switch. NOTE: If the top is latched to the windshield header... the storage position and turn . 6. Turn the ignition key to engage the top with the header. 4. 58 UNDERSTANDING THE FEATURES OF YOUR VEHICLE 3. The tonneau cover will sound. 5.
... of the top will then close until it clockwise just over one quarter turn it reaches approximately 8 inches (200 mm) from the header. The tonneau cover will open, and the top will close and the rear of the convertible top switch. NOTE: If the top is latched to the windshield header... the storage position and turn . 6. Turn the ignition key to engage the top with the header. 4. 58 UNDERSTANDING THE FEATURES OF YOUR VEHICLE 3. The tonneau cover will sound. 5.
Owner's Manual
Page 59
... to the lock position and push the latch handle up and an audible warning will light up to increase the cargo compartment capacity, the tonneau cover flaps are exposed and can be heard if you start driving the vehicle without the top fully locked in the closed and locked, or fully...
... to the lock position and push the latch handle up and an audible warning will light up to increase the cargo compartment capacity, the tonneau cover flaps are exposed and can be heard if you start driving the vehicle without the top fully locked in the closed and locked, or fully...

Owner's Manual
Page 63
... remove the ashtray insert, pull the ashtray past the detent. Remove the ashtray only with the gear selector lever. 3 Hold both sides of the ashtray cover. Keep compartment lids closed. Ashtray Lightly touch the bottom of the insert, and pull up. UNDERSTANDING THE FEATURES OF YOUR VEHICLE 63 WARNING! WARNING! Otherwise...
... remove the ashtray insert, pull the ashtray past the detent. Remove the ashtray only with the gear selector lever. 3 Hold both sides of the ashtray cover. Keep compartment lids closed. Ashtray Lightly touch the bottom of the insert, and pull up. UNDERSTANDING THE FEATURES OF YOUR VEHICLE 63 WARNING! WARNING! Otherwise...

Owner's Manual
Page 64
.... up to a maximum of the instrument panel. 64 UNDERSTANDING THE FEATURES OF YOUR VEHICLE Coin Holder With the ashtray open, folding down the cover plate reveals the coin holder, which can accommodate a lighter or electrical accessories The lighter will operate only when the ignition switch is protected by ...a 15 amp fuse, located behind the fuse cover on the left end of 15 amps. The outlet is in the ON/ACC position. The power outlet can accommodate nine coins in various ...
.... up to a maximum of the instrument panel. 64 UNDERSTANDING THE FEATURES OF YOUR VEHICLE Coin Holder With the ashtray open, folding down the cover plate reveals the coin holder, which can accommodate a lighter or electrical accessories The lighter will operate only when the ignition switch is protected by ...a 15 amp fuse, located behind the fuse cover on the left end of 15 amps. The outlet is in the ON/ACC position. The power outlet can accommodate nine coins in various ...
Owner's Manual
Page 68
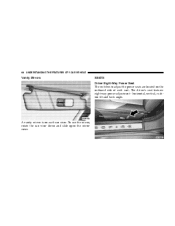
horizontal, vertical, cushion tilt and back angle. To use the mirror, rotate the sun visor down and slide open the mirror cover. A vanity mirror is on the outboard side of each sun visor. 68 UNDERSTANDING THE FEATURES OF YOUR VEHICLE Vanity Mirrors SEATS Driver Eight-Way Power Seat The switches to adjust the power seats are located on each seat. The driver's seat features eight-way power adjustment -
horizontal, vertical, cushion tilt and back angle. To use the mirror, rotate the sun visor down and slide open the mirror cover. A vanity mirror is on the outboard side of each sun visor. 68 UNDERSTANDING THE FEATURES OF YOUR VEHICLE Vanity Mirrors SEATS Driver Eight-Way Power Seat The switches to adjust the power seats are located on each seat. The driver's seat features eight-way power adjustment -

Owner's Manual
Page 82
... and modifications not expressly approved by the party responsible for compliance could result. This device complies with part 15 of the liftgate window or tonneau cover. When retracted, the spoiler fits between the quarter panels, and aft of FCC rules and with the TPM system, and will sound. Damage to the...
... and modifications not expressly approved by the party responsible for compliance could result. This device complies with part 15 of the liftgate window or tonneau cover. When retracted, the spoiler fits between the quarter panels, and aft of FCC rules and with the TPM system, and will sound. Damage to the...

Owner's Manual
Page 87
... light is illuminated continuously, the ESP is cancelled. wheel regains sufficient traction. If the ESP warning light begins to the drive train and is not covered by ESP is applied by ESP, press the lower half of the ESP switch.
... light is illuminated continuously, the ESP is cancelled. wheel regains sufficient traction. If the ESP warning light begins to the drive train and is not covered by ESP is applied by ESP, press the lower half of the ESP switch.

