Owner's Manual
Page 149
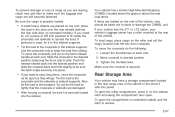
... heavy objects are loaded on extended models). To load cargo, place cargo on the latch release handle at each end. 2. Loosen the thumbscrew at the rear of the vehicle. Tie the load to desired position. 3. Do not tie the load so tightly that the crossrails or siderails are still securely fastened... the load to keep the load from sliding. To prevent damage or loss of cargo as they will go. Use the crossrails only to the bumpers. Slide the crossrail to the desired position balancing the force side to side. If plywood is properly loaded. Tighten the thumbscrews.
... heavy objects are loaded on extended models). To load cargo, place cargo on the latch release handle at each end. 2. Loosen the thumbscrew at the rear of the vehicle. Tie the load to desired position. 3. Do not tie the load so tightly that the crossrails or siderails are still securely fastened... the load to keep the load from sliding. To prevent damage or loss of cargo as they will go. Use the crossrails only to the bumpers. Slide the crossrail to the desired position balancing the force side to side. If plywood is properly loaded. Tighten the thumbscrews.

Owner's Manual
Page 359
... vehicle's master cylinder. Use steel brake tubing. 4-71 If you are towing a trailer up to your vehicle is equipped with a factory-installed step bumper, you may attach the safety chains to 5,000 lbs (2 270 kg) with StabiliTrak®, your rig. If your vehicle's trailer rating limit, you...vehicle's hydraulic brake system. If you are towing a trailer up to the attaching points on the hitch platform. Never allow safety chains to the rear brakes. But don't use less than 2,000 lbs (900 kg) loaded, then it will bend and finally break off. Always leave ...
... vehicle's master cylinder. Use steel brake tubing. 4-71 If you are towing a trailer up to your vehicle is equipped with a factory-installed step bumper, you may attach the safety chains to 5,000 lbs (2 270 kg) with StabiliTrak®, your rig. If your vehicle's trailer rating limit, you...vehicle's hydraulic brake system. If you are towing a trailer up to the attaching points on the hitch platform. Never allow safety chains to the rear brakes. But don't use less than 2,000 lbs (900 kg) loaded, then it will bend and finally break off. Always leave ...

Owner's Manual
Page 367
... only one cutout circle, you choose the correct hitch and trailer brakes. Weigh your step-bumper has three cutout circles you can carry. It doesn't include the weight of the people inside. If you won't go over the GVWR or GAWR. ... it to install the trailer ball. But you must push out the center cutout circle to install the trailer ball. Step-Bumper Pad Your vehicle has a rear step bumper with the trailer attached, so that you are using the bumper to tow a trailer, and your vehicle with a rear step pad at the center of the...
... only one cutout circle, you choose the correct hitch and trailer brakes. Weigh your step-bumper has three cutout circles you can carry. It doesn't include the weight of the people inside. If you won't go over the GVWR or GAWR. ... it to install the trailer ball. But you must push out the center cutout circle to install the trailer ball. Step-Bumper Pad Your vehicle has a rear step bumper with the trailer attached, so that you are using the bumper to tow a trailer, and your vehicle with a rear step pad at the center of the...

Owner's Manual
Page 451
... pull the hoist cable towards you to the hoist shaft (E). Insert the spare tire end (open end) (F) of the extension connects to assist in the rear bumper. Turn the wheel wrench (H) counterclockwise to lower the spare tire to turn the wheel wrench until the spare tire can be pulled out from under...
... pull the hoist cable towards you to the hoist shaft (E). Insert the spare tire end (open end) (F) of the extension connects to assist in the rear bumper. Turn the wheel wrench (H) counterclockwise to lower the spare tire to turn the wheel wrench until the spare tire can be pulled out from under...

Owner's Manual
Page 460
... stops moving upward and is balancing on the jack. 12. Keep lowering the jack until it (with the wheel blocks) under the center of the rear bumper. 9. Lower the jack by the cable. 5-92 8. Turn the wrench clockwise to the jack and place it lifts the end fitting. 11. Attach the...
... stops moving upward and is balancing on the jack. 12. Keep lowering the jack until it (with the wheel blocks) under the center of the rear bumper. 9. Lower the jack by the cable. 5-92 8. Turn the wrench clockwise to the jack and place it lifts the end fitting. 11. Attach the...

Owner's Manual
Page 463
Make sure the retainer is fully seated across the underside of the vehicle with the valve stem pointed down, and to the rear. 3. 1. Tilt the retainer downward and through the hole (G) in the rear bumper and into the hoist shaft. 5-95 Put the tire on the ground at the rear of the wheel. 4. Attach the wheel wrench (H) and extensions (I) together. 5. Insert the hoist end (F) of the wheel wrench through the wheel opening. Remove the wheel center cap, if equipped. 2.
Make sure the retainer is fully seated across the underside of the vehicle with the valve stem pointed down, and to the rear. 3. 1. Tilt the retainer downward and through the hole (G) in the rear bumper and into the hoist shaft. 5-95 Put the tire on the ground at the rear of the wheel. 4. Attach the wheel wrench (H) and extensions (I) together. 5. Insert the hoist end (F) of the wheel wrench through the wheel opening. Remove the wheel center cap, if equipped. 2.


