
Owner's Manual
Page 2
The 2003 Chevrolet Venture Owner Seats and Restraint Systems ...1-1 Front Seats ...1-3 Rear Seats ...1-7 Safety Belts ...1-30 Child Restraints ...1-55 Air Bag Systems ...1-93 Restraint System...Starting and Operating Your Vehicle ...2-31 2-44 Mirrors ...OnStar@ System ...2-46 HomeLink@Transmitter ...2-48 Storage Areas ...2-52 Vehicle Personalization ...2-62 Instrument Panel ...3-1 Instrument Panel Overview ...3-4 Climate Controls ...3-25 Warning Lights, Gages and Indicators ...3-35 Message Center ...3-50 ...3-58 Driver Information Center (DIG) Manual Audio System(s) ...3-61 Driving Your Vehicle...
The 2003 Chevrolet Venture Owner Seats and Restraint Systems ...1-1 Front Seats ...1-3 Rear Seats ...1-7 Safety Belts ...1-30 Child Restraints ...1-55 Air Bag Systems ...1-93 Restraint System...Starting and Operating Your Vehicle ...2-31 2-44 Mirrors ...OnStar@ System ...2-46 HomeLink@Transmitter ...2-48 Storage Areas ...2-52 Vehicle Personalization ...2-62 Instrument Panel ...3-1 Instrument Panel Overview ...3-4 Climate Controls ...3-25 Warning Lights, Gages and Indicators ...3-35 Message Center ...3-50 ...3-58 Driver Information Center (DIG) Manual Audio System(s) ...3-61 Driving Your Vehicle...

Owner's Manual
Page 5
...name of a component, gage or indicator reference the following topics: Seats and Restraints Systems in Section 1 Features and Controls in Section 2 Instrument Panel Overview in Section 3 Climate Controls in Section 3 Warning Lights, Gages and Indicators in Section 3 Audio System(s) in Section 3 Engine Compartment... Overview in Section 5 Notice: These mean there is something that use the same words, CAUTION or NOTICE. Vehicle Damage Warnings Also, in ...
...name of a component, gage or indicator reference the following topics: Seats and Restraints Systems in Section 1 Features and Controls in Section 2 Instrument Panel Overview in Section 3 Climate Controls in Section 3 Warning Lights, Gages and Indicators in Section 3 Audio System(s) in Section 3 Engine Compartment... Overview in Section 5 Notice: These mean there is something that use the same words, CAUTION or NOTICE. Vehicle Damage Warnings Also, in ...

Owner's Manual
Page 184
... Message ...3.51 Charging System indicator Message ...3.52 Low Oil Pressure Message ...3-52 Low Engine Oil Level Message ...3-53 Change Engine Oil Message ...-3-54 Instrument Panel Overview ...3.4 Hazard Warning Flashers ...3.6 Other Warning Devices ...3.6 Horn ...37 . Turn SignaVMultifunction Lever ...3.7 Exterior Lamps ...3.15 Interior Lamps ...3.17 Switchbanks ...3.20 Instrument Panel Switchbank ...3.21 Overhead Console...
... Message ...3.51 Charging System indicator Message ...3.52 Low Oil Pressure Message ...3-52 Low Engine Oil Level Message ...3-53 Change Engine Oil Message ...-3-54 Instrument Panel Overview ...3.4 Hazard Warning Flashers ...3.6 Other Warning Devices ...3.6 Horn ...37 . Turn SignaVMultifunction Lever ...3.7 Exterior Lamps ...3.15 Interior Lamps ...3.17 Switchbanks ...3.20 Instrument Panel Switchbank ...3.21 Overhead Console...
Owner's Manual
Page 332
... ...5-5 Gasoline Specifications ...5-5 California Fuel ...5-6 Additives ...5-6 Fuels in Foreign Countries ...5.6 Filling Your Tank ...5-7 ...5.9 Filling a Portable Fuel Container ...Checking Things Under the Hood ...Hood Release ...Engine Compartment Overview ...Engine Oil ...Engine Air Cleaner/Filter ...Automatic Transaxle Fluid ...Engine Coolant ...Radiator Pressure Cap ...Engine Overheating ...Cooling System ...Pewer Steering Fluid ...Windshield Washer Fluid ...Brakes...
... ...5-5 Gasoline Specifications ...5-5 California Fuel ...5-6 Additives ...5-6 Fuels in Foreign Countries ...5.6 Filling Your Tank ...5-7 ...5.9 Filling a Portable Fuel Container ...Checking Things Under the Hood ...Hood Release ...Engine Compartment Overview ...Engine Oil ...Engine Air Cleaner/Filter ...Automatic Transaxle Fluid ...Engine Coolant ...Radiator Pressure Cap ...Engine Overheating ...Cooling System ...Pewer Steering Fluid ...Windshield Washer Fluid ...Brakes...

Owner's Manual
Page 345
... dipstick and clean it with a paper towel or cloth, then push it again, keeping the tip down, and check the level. 5-14 See Eigine Compartment Overview on level ground. Remove it back in all the way. The dipstick handle has a bright, yellow loop design for easv identification. The engine oil dipstick...
... dipstick and clean it with a paper towel or cloth, then push it again, keeping the tip down, and check the level. 5-14 See Eigine Compartment Overview on level ground. Remove it back in all the way. The dipstick handle has a bright, yellow loop design for easv identification. The engine oil dipstick...

Owner's Manual
Page 346
For engine oil crankcase capacity, see Capacities and Specifications on location. See Engine Compartment Overview on page 5-12 for more information on page 5- 102. Notice: Don't add too much oil that the oil level gets above the cross-hatched area ...
For engine oil crankcase capacity, see Capacities and Specifications on location. See Engine Compartment Overview on page 5-12 for more information on page 5- 102. Notice: Don't add too much oil that the oil level gets above the cross-hatched area ...

Owner's Manual
Page 349
... you change is displayed on the ground, into sewers, or into streams or bodies of the engine compartment, on , reset the system. 1. See Engine Comparfment Overview on page 5- 12 for five seconds. Anytime your own oil, be a threat to a place that collects used engine oil. What to OFF. See the manufacturer...
... you change is displayed on the ground, into sewers, or into streams or bodies of the engine compartment, on , reset the system. 1. See Engine Comparfment Overview on page 5- 12 for five seconds. Anytime your own oil, be a threat to a place that collects used engine oil. What to OFF. See the manufacturer...

Owner's Manual
Page 353
... loop design for more information on location. 1. Pull out the dipstick and wipe it back out again. Notice: We recommend you use . See Engine Compartment Overview on page 5-12 for easy identification.
... loop design for more information on location. 1. Pull out the dipstick and wipe it back out again. Notice: We recommend you use . See Engine Compartment Overview on page 5-12 for easy identification.

Owner's Manual
Page 355
... can be at the FULL COLD mark, or a little higher. The vehicle must be badly damaged. The repair cost wouldn't be burned. See Engine Compartment Overview on location. If you or others could catch fire and you have to add extra inhibitors or additives which won't damage aluminum parts. Your engine...
... can be at the FULL COLD mark, or a little higher. The vehicle must be badly damaged. The repair cost wouldn't be burned. See Engine Compartment Overview on location. If you or others could catch fire and you have to add extra inhibitors or additives which won't damage aluminum parts. Your engine...
Owner's Manual
Page 357
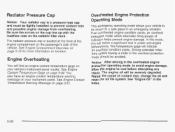
... power and engine performance. The engine oil will find an engine coolant temperature gage on location. Engine Overheating You will be avoided. See Engine Compartment Overview on page 5-12 for more information on your instrument panel. You also have an engine coolant temperature warning message on the radiator filler neck. Driving...
... power and engine performance. The engine oil will find an engine coolant temperature gage on location. Engine Overheating You will be avoided. See Engine Compartment Overview on page 5-12 for more information on your instrument panel. You also have an engine coolant temperature warning message on the radiator filler neck. Driving...

Owner's Manual
Page 369
Have the system inspected and repaired. Failure to use the proper fluid. See Engine Compartment Overview on page 5-12 for reservoir location. Then remove the cap again and look at the fluid level on page 6- 17. What to Use To determine ... It is not necessary to regularly check power steering fluid unless you suspect there is a leak in this system could indicate a problem. See Engine Compartment Overview on page 5-12 for reservoir location. If you will be sure to use . How to Check Power Steering Fluid Turn the key off, let the...
Have the system inspected and repaired. Failure to use the proper fluid. See Engine Compartment Overview on page 5-12 for reservoir location. Then remove the cap again and look at the fluid level on page 6- 17. What to Use To determine ... It is not necessary to regularly check power steering fluid unless you suspect there is a leak in this system could indicate a problem. See Engine Compartment Overview on page 5-12 for reservoir location. If you will be sure to use . How to Check Power Steering Fluid Turn the key off, let the...

Owner's Manual
Page 371
... fluid goes down . If you should add (or remove) brake fluid, as necessary, only when work is filled with DOT-3 brake fluid. See Engine Compartment Overview on s the engine. If it can spill on page 5-12 for the location of the brake system. You or others could be burned, and your...
... fluid goes down . If you should add (or remove) brake fluid, as necessary, only when work is filled with DOT-3 brake fluid. See Engine Compartment Overview on s the engine. If it can spill on page 5-12 for the location of the brake system. You or others could be burned, and your...

Owner's Manual
Page 374
.... be a sign of top quality and work properly. This could be sure you apply the brakes, with top-quality GM brake parts. See Engine Compartment Overview on a vehicle is a rapid increase in - Battery Your new vehicle comes with a maintenance free ACDelco@battery.
.... be a sign of top quality and work properly. This could be sure you apply the brakes, with top-quality GM brake parts. See Engine Compartment Overview on a vehicle is a rapid increase in - Battery Your new vehicle comes with a maintenance free ACDelco@battery.
Owner's Manual
Page 377
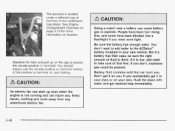
..., and some have been blinded. Use a flashlight if you . The terminal is located under a tethered cap at the front of fluid isthere. See Engine Compartment Overview on the cap to explode.
..., and some have been blinded. Use a flashlight if you . The terminal is located under a tethered cap at the front of fluid isthere. See Engine Compartment Overview on the cap to explode.

Owner's Manual
Page 430
When finished, to tighten it. Make sure that the remote positive (+) terminal cover is on , turn the knob counterclockwise and lift up. See Engine Compartment Overview on page 5-12 for more information on location. [ 1 2 1 ) f 5-99 The fuses marked spare are available if a replacement fuse is located in the engine compartment, in ...
When finished, to tighten it. Make sure that the remote positive (+) terminal cover is on , turn the knob counterclockwise and lift up. See Engine Compartment Overview on page 5-12 for more information on location. [ 1 2 1 ) f 5-99 The fuses marked spare are available if a replacement fuse is located in the engine compartment, in ...
Owner's Manual
Page 473
... ...3-54 Check and Service Engine Soon Light ...3-45 Coolant ...5-23 Coolant Heater ...2-33 Coolant TemperatureGage ...3-44 Coolant TemperatureWarningMessage ...3-51 Cooling System Inspection ...6-16 Engine Compartment Overview ...5-12 Exhaust ...2-42 Low Oil Level Message ...3-53 Oil ...5-13 Overheating ...5-26 Starting ...2-32 Engine Coolant Level Check ...6-10 Engine Oil Additives ...5-17 Engine Oil...
... ...3-54 Check and Service Engine Soon Light ...3-45 Coolant ...5-23 Coolant Heater ...2-33 Coolant TemperatureGage ...3-44 Coolant TemperatureWarningMessage ...3-51 Cooling System Inspection ...6-16 Engine Compartment Overview ...5-12 Exhaust ...2-42 Low Oil Level Message ...3-53 Oil ...5-13 Overheating ...5-26 Starting ...2-32 Engine Coolant Level Check ...6-10 Engine Oil Additives ...5-17 Engine Oil...
Owner's Manual
Page 475
... Seal ...6-15 Throttle System ...6-16 Transfer Care (Power Transfer Unit) and Carrier Assembly-Differential (Rear Drive Module) All-Wheel Drive ...6-16 Instrument Panel Cluster ...3-36 Overview ...3-4 Switchbank ...3-21 3-17 Instrument Panel Brightness ...Instrument Panel FuseBlock ...5-96 Interior Lamps ...3-17 Interior Lamps Control ...3-17 Interior Lamps Override ...3-17 Interior Plastic Components ...5-88...
... Seal ...6-15 Throttle System ...6-16 Transfer Care (Power Transfer Unit) and Carrier Assembly-Differential (Rear Drive Module) All-Wheel Drive ...6-16 Instrument Panel Cluster ...3-36 Overview ...3-4 Switchbank ...3-21 3-17 Instrument Panel Brightness ...Instrument Panel FuseBlock ...5-96 Interior Lamps ...3-17 Interior Lamps Control ...3-17 Interior Lamps Override ...3-17 Interior Plastic Components ...5-88...