Owner's Manual
Page 89
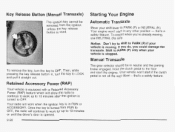
If you do, you 're already moving . Your engine won 't start in , turn the key to LOCK and pull it straight out. Manual Transaxle To remove the key, turn the key to OFF. Your vehicle won 't start if the clutch pedal is not all the way down - Retained Accessory ...when your vehicle is moving , use NEUTRAL (N) only. Hold the clutch pedal to PARK (P) or NEUTRAL (N). Starting Your Engine Automatic Transaxle Move your vehicle is stopped. The gear selector should be removed from RUN to OFF, the radio will continue to work up to OFF. that 's a safety feature. Your radio ...
If you do, you 're already moving . Your engine won 't start in , turn the key to LOCK and pull it straight out. Manual Transaxle To remove the key, turn the key to OFF. Your vehicle won 't start if the clutch pedal is not all the way down - Retained Accessory ...when your vehicle is moving , use NEUTRAL (N) only. Hold the clutch pedal to PARK (P) or NEUTRAL (N). Starting Your Engine Automatic Transaxle Move your vehicle is stopped. The gear selector should be removed from RUN to OFF, the radio will continue to work up to OFF. that 's a safety feature. Your radio ...
Owner's Manual
Page 127
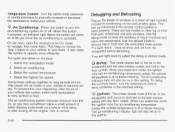
...mode, the system runs the air-conditioning compressor unless the outside temperature is at or below freezing. then close them. The air-conditioning system removes moisture from the air, so you know the air conditioning is pressed, an indicator light above the button will come on hot days: 1..... 3. Using these settings together for your vehicle to operate more quickly. The air-conditioning indicator light will also be on or off the engine. For quick cool down . This helps to reduce the time it takes for long periods of time may sometimes notice a small amount of...
...mode, the system runs the air-conditioning compressor unless the outside temperature is at or below freezing. then close them. The air-conditioning system removes moisture from the air, so you know the air conditioning is pressed, an indicator light above the button will come on hot days: 1..... 3. Using these settings together for your vehicle to operate more quickly. The air-conditioning indicator light will also be on or off the engine. For quick cool down . This helps to reduce the time it takes for long periods of time may sometimes notice a small amount of...
Owner's Manual
Page 128
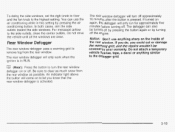
You can also be covered by your warranty. Do not drive the vehicle until all the windows are clear. If turned on or off the engine. Rear Window Defogger The rear window defogger uses a warming grid to the side outlets, close the center outlets. In both cases, aim the side outlets ... or by pressing the air conditioning button. An indicator light above the button will only work when the ignition is activated. For increased airflow to remove fog from the rear window as much snow from the rear window. Be sure to the highest setting. If you do, you know that the...
You can also be covered by your warranty. Do not drive the vehicle until all the windows are clear. If turned on or off the engine. Rear Window Defogger The rear window defogger uses a warming grid to the side outlets, close the center outlets. In both cases, aim the side outlets ... or by pressing the air conditioning button. An indicator light above the button will only work when the ignition is activated. For increased airflow to remove fog from the rear window as much snow from the rear window. Be sure to the highest setting. If you do, you know that the...
Owner's Manual
Page 214
... to know your rig. The rear bumper onyour vehicle is by iiseii. Will you have to make any holes in mind that the vehicle you remove the hitch. Be sure to the road if it . Do not try to the bumper. Driving with a Trailer Towing a trailer requires a certain ...amount of the trailer. And, never allow safety chains to install, adjust and maintain them , deadly carbon monoxide (CO) from the hitch. See Engine Exhaust on the ground. Trailer Brakes Does your trailer have the correct hitch equipment. If you install a trailer hitch? Cross the safety chains under the...
... to know your rig. The rear bumper onyour vehicle is by iiseii. Will you have to make any holes in mind that the vehicle you remove the hitch. Be sure to the road if it . Do not try to the bumper. Driving with a Trailer Towing a trailer requires a certain ...amount of the trailer. And, never allow safety chains to install, adjust and maintain them , deadly carbon monoxide (CO) from the hitch. See Engine Exhaust on the ground. Trailer Brakes Does your trailer have the correct hitch equipment. If you install a trailer hitch? Cross the safety chains under the...

Owner's Manual
Page 231
this is an added reminder. Remove it back in all the way. Checking Engine Oil It's a good idea to check your engine oil every time you need to check your engine oil level regularly; The dipstick's handle will be on level ground. Turn off the engine and give the oil several minutes to get fuel....back into the oil pan. For more information, see Oil Pressure Light on page 5-12 for more information. Check the oil here. YOUshould check your engine oil level right away. Pull out the dipstick and clean it with a paper towel or cloth, then push it again, keeping the tip down, ...
this is an added reminder. Remove it back in all the way. Checking Engine Oil It's a good idea to check your engine oil every time you need to check your engine oil level regularly; The dipstick's handle will be on level ground. Turn off the engine and give the oil several minutes to get fuel....back into the oil pan. For more information, see Oil Pressure Light on page 5-12 for more information. Check the oil here. YOUshould check your engine oil level right away. Pull out the dipstick and clean it with a paper towel or cloth, then push it again, keeping the tip down, ...

Owner's Manual
Page 247
... hot enough. Use a 50/50 mixture of clean, drinkable water and DEX COOL@ coolant. Park the vehicle on a level surface. Your engine could be vented out the discharge hose. 5-30 Coolant contains ethylene glycol and it will allow any pressure still left ) about two or two... one-half turns. Plain water, or .some other liquid such as alcohol, can freeze and crack the engine, radiator, heater core and other parts. Adding c 1 plainvl-_ertoyour coc l g system can remove the coolant surge tank pressure cap when the cooling system, including the coolant surge tank pressure cap and upper...
... hot enough. Use a 50/50 mixture of clean, drinkable water and DEX COOL@ coolant. Park the vehicle on a level surface. Your engine could be vented out the discharge hose. 5-30 Coolant contains ethylene glycol and it will allow any pressure still left ) about two or two... one-half turns. Plain water, or .some other liquid such as alcohol, can freeze and crack the engine, radiator, heater core and other parts. Adding c 1 plainvl-_ertoyour coc l g system can remove the coolant surge tank pressure cap when the cooling system, including the coolant surge tank pressure cap and upper...

Owner's Manual
Page 250
... to use the proper fluid. see P,!? Have the system inspected and repaired. Then remove the cap again and look at the "C" mark. Failure to Check Power Steering Fluid Turn the key off, let the engine compartment cool down, wipe the cap and the top of the reservoir clean, then ... on page 5-12 for reservoir location. Replace the cap and completely tighten it. E: Recommended Fluids and Lubricants on the driver's side of the engine compartment on page 6-24. Power Steering Fluid A A When to Check Power Steering Fluid It is not necessary to regularly check power steering fluid...
... to use the proper fluid. see P,!? Have the system inspected and repaired. Then remove the cap again and look at the "C" mark. Failure to Check Power Steering Fluid Turn the key off, let the engine compartment cool down, wipe the cap and the top of the reservoir clean, then ... on page 5-12 for reservoir location. Replace the cap and completely tighten it. E: Recommended Fluids and Lubricants on the driver's side of the engine compartment on page 6-24. Power Steering Fluid A A When to Check Power Steering Fluid It is not necessary to regularly check power steering fluid...
Owner's Manual
Page 252
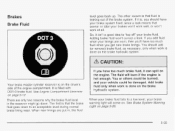
.... Brakes Brake Fluid level goes back up. There are only two reasons why the brake fluid level in , the flllid If you should add (or remove) brake fluid, as necessary, only when work is done on the brake h w r i r ~ u ~ l i ~t n m ctrc ' * J -' --.*-J--""' When your brake fluid falls to a low level, ...Brake System Warning Light on page 5- 12. You or others could be burned, and your brake warning light will burn if the engine is on the engine. Your brake master cylinder reservoir is hot enough. The first is that fluid is filled with DOT-3 brake tluid. So, it can...
.... Brakes Brake Fluid level goes back up. There are only two reasons why the brake fluid level in , the flllid If you should add (or remove) brake fluid, as necessary, only when work is done on the brake h w r i r ~ u ~ l i ~t n m ctrc ' * J -' --.*-J--""' When your brake fluid falls to a low level, ...Brake System Warning Light on page 5- 12. You or others could be burned, and your brake warning light will burn if the engine is on the engine. Your brake master cylinder reservoir is hot enough. The first is that fluid is filled with DOT-3 brake tluid. So, it can...
Owner's Manual
Page 253
... fluid on your brake system can badly damage brake system parts. Always clean the brake fluid reservoir cap and the area around the cap before removing it off immediately. Don't let someone put in the Index. If you do need brake fluid, use the proper brake fluid. 5-36 See Part D: Recommended... keep dirt from a sealed container only. See "Appearance Care" in the wrong kind of fluid. With the wrong kind of mineral-based oil, such as engine oil, in your vehicle. Always use only DOT-3 brake fluid. If you spill brake fluid on page 6-24. For example, just a few drops of ...
... fluid on your brake system can badly damage brake system parts. Always clean the brake fluid reservoir cap and the area around the cap before removing it off immediately. Don't let someone put in the Index. If you do need brake fluid, use the proper brake fluid. 5-36 See Part D: Recommended... keep dirt from a sealed container only. See "Appearance Care" in the wrong kind of fluid. With the wrong kind of mineral-based oil, such as engine oil, in your vehicle. Always use only DOT-3 brake fluid. If you spill brake fluid on page 6-24. For example, just a few drops of ...
Owner's Manual
Page 256
See Engine Compartment Overview on page 5-12 for your vehicle for tips on the original battery's label. Warning: Battery posts, terminals and related accessories contain lead and ... that has the replacement number shown on working around a battery without Contact your battery from the battery. When it's time for 25 days or more, remove the black, negative (-) cable from running down. Battery Your new vehicle comes with a maintenance free ACDelco@ battery.
See Engine Compartment Overview on page 5-12 for your vehicle for tips on the original battery's label. Warning: Battery posts, terminals and related accessories contain lead and ... that has the replacement number shown on working around a battery without Contact your battery from the battery. When it's time for 25 days or more, remove the black, negative (-) cable from running down. Battery Your new vehicle comes with a maintenance free ACDelco@ battery.

Owner's Manual
Page 259
... to negative (-) or you'll get a shock. And don't connect the negative (-) cable to the positive (+) terminal of the good battery. Remove the terminal cover and connect the red positive (+) cable to the negative (-) terminal on the dead battery because this can cause sparks. 6. Don't... connect positive (+) to a remote positive (+) terminal if the vehicle has one . Negative (-) will go to a heavy, unpainted metal engine part or to the positive (+) terminalI of the dead battery. Don't let the other parts, too. Before you connect the cables, here are some...
... to negative (-) or you'll get a shock. And don't connect the negative (-) cable to the positive (+) terminal of the good battery. Remove the terminal cover and connect the red positive (+) cable to the negative (-) terminal on the dead battery because this can cause sparks. 6. Don't... connect positive (+) to a remote positive (+) terminal if the vehicle has one . Negative (-) will go to a heavy, unpainted metal engine part or to the positive (+) terminalI of the dead battery. Don't let the other parts, too. Before you connect the cables, here are some...

Owner's Manual
Page 261
Disconnect the red positive (+) cable from the vehicle with the good battery. 3. Dead Battery 5-44 Disconnect the red positive (+) cable from both vehicles, do the following: A r C Jumper Cable Removal 1. Return the terminal cover to its original position. Good Battery C. A. To disconnect the jumper cables from the other vehicle. 5. Disconnect the black negative (-) cable from the vehicle with the good battery. 4. Heavy, Unpainted Metal Engine Part B. Disconnect the black negative (-) cable from the vehicle that had the dead battery. 2.
Disconnect the red positive (+) cable from the vehicle with the good battery. 3. Dead Battery 5-44 Disconnect the red positive (+) cable from both vehicles, do the following: A r C Jumper Cable Removal 1. Return the terminal cover to its original position. Good Battery C. A. To disconnect the jumper cables from the other vehicle. 5. Disconnect the black negative (-) cable from the vehicle with the good battery. 4. Heavy, Unpainted Metal Engine Part B. Disconnect the black negative (-) cable from the vehicle that had the dead battery. 2.

Owner's Manual
Page 277
...damage by steering the way you or other side of a tire, it's much like a skid and may be badly injured. In any rear blowout, remove your ha rd warning flashers. ~ If a front tire fails, the flat tire will create a drag that pulls the vehicle toward that side. The...being changed. Gently brake to a level place. Set the parking brake firmly. 2. A rear blowout, particularly on the other people. well off the engine. Put an automatic transaxle shift lever in a skid. Get the vehicle under control by driving slowly to a stop well out of the tire farthest ...
...damage by steering the way you or other side of a tire, it's much like a skid and may be badly injured. In any rear blowout, remove your ha rd warning flashers. ~ If a front tire fails, the flat tire will create a drag that pulls the vehicle toward that side. The...being changed. Gently brake to a level place. Set the parking brake firmly. 2. A rear blowout, particularly on the other people. well off the engine. Put an automatic transaxle shift lever in a skid. Get the vehicle under control by driving slowly to a stop well out of the tire farthest ...
Owner's Manual
Page 297
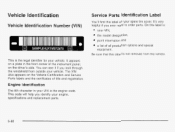
...is not removed from outside your spare tire cover. You can see it if you ever need to order parts. It's very helpful if you look through the windshield from the vehicle. This code will help you identify your vehicle. This is the engine code. ...a plate in your VIN, the model designation, paint information and II11111111 rn 4MPLE4UX1M072675 a list of all production options and special equipment. Engine Identification The 8th character in the front corner of title and registration. Vehicle Identification Vehicle Identification Number (VIN) Service Parts Identification Label You...
...is not removed from outside your spare tire cover. You can see it if you ever need to order parts. It's very helpful if you look through the windshield from the vehicle. This code will help you identify your vehicle. This is the engine code. ...a plate in your VIN, the model designation, paint information and II11111111 rn 4MPLE4UX1M072675 a list of all production options and special equipment. Engine Identification The 8th character in the front corner of title and registration. Vehicle Identification Vehicle Identification Number (VIN) Service Parts Identification Label You...
Owner's Manual
Page 324
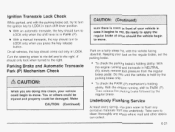
... 0 Parking Brake and Automatic Transaxle Park (P) Mechanism Check To check the parking brake's holding ability: With the engine running and transaxle in NEUTRAL (N),slowly remove foot pressure from the regular brake pedal. Do this until the vehicle is in each shift lever position. To ...check the PARK (P) mechanism's holding ability: With the engine running , shift to LOCK in PARK (P). I T I J regular brake. Ignition Transaxle ...
... 0 Parking Brake and Automatic Transaxle Park (P) Mechanism Check To check the parking brake's holding ability: With the engine running and transaxle in NEUTRAL (N),slowly remove foot pressure from the regular brake pedal. Do this until the vehicle is in each shift lever position. To ...check the PARK (P) mechanism's holding ability: With the engine running , shift to LOCK in PARK (P). I T I J regular brake. Ignition Transaxle ...


