
Owner's Manual
Page 91
... some other things. Also, the wrong kind of oil you the best advice for at least 15 amps. 4. How long should be damaged. Open the hood and unwrap the electrical cord. The cord is not required. The dealer can help. Turn off the engine. 2. You could be plugged in a minimum of...
... some other things. Also, the wrong kind of oil you the best advice for at least 15 amps. 4. How long should be damaged. Open the hood and unwrap the electrical cord. The cord is not required. The dealer can help. Turn off the engine. 2. You could be plugged in a minimum of...

Owner's Manual
Page 173
... work far better, reducing the chance of fogging the inside of the advanced engineering that went into the time-set mode. 3-6 Ventilation Tips D Keep the hood and front air inlet free of listening pleasure. Within five seconds, press and hold the left SEEK arrow until the correct minute appears on the...
... work far better, reducing the chance of fogging the inside of the advanced engineering that went into the time-set mode. 3-6 Ventilation Tips D Keep the hood and front air inlet free of listening pleasure. Within five seconds, press and hold the left SEEK arrow until the correct minute appears on the...

Owner's Manual
Page 274
... deep, then drive through rushing water. When you go through water, remember that has collected on your ignition system and your tailpipe is under the hood. These substances can sweep your engine. Your vehicle will require more information on driving through rushing water can be a fire hazard. Deep water can cause...
... deep, then drive through rushing water. When you go through water, remember that has collected on your ignition system and your tailpipe is under the hood. These substances can sweep your engine. Your vehicle will require more information on driving through rushing water can be a fire hazard. Deep water can cause...

Owner's Manual
Page 312
...-volt battery with a negative ground, both batteries. Unplug unnecessary accessories plugged into the cigarette lighter or in NEUTRAL before setting the parking brake. Open the hoods and locate the batteries. Get the vehicles close enough so the jumper cables can be sure the vehicles aren't touching each vehicle. And it could...
...-volt battery with a negative ground, both batteries. Unplug unnecessary accessories plugged into the cigarette lighter or in NEUTRAL before setting the parking brake. Open the hoods and locate the batteries. Get the vehicles close enough so the jumper cables can be sure the vehicles aren't touching each vehicle. And it could...

Owner's Manual
Page 317
... no sign of steam or coolant before you get out of the vehicle until there is overheated, the liquids in traffic. If you open the hood. See "Driving on , turn it overheats, and get an engine overheat warning but see or hear steam coming from the vehicle until it . Stop after... your engine if it off . 2. Stop your engine catches fire because you keep driving when your vehicle can catch fire. If you just open the hood.
... no sign of steam or coolant before you get out of the vehicle until there is overheated, the liquids in traffic. If you open the hood. See "Driving on , turn it overheats, and get an engine overheat warning but see or hear steam coming from the vehicle until it . Stop after... your engine if it off . 2. Stop your engine catches fire because you keep driving when your vehicle can catch fire. If you just open the hood.
Owner's Manual
Page 318
... to get everyone out of steam, idle the engine for three minutes while you're parked. You may decide not to lift the hood but to lift the hood, here's what you'll see: A. If there's still no longer have the warning, turn off the engine and get service help right away...
... to get everyone out of steam, idle the engine for three minutes while you're parked. You may decide not to lift the hood but to lift the hood, here's what you'll see: A. If there's still no longer have the warning, turn off the engine and get service help right away...
Owner's Manual
Page 346
... 6-20 6-21 6-22 6-23 6-25 6-29 6-29 6-30 Service Fuel Fuels in Foreign Countries Filling Your Tank Filling a Portable Fuel Container Checking Things Under the Hood Engine Oil Engine Air Cleaner/Filter Automatic Transmission Fluid Manual Transmission Fluid Hydraulic Clutch Rear Axle Four-Wheel Drive (If Equipped) Engine Coolant Radiator Pressure...
... 6-20 6-21 6-22 6-23 6-25 6-29 6-29 6-30 Service Fuel Fuels in Foreign Countries Filling Your Tank Filling a Portable Fuel Container Checking Things Under the Hood Engine Oil Engine Air Cleaner/Filter Automatic Transmission Fluid Manual Transmission Fluid Hydraulic Clutch Rear Axle Four-Wheel Drive (If Equipped) Engine Coolant Radiator Pressure...

Owner's Manual
Page 353
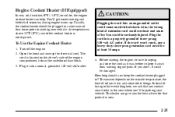
... nozzle. D Don't smoke while pumping gasoline. Be careful not to you and others could be maintained until the filling is complete. Checking Things Under the Hood CAUTION: Things that will burn onto a hot engine. 6-8 Filling a Portable Fuel Container CAUTION: Never fill a portable fuel container while it is in a vehicle's trunk, pickup...
... nozzle. D Don't smoke while pumping gasoline. Be careful not to you and others could be maintained until the filling is complete. Checking Things Under the Hood CAUTION: Things that will burn onto a hot engine. 6-8 Filling a Portable Fuel Container CAUTION: Never fill a portable fuel container while it is in a vehicle's trunk, pickup...

Owner's Manual
Page 354
... retainer. Pull the handle located inside the vehicle on properly. Lift the hood. 3. Then lift the hood to its retainer and put the hood prop into the slot in the hood and return the prop to relieve pressure on the hood. 2. Release the hood prop from about 10 to 12 inches (25 to close.... Hood Release To open the hood, do the following: 1. Before closing the hood, be sure all the filler ...
... retainer. Pull the handle located inside the vehicle on properly. Lift the hood. 3. Then lift the hood to its retainer and put the hood prop into the slot in the hood and return the prop to relieve pressure on the hood. 2. Release the hood prop from about 10 to 12 inches (25 to close.... Hood Release To open the hood, do the following: 1. Before closing the hood, be sure all the filler ...

Owner's Manual
Page 355
B. Automatic Transmission Dipstick (If Equipped) F. Power Steering Reservoir G. K. Battery Coolant Recovery Tank Engine Oil Dipstick Engine Oil Fill E. I. D. Brake Master Cylinder Reservoir H. J. Engine Compartment Overview When you open the hood, you will see the following: A. C. Engine Air Cleaner/Filter Clutch Master Cylinder Reservoir Engine Compartment Fuse Block Windshield Washer Fluid Reservoir 6-10
B. Automatic Transmission Dipstick (If Equipped) F. Power Steering Reservoir G. K. Battery Coolant Recovery Tank Engine Oil Dipstick Engine Oil Fill E. I. D. Brake Master Cylinder Reservoir H. J. Engine Compartment Overview When you open the hood, you will see the following: A. C. Engine Air Cleaner/Filter Clutch Master Cylinder Reservoir Engine Compartment Fuse Block Windshield Washer Fluid Reservoir 6-10

Owner's Manual
Page 382
Bulb Replacement See "Replacement Bulbs" in this section, contact your GM dealer's service department. Open the hood. Be sure to use. Headlamps One-Piece Composite Headlamp System 1. You or others could be injured. Pull the headlamp assembly out. 4. Halogen Bulbs CAUTION: Halogen ...
Bulb Replacement See "Replacement Bulbs" in this section, contact your GM dealer's service department. Open the hood. Be sure to use. Headlamps One-Piece Composite Headlamp System 1. You or others could be injured. Pull the headlamp assembly out. 4. Halogen Bulbs CAUTION: Halogen ...

Owner's Manual
Page 383
5. Plug in the electrical connector. 8. Install the two retaining clips. 10. Turn the bulb/socket assembly counterclockwise to remove it is tight. 7. Close the hood. 6-38 Put the headlamp assembly back into the headlamp assembly and turn it clockwise until it . 6. Put the new bulb/socket assembly into the vehicle. 9.
5. Plug in the electrical connector. 8. Install the two retaining clips. 10. Turn the bulb/socket assembly counterclockwise to remove it is tight. 7. Close the hood. 6-38 Put the headlamp assembly back into the headlamp assembly and turn it clockwise until it . 6. Put the new bulb/socket assembly into the vehicle. 9.

Owner's Manual
Page 384
Pull the headlamp assembly out. 5. Plug in the electrical connector. 7. Install the two retaining clips. 9. Put the new bulb/socket assembly into the vehicle. 8. Close the hood. 6-39 Turn the bulb/socket assembly counterclockwise to remove it is tight. 6. Put the headlamp assembly back into the headlamp assembly and turn it clockwise until it . 2. Two-Piece Composite Headlamp System 1. Open the hood. 4. Remove the black retainer clips by lifting up. 3.
Pull the headlamp assembly out. 5. Plug in the electrical connector. 7. Install the two retaining clips. 9. Put the new bulb/socket assembly into the vehicle. 8. Close the hood. 6-39 Turn the bulb/socket assembly counterclockwise to remove it is tight. 6. Put the headlamp assembly back into the headlamp assembly and turn it clockwise until it . 2. Two-Piece Composite Headlamp System 1. Open the hood. 4. Remove the black retainer clips by lifting up. 3.

Owner's Manual
Page 385
.... 6-40 Two-Piece Front Turn Signal Lamps 1. Remove the headlamp assembly as shown under "Two-Piece Composite Headlamp System" earlier in this section. 2. Close the hood. 3.
.... 6-40 Two-Piece Front Turn Signal Lamps 1. Remove the headlamp assembly as shown under "Two-Piece Composite Headlamp System" earlier in this section. 2. Close the hood. 3.

Owner's Manual
Page 386
Push the new bulb into place. 7. Close the hood. 6-41 Reinstall the harness bulb socket with the new bulb into the headlamp assembly and turn it clockwise until it snaps into the socket until it is tight. 8. Install the two retaining clips. 10. Turn the harness bulb socket counterclockwise to remove it . 5. Pull the bulb straight out to remove it from the socket. 6. Then swing the assembly in and snap it into the vehicle. To reinstall the assembly, snap the outboard end of the lamp assembly back into place. 9. 4.
Push the new bulb into place. 7. Close the hood. 6-41 Reinstall the harness bulb socket with the new bulb into the headlamp assembly and turn it clockwise until it snaps into the socket until it is tight. 8. Install the two retaining clips. 10. Turn the harness bulb socket counterclockwise to remove it . 5. Pull the bulb straight out to remove it from the socket. 6. Then swing the assembly in and snap it into the vehicle. To reinstall the assembly, snap the outboard end of the lamp assembly back into place. 9. 4.

Owner's Manual
Page 413
... on the driver's side of the vehicle. Remove the cover by turning the fastener counterclockwise. If the fuse block pictured here is located under the hood on location.
... on the driver's side of the vehicle. Remove the cover by turning the fastener counterclockwise. If the fuse block pictured here is located under the hood on location.

Owner's Manual
Page 464
... in the Index. Automatic Transmission Check Check the transmission fluid level; A fluid loss may be required when exposed to use. Body Lubrication Service Lubricate all hood hinges, hood latch assembly, secondary latch, pivots, spring anchor, release pawl, door hinges, fuel door hinge, endgate hinges, outer tailgate handle pivot points, tailgate hinges, tailgate...
... in the Index. Automatic Transmission Check Check the transmission fluid level; A fluid loss may be required when exposed to use. Body Lubrication Service Lubricate all hood hinges, hood latch assembly, secondary latch, pivots, spring anchor, release pawl, door hinges, fuel door hinge, endgate hinges, outer tailgate handle pivot points, tailgate hinges, tailgate...

Owner's Manual
Page 472
... or equivalent). Synthetic Grease with Teflon, SuperlubeR (GM Part No. 12371287 or equivalent). 7-54 Clutch Pushrod to Clutch Fork Joint Hood Latch Assembly, Secondary Latch, Pivots, Spring Anchor and Release Pawl LubriplateR Lubricant Aerosol (GM Part No. 12346293 or equivalent) or lubricant...Lubricant (GM Part No. 12377985 or equivalent) or lubricant meeting requirements of NLGI # 2, Category LB or GC-LB. USAGE Hood and Door Hinges Tailgate Mounted Spare Tire Carrier (if equipped), Outer Tailgate Handle Pivot Points and Hinges Weatherstrip Conditioning Weatherstrip Squeaks ...
... or equivalent). Synthetic Grease with Teflon, SuperlubeR (GM Part No. 12371287 or equivalent). 7-54 Clutch Pushrod to Clutch Fork Joint Hood Latch Assembly, Secondary Latch, Pivots, Spring Anchor and Release Pawl LubriplateR Lubricant Aerosol (GM Part No. 12346293 or equivalent) or lubricant...Lubricant (GM Part No. 12377985 or equivalent) or lubricant meeting requirements of NLGI # 2, Category LB or GC-LB. USAGE Hood and Door Hinges Tailgate Mounted Spare Tire Carrier (if equipped), Outer Tailgate Handle Pivot Points and Hinges Weatherstrip Conditioning Weatherstrip Squeaks ...


