Owner's Manual
Page 4
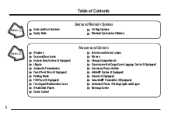
Table of Contents Seats and Restraint Systems Section 1 Seats and Seat Controls Safety Belts Air Bag Systems Restraint Systems for Children Features and Controls Section 2 Windows Keys and Door Locks Keyless Entry System (If ... Equipped) Parking Brake Tilt Wheel (If Equipped) Turn Signal/Multifunction Lever Windshield Wipers Cruise Control Exterior and Interior Lamps Mirrors Storage Compartments Convenience Net/Cargo Cover/Luggage Carrier (If Equipped) Accessory Power Outlets OnStar® System (If Equipped) Sunroof (If Equipped) HomeLink® Transmitter (If Equipped) Instrument Panel, ...
Table of Contents Seats and Restraint Systems Section 1 Seats and Seat Controls Safety Belts Air Bag Systems Restraint Systems for Children Features and Controls Section 2 Windows Keys and Door Locks Keyless Entry System (If ... Equipped) Parking Brake Tilt Wheel (If Equipped) Turn Signal/Multifunction Lever Windshield Wipers Cruise Control Exterior and Interior Lamps Mirrors Storage Compartments Convenience Net/Cargo Cover/Luggage Carrier (If Equipped) Accessory Power Outlets OnStar® System (If Equipped) Sunroof (If Equipped) HomeLink® Transmitter (If Equipped) Instrument Panel, ...

Owner's Manual
Page 23
...position. That way, the buckles will be available for passengers to use when the seat is flat. Then lower the seat cushion until it forward. To return the seat to cover the rear seat footwell area. Pull forward on the seat cushion to make sure that nothing is folded and will be out of the... seat and that the head restraints are completely lowered. Then fold the panels back to the passenger position on the ...
...position. That way, the buckles will be available for passengers to use when the seat is flat. Then lower the seat cushion until it forward. To return the seat to cover the rear seat footwell area. Pull forward on the seat cushion to make sure that nothing is folded and will be out of the... seat and that the head restraints are completely lowered. Then fold the panels back to the passenger position on the ...

Owner's Manual
Page 45
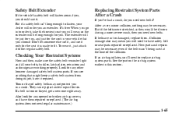
The right front passenger's side impact air bag is between an occupant and an air bag, and don't attach or put anything on the steering wheel hub or on or near any other air bag covering and don't let seat covers block the inflation path of an inflating air bag must be kept clear. Don't put anything between an occupant and an air bag, the bag might not inflate properly or it might force the object into that person. CAUTION: If something is in the side of the passenger's seatback closest to the door. 1-32 The path of a side impact air bag.
The right front passenger's side impact air bag is between an occupant and an air bag, and don't attach or put anything on the steering wheel hub or on or near any other air bag covering and don't let seat covers block the inflation path of an inflating air bag must be kept clear. Don't put anything between an occupant and an air bag, the bag might not inflate properly or it might force the object into that person. CAUTION: If something is in the side of the passenger's seatback closest to the door. 1-32 The path of a side impact air bag.
Owner's Manual
Page 78
...bag system earlier in a crash. Torn or frayed safety belts may mean you will be long enough for the seat in to order it is torn or frayed, get a new one right away. If you see anything that ...system parts. If a belt is made to fit. Also look for any opened or broken air bag covers, and have safety belt or seat parts repaired or replaced. It's free. To wear it, just attach it repaired. If an air... all your dealer will fasten around you, you should use it only for the seat it , take the heaviest coat you will wear, so the extender will be just for you, and just ...
...bag system earlier in a crash. Torn or frayed safety belts may mean you will be long enough for the seat in to order it is torn or frayed, get a new one right away. If you see anything that ...system parts. If a belt is made to fit. Also look for any opened or broken air bag covers, and have safety belt or seat parts repaired or replaced. It's free. To wear it, just attach it repaired. If an air... all your dealer will fasten around you, you should use it only for the seat it , take the heaviest coat you will wear, so the extender will be just for you, and just ...

Owner's Manual
Page 133
...a collision or sudden maneuver. Latch the shade posts into the holder. Then, hold it is secure. The slots furthest forward allow the shade to cover items in the driver's side trim panel. The endcap should lock in the holder faces rearward with the round surface facing down . 2-55 Move the...shade move forward to make sure the shade slot in the compressed position. You or others could be used if the third seat is securely reattached. When you remove the cover, always store it is removed or folded down . To return the shade to the retracted position, pull up on the...
...a collision or sudden maneuver. Latch the shade posts into the holder. Then, hold it is secure. The slots furthest forward allow the shade to cover items in the driver's side trim panel. The endcap should lock in the holder faces rearward with the round surface facing down . 2-55 Move the...shade move forward to make sure the shade slot in the compressed position. You or others could be used if the third seat is securely reattached. When you remove the cover, always store it is removed or folded down . To return the shade to the retracted position, pull up on the...

Owner's Manual
Page 137
... Power Outlets When not in use the outlets, remove the cover by lifting the pull tab. Two accessory power outlets are ... experience a problem, see your dealer for additional glare protection. You can swing down and lift the mirror cover to operate with the protective cap. Use these outlets to power mobile telephones or other devices designed to turn... on the accessory power outlets. To use , always cover the rear outlet with vehicle electrical systems. The cigarette lighter is a slide switch to adjust the intensity of...
... Power Outlets When not in use the outlets, remove the cover by lifting the pull tab. Two accessory power outlets are ... experience a problem, see your dealer for additional glare protection. You can swing down and lift the mirror cover to operate with the protective cap. Use these outlets to power mobile telephones or other devices designed to turn... on the accessory power outlets. To use , always cover the rear outlet with vehicle electrical systems. The cigarette lighter is a slide switch to adjust the intensity of...

Owner's Manual
Page 251
...keep going. If you carry something inside your vehicle. If you load your truck can . D Put things in your vehicle. D Don't leave a seat folded down unless you need to help you can carry. D Never stack heavier things, like suitcases, tools, packages, or anything else -- Your warranty... does not cover parts or components that some of them are above the tops of the seats. like suitcases, inside your weight ratings. D Don't leave an unsecured child restraint in the cargo area ...
...keep going. If you carry something inside your vehicle. If you load your truck can . D Put things in your vehicle. D Don't leave a seat folded down unless you need to help you can carry. D Never stack heavier things, like suitcases, tools, packages, or anything else -- Your warranty... does not cover parts or components that some of them are above the tops of the seats. like suitcases, inside your weight ratings. D Don't leave an unsecured child restraint in the cargo area ...

Owner's Manual
Page 286
Bracket and Wing Nut A. Retaining Hook E. Removing the Spare Tire and Tools Utility Models (Rear Access Panel) Utility Models (Under Driver's Side Rear Seat) A. Tool Kit with Jack Tools and Gloves B. Speaker B. Wing Nut D. Tire Blocks F. Bottle Jack C. Cover Panel 5-19
Bracket and Wing Nut A. Retaining Hook E. Removing the Spare Tire and Tools Utility Models (Rear Access Panel) Utility Models (Under Driver's Side Rear Seat) A. Tool Kit with Jack Tools and Gloves B. Speaker B. Wing Nut D. Tire Blocks F. Bottle Jack C. Cover Panel 5-19

Owner's Manual
Page 298
Position behind the jack storage cover in the left rear side panel just below the speaker and tighten, adjusting clockwise until the jack is secured tight in the mounting bracket. Tire ... H. Hoist Shaft E. Tighten down with the jack tools and gloves, in the tool bag and place in the retaining clip under the driver's side second seat. 2. Wheel Wrench C. Jack Handle Extensions D. Put the tool kit, with the wing nut. 3. Valve Stem, Pointed Up F. Then, assemble wheel chocks and bottle jack together...
Position behind the jack storage cover in the left rear side panel just below the speaker and tighten, adjusting clockwise until the jack is secured tight in the mounting bracket. Tire ... H. Hoist Shaft E. Tighten down with the jack tools and gloves, in the tool bag and place in the retaining clip under the driver's side second seat. 2. Wheel Wrench C. Jack Handle Extensions D. Put the tool kit, with the wing nut. 3. Valve Stem, Pointed Up F. Then, assemble wheel chocks and bottle jack together...


