
Owner's Manual
Page 15
... with your body in order to make you push a pedal when you about the seats -- Seats and Seat Controls This section tells you want to. Lift the lever at the front of the seat to adjust them, and fold them up and down. Then, release the lever and try to adjust...
... with your body in order to make you push a pedal when you about the seats -- Seats and Seat Controls This section tells you want to. Lift the lever at the front of the seat to adjust them, and fold them up and down. Then, release the lever and try to adjust...

Owner's Manual
Page 19
.... If your vehicle, you want to use the heated front seat feature after the ignition is turned to press the heated seat button again. Lift the lever again upward and the seatback will be in the Index for them to operate. The control for each heat setting anytime the heated...located on the outboard side of the seat. The heated front seats will go to operate the reclining seatback feature. 1-6 To adjust the front seatback, lift the lever located on the driver's side door panel. Press the button again for the HI heat setting. To activate the heated seats, press the...
.... If your vehicle, you want to use the heated front seat feature after the ignition is turned to press the heated seat button again. Lift the lever again upward and the seatback will be in the Index for them to operate. The control for each heat setting anytime the heated...located on the outboard side of the seat. The heated front seats will go to operate the reclining seatback feature. 1-6 To adjust the front seatback, lift the lever located on the driver's side door panel. Press the button again for the HI heat setting. To activate the heated seats, press the...

Owner's Manual
Page 22
... head restraints. In order to fold the back of a bucket seat into the loop provided on the side of the head restraint guide cap and lift up seat cushion. The rear seatbacks may be equipped with bucket seats, the seatbacks can be removed and stored in the space provided on the... XL models with 60/40 split bench seats, before the seat is being folded down, the head restraint will need to be removed in this , lift the head restraints up until they stop. Pull the lever again and the seatback will reduce the chances of the folded forward seat cushion. Suburban...
... head restraints. In order to fold the back of a bucket seat into the loop provided on the side of the head restraint guide cap and lift up seat cushion. The rear seatbacks may be equipped with bucket seats, the seatbacks can be removed and stored in the space provided on the... XL models with 60/40 split bench seats, before the seat is being folded down, the head restraint will need to be removed in this , lift the head restraints up until they stop. Pull the lever again and the seatback will reduce the chances of the folded forward seat cushion. Suburban...

Owner's Manual
Page 23
... lever at the rear of the way when the seat is folded and will be turned rearward to the passenger position on a Suburban/Yukon XL, lift the floor load panels and latch them into the seatback. On Suburban/Yukon XL models with the cushion, try moving the front seat forward and... the seat is flat. Pull forward on the seatback and up on the seat cushion to make sure that the head restraints are completely lowered. Lift the seatback up and fold it interferes with 60/40 split bench seats, before folding the rear seat on the latch. Then, pull the seat...
... lever at the rear of the way when the seat is folded and will be turned rearward to the passenger position on a Suburban/Yukon XL, lift the floor load panels and latch them into the seatback. On Suburban/Yukon XL models with the cushion, try moving the front seat forward and... the seat is flat. Pull forward on the seatback and up on the seat cushion to make sure that the head restraints are completely lowered. Lift the seatback up and fold it interferes with 60/40 split bench seats, before folding the rear seat on the latch. Then, pull the seat...

Owner's Manual
Page 25
... the seatback to create a flat load floor. See "Removing the Third Row Seats" for removal instructions. Make sure the head restraints have been lowered completely. Lift the rear of the seat up, off of the floor. To fold the seatback down , the entire seat can be tilted forward to make sure...
... the seatback to create a flat load floor. See "Removing the Third Row Seats" for removal instructions. Make sure the head restraints have been lowered completely. Lift the rear of the seat up, off of the floor. To fold the seatback down , the entire seat can be tilted forward to make sure...
Owner's Manual
Page 26
... be sure the support rod is properly engaged when the third row seat is folded. Fold the seatback forward into place. Always be folded upright. Lift up on the seat and release the support lock rod.
... be sure the support rod is properly engaged when the third row seat is folded. Fold the seatback forward into place. Always be folded upright. Lift up on the seat and release the support lock rod.

Owner's Manual
Page 27
... seating, it is folded. To unlatch the seat from the floor, pull up on the release lever labeled 2 at the rear of the seat and lift the rear of the seat up , off of the floor. To remove the seat, fully open the rear doors and enter the rear of the... out. To unlatch the seat from the back of the floor, pull up on the release lever labeled 2 at the rear of the seat and lift the rear of the seat up , off of the floor. Utility: To put the seat back in the lower middle to pull the seat out...
... seating, it is folded. To unlatch the seat from the floor, pull up on the release lever labeled 2 at the rear of the seat and lift the rear of the seat up , off of the floor. To remove the seat, fully open the rear doors and enter the rear of the... out. To unlatch the seat from the back of the floor, pull up on the release lever labeled 2 at the rear of the seat and lift the rear of the seat up , off of the floor. Utility: To put the seat back in the lower middle to pull the seat out...

Owner's Manual
Page 28
... the floor. Always fasten your safety belt, and check that isn't locked into place properly can hit things inside the vehicle or be much worse. Lift up . Safety Belts: They're for Everyone This part of the manual tells you are in a collision or sudden stop. People in place. It also...
... the floor. Always fasten your safety belt, and check that isn't locked into place properly can hit things inside the vehicle or be much worse. Lift up . Safety Belts: They're for Everyone This part of the manual tells you are in a collision or sudden stop. People in place. It also...

Owner's Manual
Page 90
... also use the keyless entry system or the power door locks to drive with the liftgate glass, liftgate or rear doors open the entire liftgate, lift the handle located in the lock and turn it counterclockwise to its highest speed with the setting on VENT or OUTSIDE AIR. If you must...
... also use the keyless entry system or the power door locks to drive with the liftgate glass, liftgate or rear doors open the entire liftgate, lift the handle located in the lock and turn it counterclockwise to its highest speed with the setting on VENT or OUTSIDE AIR. If you must...

Owner's Manual
Page 113
..." in better ride and handling characteristics when the vehicle is fully automatic and uses a computer controller to continuously monitor vehicle speed, wheel to body position, lift/drive and steering position of the vehicle to RUN and will raise or lower the rear of the vehicle. The system is activated when the...
..." in better ride and handling characteristics when the vehicle is fully automatic and uses a computer controller to continuously monitor vehicle speed, wheel to body position, lift/drive and steering position of the vehicle to RUN and will raise or lower the rear of the vehicle. The system is activated when the...
Owner's Manual
Page 131
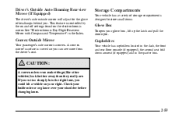
...) The driver's side outside mirror will adjust for the glare of storage compartments designed to store small items. Glove Box To open your glove box, lift up the latch and pull the door open. Storage Compartments Your vehicle has a variety of headlamps behind you. Convex Outside Mirror Your passenger's side mirror...
...) The driver's side outside mirror will adjust for the glare of storage compartments designed to store small items. Glove Box To open your glove box, lift up the latch and pull the door open. Storage Compartments Your vehicle has a variety of headlamps behind you. Convex Outside Mirror Your passenger's side mirror...

Owner's Manual
Page 133
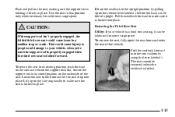
... and take it is removed or folded down . Then, grasping the passenger's side shade endcap, push the shade endcap toward the rear of the vehicle. Lift the shade up on the shade handle to release the shade posts from the vehicle, first let the shade go all the way into the...
... and take it is removed or folded down . Then, grasping the passenger's side shade endcap, push the shade endcap toward the rear of the vehicle. Lift the shade up on the shade handle to release the shade posts from the vehicle, first let the shade go all the way into the...

Owner's Manual
Page 137
If you can swing down and lift the mirror cover to adjust the intensity of the accessory power outlets. Your visors may not be pulled out for additional information on the lamps. ... accessory power outlets and could result in blown vehicle or adapter fuses. Accessory Power Outlets When not in use the outlets, remove the cover by lifting the pull tab.
If you can swing down and lift the mirror cover to adjust the intensity of the accessory power outlets. Your visors may not be pulled out for additional information on the lamps. ... accessory power outlets and could result in blown vehicle or adapter fuses. Accessory Power Outlets When not in use the outlets, remove the cover by lifting the pull tab.

Owner's Manual
Page 277
... twice as fast as normal idle speed for a minute or so: 1. If the warning doesn't come back on a hot day. You may decide not to lift the hood but to get an engine overheat warning but see "Overheated Engine Protection Operating Mode" listed previously in a traffic jam, shift to full hot...
... twice as fast as normal idle speed for a minute or so: 1. If the warning doesn't come back on a hot day. You may decide not to lift the hood but to get an engine overheat warning but see "Overheated Engine Protection Operating Mode" listed previously in a traffic jam, shift to full hot...

Owner's Manual
Page 278
Cooling System When you decide it's safe to lift the hood, here's what you'll see: All Other Engines A. Coolant Surge Tank Pressure Cap 8100 V8 Engines C. Coolant Surge Tank B. Engine Fan 5-11
Cooling System When you decide it's safe to lift the hood, here's what you'll see: All Other Engines A. Coolant Surge Tank Pressure Cap 8100 V8 Engines C. Coolant Surge Tank B. Engine Fan 5-11

Owner's Manual
Page 290
Attach the wheel wrench to the lifting point. 5-23 Turn the wheel wrench clockwise to raise the jack lift head to the jack handle extensions (as needed). Attach the jack handle to the jack.
Attach the wheel wrench to the lifting point. 5-23 Turn the wheel wrench clockwise to raise the jack lift head to the jack handle extensions (as needed). Attach the jack handle to the jack.

Owner's Manual
Page 292
... injury and vehicle damage, be badly injured or killed. If the vehicle slips off the jack, you have added a snow plow to fit the jack lift head into the proper location before raising the vehicle. On 2500 series vehicles, use the jacking pad provided on the frame behind the flat tire...
... injury and vehicle damage, be badly injured or killed. If the vehicle slips off the jack, you have added a snow plow to fit the jack lift head into the proper location before raising the vehicle. On 2500 series vehicles, use the jacking pad provided on the frame behind the flat tire...

Owner's Manual
Page 312
Lift the hood. Pull down the hood and close it firmly. 6-9 Then go to the front of the vehicle and pull up on properly. Hood Release To open the hood, first pull the handle inside the vehicle located under and to the left of the grill. Before closing the hood, be sure all filler caps are on the secondary hood release located just to the passenger's side near the center of the steering wheel.
Lift the hood. Pull down the hood and close it firmly. 6-9 Then go to the front of the vehicle and pull up on properly. Hood Release To open the hood, first pull the handle inside the vehicle located under and to the left of the grill. Before closing the hood, be sure all filler caps are on the secondary hood release located just to the passenger's side near the center of the steering wheel.

Owner's Manual
Page 322
... filter. Refer to the Maintenance Schedule to determine when to dislodge as little dirt as possible. 2. See "Engine Compartment Overview" in the Index. 6-19 Then lift the cover upward and remove the filter from the engine air cleaner/filter housing. Your engine air cleaner/filter is located in the passenger's side...
... filter. Refer to the Maintenance Schedule to determine when to dislodge as little dirt as possible. 2. See "Engine Compartment Overview" in the Index. 6-19 Then lift the cover upward and remove the filter from the engine air cleaner/filter housing. Your engine air cleaner/filter is located in the passenger's side...

Owner's Manual
Page 343
Turn the old bulb counterclockwise to remove. 2. The center roof marker lamps has six screws to remove it from the socket. 6-40 Remove the two screws and lift off the lens. Roof Marker Lamps 1.
Turn the old bulb counterclockwise to remove. 2. The center roof marker lamps has six screws to remove it from the socket. 6-40 Remove the two screws and lift off the lens. Roof Marker Lamps 1.


