Owner's Manual
Page 170
... hours of the display lit briefly and a chime. D RANGE (Trip Range): This shows the estimated distance that the calibration mode is complete. The reset is based on and cycle the DIC to confirm that can only be displayed. Manual Compass Calibration If the compass appears erratic and the calibration symbol does...
... hours of the display lit briefly and a chime. D RANGE (Trip Range): This shows the estimated distance that the calibration mode is complete. The reset is based on and cycle the DIC to confirm that can only be displayed. Manual Compass Calibration If the compass appears erratic and the calibration symbol does...

Owner's Manual
Page 228
... you'll want it before you enter the curve, while your front wheels are out of you can perform very well in Emergencies There are based on the space available. 4-12 If you need to lock your speed. Steering in emergencies like these problems by braking -- That's the time for evasive...
... you'll want it before you enter the curve, while your front wheels are out of you can perform very well in Emergencies There are based on the space available. 4-12 If you need to lock your speed. Steering in emergencies like these problems by braking -- That's the time for evasive...
Owner's Manual
Page 245
.... CO could overcome you and kill you 've been stopped by the snow. Open a window just a little on extra clothing or wrap a blanket around the base of the vehicle that you . anything you have no blankets or extra clothing, make body insulators from the wind. This will help keep warm, but...
.... CO could overcome you and kill you 've been stopped by the snow. Open a window just a little on extra clothing or wrap a blanket around the base of the vehicle that you . anything you have no blankets or extra clothing, make body insulators from the wind. This will help keep warm, but...
Owner's Manual
Page 273
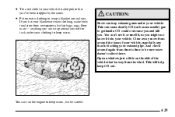
.... B. The other is one bleed valve. Otherwise, close the valve. Remove the oil fill tube, with the proper DEX-COOLR coolant mixture, up to the base of coolant coming from the engine and the compartment. 7. Place the hole in the cover shield over the hole in the Index for more information...
.... B. The other is one bleed valve. Otherwise, close the valve. Remove the oil fill tube, with the proper DEX-COOLR coolant mixture, up to the base of coolant coming from the engine and the compartment. 7. Place the hole in the cover shield over the hole in the Index for more information...
Owner's Manual
Page 274
Put the cap back on the coolant recovery tank, but leave the radiator pressure cap off. 10. If the level is lower, add more of the proper DEX-COOLR coolant mixture through the filler neck until you can feel the upper radiator hose getting hot. Watch out for the engine cooling fans. 11. 8. Then fill the coolant recovery tank to the COLD mark. 9. Start the engine and let it run until the level reaches the base of the filler neck. 5-20 By this time, the coolant level inside the radiator filler neck may be lower.
Put the cap back on the coolant recovery tank, but leave the radiator pressure cap off. 10. If the level is lower, add more of the proper DEX-COOLR coolant mixture through the filler neck until you can feel the upper radiator hose getting hot. Watch out for the engine cooling fans. 11. 8. Then fill the coolant recovery tank to the COLD mark. 9. Start the engine and let it run until the level reaches the base of the filler neck. 5-20 By this time, the coolant level inside the radiator filler neck may be lower.
Owner's Manual
Page 304
... computer has calculated that a change your vehicle. The system won't detect dust in engine damage not covered by your vehicle -- When to change is not based on mileage, but on before 3,000 miles (5 000 km). NOTICE: Use only engine oil with the starburst symbol are all the requirements for good performance...
... computer has calculated that a change your vehicle. The system won't detect dust in engine damage not covered by your vehicle -- When to change is not based on mileage, but on before 3,000 miles (5 000 km). NOTICE: Use only engine oil with the starburst symbol are all the requirements for good performance...
Owner's Manual
Page 319
... system, your brake system can damage brake system parts so badly that they may not work at all. CAUTION: With the wrong kind of mineral-based oil, such as engine oil, in your brakes may not even work well, or they 'll have to be damaged. For example, just a few drops...
... system, your brake system can damage brake system parts so badly that they may not work at all. CAUTION: With the wrong kind of mineral-based oil, such as engine oil, in your brakes may not even work well, or they 'll have to be damaged. For example, just a few drops...
Owner's Manual
Page 324
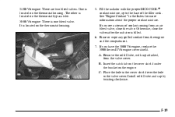
...Reinstall the lamps and screw. 6-37 Turn the old bulb counterclockwise and remove it from the bulb by inserting the smallest tab on the bulb base into the assembly. 5. Aim adjustment to the low beam may be re-aimed, we recommend that you to the dealer for service. Remove... by following : 1. Install the electrical connector to reinstall the headlamp assembly. Turn the bulb a quarter-turn clockwise until it away from the bulb's base. 8. Then, check the lamps. If you believe your headlamps need to see lane markers (for horizontal aim), or if oncoming drivers flash their high...
...Reinstall the lamps and screw. 6-37 Turn the old bulb counterclockwise and remove it from the bulb by inserting the smallest tab on the bulb base into the assembly. 5. Aim adjustment to the low beam may be re-aimed, we recommend that you to the dealer for service. Remove... by following : 1. Install the electrical connector to reinstall the headlamp assembly. Turn the bulb a quarter-turn clockwise until it away from the bulb's base. 8. Then, check the lamps. If you believe your headlamps need to see lane markers (for horizontal aim), or if oncoming drivers flash their high...
Owner's Manual
Page 326
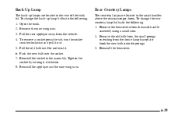
... are located in the assembly. Back-Up Lamp The back-up lamp bulbs do the following : 1. Pull the rear applique away from the dome lamp base plate; Reinstall the applique and the nine wing nuts. Remove the lens covers from the assist handle assembly using a small coin. 2. To change the rear...
... are located in the assembly. Back-Up Lamp The back-up lamp bulbs do the following : 1. Pull the rear applique away from the dome lamp base plate; Reinstall the applique and the nine wing nuts. Remove the lens covers from the assist handle assembly using a small coin. 2. To change the rear...
Owner's Manual
Page 335
...the government course as well on a specified indoor laboratory test wheel. Temperature -- Warning: The temperature grade for this tire is based on the laboratory test wheel than the minimum required by law. Excessive speed, underinflation, or excessive loading, either separately or ... have poor traction performance. A, B, C The temperature grades are AA, A, B, and C. Treadwear The treadwear grade is a comparative rating based on the wear rate of the tire when tested under controlled conditions on specified government test surfaces of asphalt and concrete. Warning: The traction...
...the government course as well on a specified indoor laboratory test wheel. Temperature -- Warning: The temperature grade for this tire is based on the laboratory test wheel than the minimum required by law. Excessive speed, underinflation, or excessive loading, either separately or ... have poor traction performance. A, B, C The temperature grades are AA, A, B, and C. Treadwear The treadwear grade is a comparative rating based on the wear rate of the tire when tested under controlled conditions on specified government test surfaces of asphalt and concrete. Warning: The traction...
Owner's Manual
Page 340
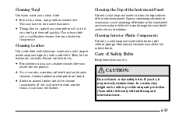
... a clean, damp cloth to dry. Then, let the leather dry naturally. Do not use heat to remove dirt. D For stubborn stains, use oils, varnishes, solvent-based or abrasive cleaners, furniture polish or shoe polish on a soft cloth or sponge. D Never use a leather cleaner. Clean safety belts only with a soft cloth. Cleaning...
... a clean, damp cloth to dry. Then, let the leather dry naturally. Do not use heat to remove dirt. D For stubborn stains, use oils, varnishes, solvent-based or abrasive cleaners, furniture polish or shoe polish on a soft cloth or sponge. D Never use a leather cleaner. Clean safety belts only with a soft cloth. Cleaning...
Owner's Manual
Page 342
... can get GM-approved cleaning products from your dealer. See "Appearance Care and Materials" in the Index. Always use waxes and polishes that are petroleum based, or that are non-abrasive and made for a basecoat/clearcoat paint finish. Don't use cleaning agents that contain acid or abrasives. Cleaning the Outside of...
... can get GM-approved cleaning products from your dealer. See "Appearance Care and Materials" in the Index. Always use waxes and polishes that are petroleum based, or that are non-abrasive and made for a basecoat/clearcoat paint finish. Don't use cleaning agents that contain acid or abrasives. Cleaning the Outside of...
Owner's Manual
Page 343
... over a period of the vehicle. Don't take care to aging, weather and chemical fallout that can damage your vehicle garaged or covered whenever possible. Petroleum-based products may then be applied. After rinsing thoroughly, dry with clean water. Don't use chrome polish on the body or wheels of years.
... over a period of the vehicle. Don't take care to aging, weather and chemical fallout that can damage your vehicle garaged or covered whenever possible. Petroleum-based products may then be applied. After rinsing thoroughly, dry with clean water. Don't use chrome polish on the body or wheels of years.