
Owner's Manual
Page 254
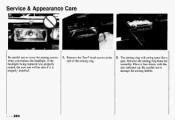
If the headlight being replaced was properly aimed, the new one will swing open like a gate. Place it is properly installed. 7 i 2. Remove the Torx@head screws at the end of the aimingring. Remove the aiming ring from the assembly. Service & Appearance Care fBe careful not to damage the aimingbubble. 1. Be careful not to move the aiming screws when you replace the headlight. t 1 ...250 The aiming ring will be also if it face down, with the aim indicator up.
If the headlight being replaced was properly aimed, the new one will swing open like a gate. Place it is properly installed. 7 i 2. Remove the Torx@head screws at the end of the aimingring. Remove the aiming ring from the assembly. Service & Appearance Care fBe careful not to damage the aimingbubble. 1. Be careful not to move the aiming screws when you replace the headlight. t 1 ...250 The aiming ring will be also if it face down, with the aim indicator up.
Owner's Manual
Page 255
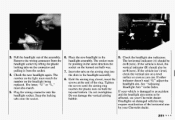
... letter, "U" or "L," the screws until the aiming ring Headlight Aim" in the headlight assembly. Do not overtighten. 5. Plug the wiring connector into check the vertical aim on the light must match the 8. Tighten headlight aim. Place the new headlight in the same direction the headlight socket by your Chevrolet dealer. on the burned out bulb was. Check...
... letter, "U" or "L," the screws until the aiming ring Headlight Aim" in the headlight assembly. Do not overtighten. 5. Plug the wiring connector into check the vertical aim on the light must match the 8. Tighten headlight aim. Place the new headlight in the same direction the headlight socket by your Chevrolet dealer. on the burned out bulb was. Check...


