

Owner's Manual
Page 1
2012 Cadillac Escalade/Escalade ESV Owner Manual M In Brief ...1-1 Instrument Panel ...1-2 Initial Drive Information ...1-4 Vehicle Features ...1-18 Performance and Maintenance ...1-24 Keys, Doors, and Windows ...2-1 Keys and Locks ...2-2 Doors ...2-9 ...
2012 Cadillac Escalade/Escalade ESV Owner Manual M In Brief ...1-1 Instrument Panel ...1-2 Initial Drive Information ...1-4 Vehicle Features ...1-18 Performance and Maintenance ...1-24 Keys, Doors, and Windows ...2-1 Keys and Locks ...2-2 Doors ...2-9 ...

Owner's Manual
Page 2
2012 Cadillac Escalade/Escalade ESV Owner Manual M Driving and Operating ...9-1 Driving Information ...9-2 Starting and Operating ...9-21 Engine Exhaust ...9-29 Automatic Transmission ...9-30 Drive Systems ...9-34 Brakes ...9-35 Ride...10-38 Wheels and Tires ...10-46 Jump Starting ...10-88 Towing ...10-93 Appearance Care ...10-96 Service and Maintenance ...11-1 General Information ...11-1 Cadillac Premium Care Maintenance ...11-3 Maintenance Schedule ...11-3 Special Application Services ...11-9 Additional Maintenance and Care ...11-9 Recommended Fluids, Lubricants, and Parts ...11-13 Maintenance...
2012 Cadillac Escalade/Escalade ESV Owner Manual M Driving and Operating ...9-1 Driving Information ...9-2 Starting and Operating ...9-21 Engine Exhaust ...9-29 Automatic Transmission ...9-30 Drive Systems ...9-34 Brakes ...9-35 Ride...10-38 Wheels and Tires ...10-46 Jump Starting ...10-88 Towing ...10-93 Appearance Care ...10-96 Service and Maintenance ...11-1 General Information ...11-1 Cadillac Premium Care Maintenance ...11-3 Maintenance Schedule ...11-3 Special Application Services ...11-9 Additional Maintenance and Care ...11-9 Recommended Fluids, Lubricants, and Parts ...11-13 Maintenance...

Owner's Manual
Page 3
If the vehicle is a hybrid, see the hybrid supplement for Cadillac Motor Division wherever it appears in this manual in U.S.A. iii Canadian Vehicle Owners Propriétaires Canadiens A French language copy of this manual can be ... B Second Printing © 2011 General Motors LLC. Please refer to the purchase documentation relating to your specific vehicle to , GM, the GM logo, CADILLAC, the CADILLAC Crest and Wreath, ESCALADE, and ESV are options that you did not purchase or due to changes subsequent to the printing of this manual including, but not...
If the vehicle is a hybrid, see the hybrid supplement for Cadillac Motor Division wherever it appears in this manual in U.S.A. iii Canadian Vehicle Owners Propriétaires Canadiens A French language copy of this manual can be ... B Second Printing © 2011 General Motors LLC. Please refer to the purchase documentation relating to your specific vehicle to , GM, the GM logo, CADILLAC, the CADILLAC Crest and Wreath, ESCALADE, and ESV are options that you did not purchase or due to changes subsequent to the printing of this manual including, but not...

Owner's Manual
Page 4
Notice: This means there is a safety symbol which will result in serious injury or death. M : This symbol is shown when you need to see a service manual for additional instructions or information. * : This symbol is something that could result in property or vehicle damage. A circle with a slash through it can be covered by the vehicle's warranty. This would not be found on vehicle labels and in this Manual To quickly locate information about the vehicle, use symbols instead of what to do this," or "Do not let this happen." Warning or Caution indicates a hazard...
Notice: This means there is a safety symbol which will result in serious injury or death. M : This symbol is shown when you need to see a service manual for additional instructions or information. * : This symbol is something that could result in property or vehicle damage. A circle with a slash through it can be covered by the vehicle's warranty. This would not be found on vehicle labels and in this Manual To quickly locate information about the vehicle, use symbols instead of what to do this," or "Do not let this happen." Warning or Caution indicates a hazard...

Owner's Manual
Page 5
v 0 : Adjustable Pedals 9 : Airbag Readiness Light # : Air Conditioning ! : Antilock Brake System (ABS) % : Audio Steering Wheel Controls or OnStar® I : Cruise Control B : Engine Coolant Temperature O : Exterior Lamps # : Fog Lamps . : Fuel Gauge + : Fuses 3 : Headlamp High/Low-Beam Changer LATCH System Child Restraints g : Outside Power Foldaway Mirrors O : Power / : Remote Vehicle Start > : Safety Belt Reminders 7 : Tire Pressure Monitor _ : Tow/Haul Mode d : Traction Control/StabiliTrak® M : Windshield Washer Fluid (: j: Heated Steering Wheel $ : Brake System Warning Light "...
v 0 : Adjustable Pedals 9 : Airbag Readiness Light # : Air Conditioning ! : Antilock Brake System (ABS) % : Audio Steering Wheel Controls or OnStar® I : Cruise Control B : Engine Coolant Temperature O : Exterior Lamps # : Fog Lamps . : Fuel Gauge + : Fuses 3 : Headlamp High/Low-Beam Changer LATCH System Child Restraints g : Outside Power Foldaway Mirrors O : Power / : Remote Vehicle Start > : Safety Belt Reminders 7 : Tire Pressure Monitor _ : Tow/Haul Mode d : Traction Control/StabiliTrak® M : Windshield Washer Fluid (: j: Heated Steering Wheel $ : Brake System Warning Light "...

Owner's Manual
Page 6
vi Introduction 2 NOTES
vi Introduction 2 NOTES

Owner's Manual
Page 7
In Brief 1-1 1-24 1-24 1-24 1-25 1-25 1-25 1-26 1-26 In Brief Instrument Panel Instrument Panel ...1-2 Initial Drive Information Initial Drive Information ...1-4 Remote Keyless Entry (RKE) System ...1-4 Remote Vehicle Start ...1-4 Door Locks ...1-5 Liftgate ...1-6 Windows ...1-7 Seat Adjustment ...1-8 Memory Features ...1-9 Second Row Seats ...1-10 Third Row Seats ...1-10 Heated and Ventilated Seats ...1-10 Head Restraint Adjustment ...1-11 Safety Belts ...1-11 Passenger Sensing System ...1-12 Mirror Adjustment ...1-12 Steering Wheel Adjustment ...1-14 Throttle and Brake Pedal Adjustment ...
In Brief 1-1 1-24 1-24 1-24 1-25 1-25 1-25 1-26 1-26 In Brief Instrument Panel Instrument Panel ...1-2 Initial Drive Information Initial Drive Information ...1-4 Remote Keyless Entry (RKE) System ...1-4 Remote Vehicle Start ...1-4 Door Locks ...1-5 Liftgate ...1-6 Windows ...1-7 Seat Adjustment ...1-8 Memory Features ...1-9 Second Row Seats ...1-10 Third Row Seats ...1-10 Heated and Ventilated Seats ...1-10 Head Restraint Adjustment ...1-11 Safety Belts ...1-11 Passenger Sensing System ...1-12 Mirror Adjustment ...1-12 Steering Wheel Adjustment ...1-14 Throttle and Brake Pedal Adjustment ...

Owner's Manual
Page 9
See Turn and Lane-Change Signals on page 5‑7. D. I. K. L. Dome Lamp Override. N. B. Clock on page 6‑7. StabiliTrak® System on page 5‑2. Steering Wheel Adjustment on page 9‑37. P. 1-3 Cruise Control on page 5‑11. R. Pedal Adjust Button. Instrument Cluster on page 9‑41. Driver Shift Control (DSC). Tow/Haul Mode on page 6‑1. Driver Information Center (DIC) Buttons. J. S. M. O. Shift Lever. F. G. Exterior Lamp Controls on page 9‑33. Horn on page 5‑2. Steering Wheel ...
See Turn and Lane-Change Signals on page 5‑7. D. I. K. L. Dome Lamp Override. N. B. Clock on page 6‑7. StabiliTrak® System on page 5‑2. Steering Wheel Adjustment on page 9‑37. P. 1-3 Cruise Control on page 5‑11. R. Pedal Adjust Button. Instrument Cluster on page 9‑41. Driver Shift Control (DSC). Tow/Haul Mode on page 6‑1. Driver Information Center (DIC) Buttons. J. S. M. O. Shift Lever. F. G. Exterior Lamp Controls on page 9‑33. Horn on page 5‑2. Steering Wheel ...

Owner's Manual
Page 10
Press Initial Drive Information This section provides a brief overview about some of the important features that may or may not be on page 2‑3. For more detailed information, refer to lock all remaining doors. Remote Vehicle Start With this owner manual. Q to each of the vehicle. Press and hold / until the turn signal lamps flash. Starting the Vehicle 1. 1-4 In Brief Press L and release to unlock the driver door. Press and hold for three seconds to unlock all doors. Press K again within three seconds to sound the panic alarm. Remote Keyless Entry (RKE)...
Press Initial Drive Information This section provides a brief overview about some of the important features that may or may not be on page 2‑3. For more detailed information, refer to lock all remaining doors. Remote Vehicle Start With this owner manual. Q to each of the vehicle. Press and hold / until the turn signal lamps flash. Starting the Vehicle 1. 1-4 In Brief Press L and release to unlock the driver door. Press and hold for three seconds to unlock all doors. Press K again within three seconds to sound the panic alarm. Remote Keyless Entry (RKE)...

Owner's Manual
Page 11
From inside, use the Remote Keyless Entry (RKE) transmitter or the key in the driver door. Turn on the RKE transmitter. Power Door Locks Press Q or K on the hazard warning flashers. The doors will be extended only once. 1-5 Door Locks There are several ways to lock and unlock the vehicle. Turn the ignition on page 2‑5. Press to lock the doors. See Remote Vehicle Start on and then back off . Remote start : . From outside, use the power door locks or the manual door locks. Q: K: Press to unlock the doors. In Brief When the vehicle starts, the parking ...
From inside, use the Remote Keyless Entry (RKE) transmitter or the key in the driver door. Turn on the RKE transmitter. Power Door Locks Press Q or K on the hazard warning flashers. The doors will be extended only once. 1-5 Door Locks There are several ways to lock and unlock the vehicle. Turn the ignition on page 2‑5. Press to lock the doors. See Remote Vehicle Start on and then back off . Remote start : . From outside, use the power door locks or the manual door locks. Q: K: Press to unlock the doors. In Brief When the vehicle starts, the parking ...

Owner's Manual
Page 12
Use the pull cup to use the power feature. Do not press the touch pad while closing the liftgate. The taillamps will flash and a chime will cause the release of the liftglass or liftgate to open and close the liftgate. The liftglass or liftgate cannot be opened if the rear wiper is in P (Park) to lower and close the power liftgate: . Press and hold 8 on the bottom of the liftgate next to the latch to be in motion. Press l on the RKEtransmitter until the wipers are several ways to open the liftglass or liftgate while the rear wiper is on the overhead console. This will ...
Use the pull cup to use the power feature. Do not press the touch pad while closing the liftgate. The taillamps will flash and a chime will cause the release of the liftglass or liftgate to open and close the liftgate. The liftglass or liftgate cannot be opened if the rear wiper is in P (Park) to lower and close the power liftgate: . Press and hold 8 on the bottom of the liftgate next to the latch to be in motion. Press l on the RKEtransmitter until the wipers are several ways to open the liftglass or liftgate while the rear wiper is on the overhead console. This will ...

Owner's Manual
Page 13
In Brief Pressing a second time while the liftgate is in Retained Accessory Power (RAP). For more information. Press the button on page 2‑19. Liftglass If equipped, there are two ways to lower the window. Power Windows on the underside of the license plate applique (A). Windows on the RKE transmitter. Premium Trim Shown, Up‐Level Similar The driver door has switches that control all windows, the passengers door switch only control that window. Press m on page 2‑18. The power windows work when the ignition is moving reverses the direction. See Retained ...
In Brief Pressing a second time while the liftgate is in Retained Accessory Power (RAP). For more information. Press the button on page 2‑19. Liftglass If equipped, there are two ways to lower the window. Power Windows on the underside of the license plate applique (A). Windows on the RKE transmitter. Premium Trim Shown, Up‐Level Similar The driver door has switches that control all windows, the passengers door switch only control that window. Press m on page 2‑18. The power windows work when the ignition is moving reverses the direction. See Retained ...

Owner's Manual
Page 14
1-8 In Brief Lumbar Adjustment Reclining Seatbacks Seat Adjustment To adjust the seat: . Raise or lower the front or rear part of the seat cushion by moving the entire control up or down . To adjust the seatback: . . Press and hold the top or bottom of the control to increase or decrease lumbar support. Tilt the top of the control rearward to raise. . . See Lumbar Adjustment on page 3‑3. See Power Seat Adjustment on page 3‑3. See Reclining Seatbacks on page 3‑4. . Tilt the top of the control forward to recline. Raise or lower the entire seat by ...
1-8 In Brief Lumbar Adjustment Reclining Seatbacks Seat Adjustment To adjust the seat: . Raise or lower the front or rear part of the seat cushion by moving the entire control up or down . To adjust the seatback: . . Press and hold the top or bottom of the control to increase or decrease lumbar support. Tilt the top of the control rearward to raise. . . See Lumbar Adjustment on page 3‑3. See Power Seat Adjustment on page 3‑3. See Reclining Seatbacks on page 3‑4. . Tilt the top of the control forward to recline. Raise or lower the entire seat by ...

Owner's Manual
Page 15
The vehicle must be in P (Park). The vehicle must be in P (Park). The seat, outside mirrors, steering column, and adjustable throttle and brake pedals will move the driver seat rearward and the power steering column up and forward to allow extra room to exit the vehicle. Not all mirrors and adjustable throttles and brake pedals will sound. B : Press to save into memory: 1. See Memory Seats on page 3‑5 and Vehicle Personalization on page 9‑22. See Power Mirrors on page 2‑16, Steering Wheel Adjustment on page 5‑2, and Adjustable Throttle and Brake ...
The vehicle must be in P (Park). The vehicle must be in P (Park). The seat, outside mirrors, steering column, and adjustable throttle and brake pedals will move the driver seat rearward and the power steering column up and forward to allow extra room to exit the vehicle. Not all mirrors and adjustable throttles and brake pedals will sound. B : Press to save into memory: 1. See Memory Seats on page 3‑5 and Vehicle Personalization on page 9‑22. See Power Mirrors on page 2‑16, Steering Wheel Adjustment on page 5‑2, and Adjustable Throttle and Brake ...

Owner's Manual
Page 16
With each press of the button, the seat will change to the next lower setting, and then to heat the seat and seatback. Indicator bars next to the symbol on the climate control display show the selected setting: three for high, two for medium, and one for easy entry/exit to cool the entire seat. z : Press to the off setting. 1-10 In Brief Second Row Seats On vehicles with a 60/40 split bench or buckets seats, the seatbacks can be folded for additional cargo space, or the seats can be folded and tumbled for low. The buttons are on page 3‑12. Third Row Seats On ...
With each press of the button, the seat will change to the next lower setting, and then to heat the seat and seatback. Indicator bars next to the symbol on the climate control display show the selected setting: three for high, two for medium, and one for easy entry/exit to cool the entire seat. z : Press to the off setting. 1-10 In Brief Second Row Seats On vehicles with a 60/40 split bench or buckets seats, the seatbacks can be folded for additional cargo space, or the seats can be folded and tumbled for low. The buttons are on page 3‑12. Third Row Seats On ...

Owner's Manual
Page 17
In Brief Heated Rear Seats 1-11 Head Restraint Adjustment Do not drive until the head restraints for all occupants are on the Rear Sear Audio (RSA) panel on the rear of the center console. See Head Restraints on page 3‑2 and Power Seat Adjustment on page 3‑8. See Heated Rear Seats on page 3‑3. How to use safety belts properly... Press M or L to heat the left outboard or right outboard seat cushion and to the following sections for Children (LATCH System) on page 3‑17. Lower Anchors and Tethers for important information on how to Wear Safety Belts ...
In Brief Heated Rear Seats 1-11 Head Restraint Adjustment Do not drive until the head restraints for all occupants are on the Rear Sear Audio (RSA) panel on the rear of the center console. See Head Restraints on page 3‑2 and Power Seat Adjustment on page 3‑8. See Heated Rear Seats on page 3‑3. How to use safety belts properly... Press M or L to heat the left outboard or right outboard seat cushion and to the following sections for Children (LATCH System) on page 3‑17. Lower Anchors and Tethers for important information on how to Wear Safety Belts ...

Owner's Manual
Page 18
Press the arrows on the control pad to a neutral position. Press the opposite side to get the control pad to move the mirror up, down, right, or left. 3. Mirror Adjustment Exterior Mirrors United States Canada and Mexico See Passenger Sensing System on the overhead console when the vehicle is affected by the passenger sensing system. Press (A) or (B) to select the driver or passenger side mirror. 2. The passenger airbag status indicator, if equipped, will be visible on page 3‑33 for the right front passenger position. 1-12 In Brief Passenger Sensing System The passenger ...
Press the arrows on the control pad to a neutral position. Press the opposite side to get the control pad to move the mirror up, down, right, or left. 3. Mirror Adjustment Exterior Mirrors United States Canada and Mexico See Passenger Sensing System on the overhead console when the vehicle is affected by the passenger sensing system. Press (A) or (B) to select the driver or passenger side mirror. 2. The passenger airbag status indicator, if equipped, will be visible on page 3‑33 for the right front passenger position. 1-12 In Brief Passenger Sensing System The passenger ...

Owner's Manual
Page 19
Automatic Dimming Mirror The driver outside rearview mirrors turn the dimming feature on or off setting on page 8‑1 for more information. This feature is controlled by the on page 2‑17 for more information. 1-13 Interior Mirror Adjustment Hold the rearview mirror in the center and move it to the original position when the vehicle is shifted out of headlamps from behind . See Automatic Dimming Rearview Mirror on and off . In Brief Power Folding Mirrors To fold the mirrors: 1. Heated Mirrors The heated outside mirror automatically dimes for more...
Automatic Dimming Mirror The driver outside rearview mirrors turn the dimming feature on or off setting on page 8‑1 for more information. This feature is controlled by the on page 2‑17 for more information. 1-13 Interior Mirror Adjustment Hold the rearview mirror in the center and move it to the original position when the vehicle is shifted out of headlamps from behind . See Automatic Dimming Rearview Mirror on and off . In Brief Power Folding Mirrors To fold the mirrors: 1. Heated Mirrors The heated outside mirror automatically dimes for more...

Owner's Manual
Page 20
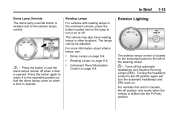
Interior Lighting Dome Lamps The dome lamps are closed. They come on until the knob is turned counterclockwise. 1-14 In Brief Steering Wheel Adjustment Throttle and Brake Pedal Adjustment The vehicle has adjustable throttle and brake pedals that allow you to manually turn off after all the doors are located in the overhead console. The dome lamps remain on when any door is located on the center console below the dome lamp override button, clockwise to the farthest position to change their positions. See Adjustable Throttle and Brake Pedal on page 5‑38. ...
Interior Lighting Dome Lamps The dome lamps are closed. They come on until the knob is turned counterclockwise. 1-14 In Brief Steering Wheel Adjustment Throttle and Brake Pedal Adjustment The vehicle has adjustable throttle and brake pedals that allow you to manually turn off after all the doors are located in the overhead console. The dome lamps remain on when any door is located on the center console below the dome lamp override button, clockwise to the farthest position to change their positions. See Adjustable Throttle and Brake Pedal on page 5‑38. ...
Owner's Manual
Page 21
For more information about interior lamps, see: . . 1-15 Exterior Lighting Dome Lamps on page 6‑9. Press the button in Canada, the off position only works when the vehicle is shifted into the P (Park) position. k: . For vehicles first sold in and the dome lamps remain off when a door is opened . Turning the headlamp control to the exterior lamps control. P : Turns off . The vehicle may also have reading lamps in the overhead console, press the button located next to the lamp to turn the automatic headlamps and DRL back on. The lamps cannot be adjusted. In ...
For more information about interior lamps, see: . . 1-15 Exterior Lighting Dome Lamps on page 6‑9. Press the button in Canada, the off position only works when the vehicle is shifted into the P (Park) position. k: . For vehicles first sold in and the dome lamps remain off when a door is opened . Turning the headlamp control to the exterior lamps control. P : Turns off . The vehicle may also have reading lamps in the overhead console, press the button located next to the lamp to turn the automatic headlamps and DRL back on. The lamps cannot be adjusted. In ...
