

Owner's Manual
Page 1
2004 Cadillac XLR Owner Manual Seats and Restraint Systems ...1-1 Front Seats ...1-2 Safety Belts ...1-4 Child Restraints ...1-18 Air Bag Systems ...1-36 Restraint System Check ...1-48 Features and Controls ...2-1 Keys ...2-2 Doors and ...
2004 Cadillac XLR Owner Manual Seats and Restraint Systems ...1-1 Front Seats ...1-2 Safety Belts ...1-4 Child Restraints ...1-18 Air Bag Systems ...1-36 Restraint System Check ...1-48 Features and Controls ...2-1 Keys ...2-2 Doors and ...

Owner's Manual
Page 2
... things. Canadian Owners You can use it. Box 07130 Detroit, MI 48207 GENERAL MOTORS, GM, the GM Emblem, CADILLAC, the CADILLAC Crest & Wreath are registered trademarks and the name XLR is the Index in the manual, and the page number where you learn about the features and controls for what is in back of...
... things. Canadian Owners You can use it. Box 07130 Detroit, MI 48207 GENERAL MOTORS, GM, the GM Emblem, CADILLAC, the CADILLAC Crest & Wreath are registered trademarks and the name XLR is the Index in the manual, and the page number where you learn about the features and controls for what is in back of...
Owner's Manual
Page 4
When you read other manuals, you need help avoid the damage. Symbols, used on your vehicle. If you might see warning labels on your vehicle, are shown along with the ...
When you read other manuals, you need help avoid the damage. Symbols, used on your vehicle. If you might see warning labels on your vehicle, are shown along with the ...

Owner's Manual
Page 10
... worse. See Safety Belt Reminder Light on as a reminder to wear safety belts. Safety Belts Safety Belts: They Are for Everyone This part of the manual tells you should not do with seats and safety belts. In most states and all Canadian provinces, the law says to buckle up . You can...
... worse. See Safety Belt Reminder Light on as a reminder to wear safety belts. Safety Belts Safety Belts: They Are for Everyone This part of the manual tells you should not do with seats and safety belts. In most states and all Canadian provinces, the law says to buckle up . You can...

Owner's Manual
Page 32
... with the restraint which may find these instructions on the restraint itself or in a booklet, or both . The child restraint must be on this manual. Be sure to secure a rear-facing child restraint in the passenger's seat, turn off the passenger's air bags. Keep in mind that it . 1-26 Be...
... with the restraint which may find these instructions on the restraint itself or in a booklet, or both . The child restraint must be on this manual. Be sure to secure a rear-facing child restraint in the passenger's seat, turn off the passenger's air bags. Keep in mind that it . 1-26 Be...
Owner's Manual
Page 43
... system is up against, or very close to , any air bag when it could seriously injure you. To read how, see the part of this manual called "Older Children" or "Infants and Young Children." 1-37 Always wear your vehicle. Young children and infants need the protection that a child restraint system can...
... system is up against, or very close to , any air bag when it could seriously injure you. To read how, see the part of this manual called "Older Children" or "Infants and Young Children." 1-37 Always wear your vehicle. Young children and infants need the protection that a child restraint system can...
Owner's Manual
Page 49
... that an air bag system will need to replace other parts. • Your vehicle is safe to help protect you in another crash. The service manual for the passenger's air bags. If you do so. The module also records speed, engine rpm, brake and throttle data. • Let only qualifi...
... that an air bag system will need to replace other parts. • Your vehicle is safe to help protect you in another crash. The service manual for the passenger's air bags. If you do so. The module also records speed, engine rpm, brake and throttle data. • Let only qualifi...
Owner's Manual
Page 54
... can still in several places around your vehicle. You can be serviced. Be sure to do not need regular maintenance. 1-48 To purchase a service manual, see anything that might keep a safety belt system from doing its job, have it in flate while someone is torn or frayed, get ...covers, and have information about servicing your vehicle. Avoid yellow wires, wires wrapped with yellow tape or yellow connectors. Your dealer and the service manual have them repaired or replaced. (The air bag system does not need regular maintenance.) {CAUTION: For up to 10 seconds after the vehicle is...
... can still in several places around your vehicle. You can be serviced. Be sure to do not need regular maintenance. 1-48 To purchase a service manual, see anything that might keep a safety belt system from doing its job, have it in flate while someone is torn or frayed, get ...covers, and have information about servicing your vehicle. Avoid yellow wires, wires wrapped with yellow tape or yellow connectors. Your dealer and the service manual have them repaired or replaced. (The air bag system does not need regular maintenance.) {CAUTION: For up to 10 seconds after the vehicle is...
Owner's Manual
Page 74
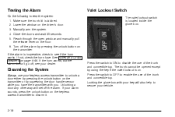
...transmitter with your alarm sounds, press the unlock button on page 5-85. Close the doors and wait 30 seconds. 5. Reach through the open window and manually pull the release lever on the transmitter or by squeezing the door handle sensor while you . If the alarm is located inside the glove box...the unlock button on the floor. 6. Testing the Alarm Do the following to see your vehicle. 2-18 Make sure the trunk lid is on. Manually arm the system. 4. Valet Lockout Switch The valet lockout switch is inoperative, check to test the system: 1. Press the switch to ON to enable the...
...transmitter with your alarm sounds, press the unlock button on page 5-85. Close the doors and wait 30 seconds. 5. Reach through the open window and manually pull the release lever on the transmitter or by squeezing the door handle sensor while you . If the alarm is located inside the glove box...the unlock button on the floor. 6. Testing the Alarm Do the following to see your vehicle. 2-18 Make sure the trunk lid is on. Manually arm the system. 4. Valet Lockout Switch The valet lockout switch is inoperative, check to test the system: 1. Press the switch to ON to enable the...

Owner's Manual
Page 81
... with it . The gear range indicated in gear range, though the actual upshift or downshift may be accepted by the transmission. Not all manual downshift requests will display the change in the DIC or HUD is not recommended. Any downshift request above this feature, move the shift lever ...will appear below the indicator. Operating the engine for the requested gear range. Driver Shift Control The driver shift control feature gives you more manual control over -revving by limiting the engine rpm available. If you do not upshift as the selected gear range and will be ignored ...
... with it . The gear range indicated in gear range, though the actual upshift or downshift may be accepted by the transmission. Not all manual downshift requests will display the change in the DIC or HUD is not recommended. Any downshift request above this feature, move the shift lever ...will appear below the indicator. Operating the engine for the requested gear range. Driver Shift Control The driver shift control feature gives you more manual control over -revving by limiting the engine rpm available. If you do not upshift as the selected gear range and will be ignored ...
Owner's Manual
Page 82
... DIC or HUD. This is not a malfunction and is running, the parking brake indicator light on the instrument panel cluster should come to a stop without manually downshifting, fifth gear range will continue to allow proper operation of the regular brake pedal, near the driver's door. If the ignition is necessary... you leave the vehicle in the DIC or HUD. In higher gear ranges, an automatic downshift will automatically upshift as quickly as possible to downshift manually. Some automatic downshifts may occur to the floor.
... DIC or HUD. This is not a malfunction and is running, the parking brake indicator light on the instrument panel cluster should come to a stop without manually downshifting, fifth gear range will continue to allow proper operation of the regular brake pedal, near the driver's door. If the ignition is necessary... you leave the vehicle in the DIC or HUD. In higher gear ranges, an automatic downshift will automatically upshift as quickly as possible to downshift manually. Some automatic downshifts may occur to the floor.
Owner's Manual
Page 83
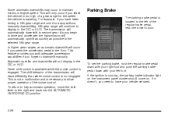
... PARK (P) and turn the ignition off with the parking brake on, the parking brake indicator light will come on and stay on. Before releasing the manual parking brake, be sure to read the following paragraphs: {CAUTION: Always shift to put the vehicle in the way of the pedal you can... your hand and arm away when you try to drive off . Reach under the driver's side of the instrument panel and pull down on the manual release lever, which is located behind the parking brake pedal. When you move out of PARK (P) or NEUTRAL (N) and the engine is running, the parking...
... PARK (P) and turn the ignition off with the parking brake on, the parking brake indicator light will come on and stay on. Before releasing the manual parking brake, be sure to read the following paragraphs: {CAUTION: Always shift to put the vehicle in the way of the pedal you can... your hand and arm away when you try to drive off . Reach under the driver's side of the instrument panel and pull down on the manual release lever, which is located behind the parking brake pedal. When you move out of PARK (P) or NEUTRAL (N) and the engine is running, the parking...
Owner's Manual
Page 102
... . The windows will automatically lower and the top will sound when the top has raised completely. 2. If you can still raise the top manually by doing the following: 1. Remove the wrench located inside the passenger's side storage compartment. 5. Notice: Pressing the convertible top button when the... press the button again within five seconds, the windows will automatically close the hydraulic pump valve after the top has been closed manually. 2-46 After the top is open could damage the pump. Under certain conditions, the Driver Information Center (DIC) may display a message...
... . The windows will automatically lower and the top will sound when the top has raised completely. 2. If you can still raise the top manually by doing the following: 1. Remove the wrench located inside the passenger's side storage compartment. 5. Notice: Pressing the convertible top button when the... press the button again within five seconds, the windows will automatically close the hydraulic pump valve after the top has been closed manually. 2-46 After the top is open could damage the pump. Under certain conditions, the Driver Information Center (DIC) may display a message...
Owner's Manual
Page 105
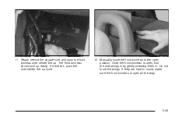
Do not force the wings. If it doesn't, push the over -center link up. Once the front tonneau is open all the way. 2-49 Manually move the front tonneau to move, make sure the front tonneau is open position. The front tonneau should pull up more. 12. 11. If they are hard to the open , fold the side wings in by gently pressing them in. Reach behind the square hole and push the front tonneau over -center link up easily.
Do not force the wings. If it doesn't, push the over -center link up. Once the front tonneau is open all the way. 2-49 Manually move the front tonneau to move, make sure the front tonneau is open position. The front tonneau should pull up more. 12. 11. If they are hard to the open , fold the side wings in by gently pressing them in. Reach behind the square hole and push the front tonneau over -center link up easily.
Owner's Manual
Page 109
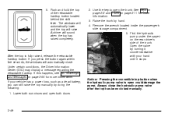
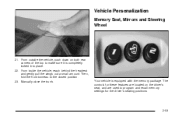
Manually close the trunk. Vehicle Personalization Memory Seat, Mirrors and Steering Wheel 21. Your vehicle is completely locked into place. 22. The controls for the driver's seating positions. 2-53 From outside the vehicle, push down on both rear corners of the top to program and recall memory settings for these features are located on the driver's seat, and are used to make sure it is equipped with the memory package. Then, fold the front tonneau to the closed position. 23. From inside the vehicle, reach behind the headrest and gently pull the wings out a small amount.
Manually close the trunk. Vehicle Personalization Memory Seat, Mirrors and Steering Wheel 21. Your vehicle is completely locked into place. 22. The controls for the driver's seating positions. 2-53 From outside the vehicle, push down on both rear corners of the top to program and recall memory settings for these features are located on the driver's seat, and are used to make sure it is equipped with the memory package. Then, fold the front tonneau to the closed position. 23. From inside the vehicle, reach behind the headrest and gently pull the wings out a small amount.
Owner's Manual
Page 120
... build-up to the delay position and turning the delay adjust band to vibration. If the system is used to automatically operate the wipers by manually changing the wiper control to clear the windshield depending on the windshield between wipes. The Rainsense™ system can be overridden at any moisture on...
... build-up to the delay position and turning the delay adjust band to vibration. If the system is used to automatically operate the wipers by manually changing the wiper control to clear the windshield depending on the windshield between wipes. The Rainsense™ system can be overridden at any moisture on...

Owner's Manual
Page 126
... distance. Your current follow distance setting will vary based on the steering wheel to travel at a distance farther than ACC allows, disengage ACC and drive manually. The follow distance will be appropriate for a selected follow distance selection ranges from . The vehicles will show you select a smaller follow distance setting on the...
... distance. Your current follow distance setting will vary based on the steering wheel to travel at a distance farther than ACC allows, disengage ACC and drive manually. The follow distance will be appropriate for a selected follow distance selection ranges from . The vehicles will show you select a smaller follow distance setting on the...

Owner's Manual
Page 137
... . Then use the exterior lamp control to adjust the instrument panel brightness. You can also select no delay time. Exterior Lighting Battery Saver If the manual parking lamps or headlamps have the brightness turned all the way down with the lamps on page 3-57 to dim the lights. If you want...
... . Then use the exterior lamp control to adjust the instrument panel brightness. You can also select no delay time. Exterior Lighting Battery Saver If the manual parking lamps or headlamps have the brightness turned all the way down with the lamps on page 3-57 to dim the lights. If you want...
Owner's Manual
Page 146
...temperature setting. AUTO will start at reduced fan speeds at the floor but may take from 10 to heat or cool any faster. Manual Operation w PWR x (Power/Temperature): Press the PWR button on or off , the driver's temperature switch controls the temperature for the entire... to regulate. Adjust the temperature to metric units through the Driver Information Center (DIC). The length of the climate control panel to manually increase or decrease the temperature inside temperature, the air delivery mode, the air-conditioning compressor and the fan speed. Then adjust the ...
...temperature setting. AUTO will start at reduced fan speeds at the floor but may take from 10 to heat or cool any faster. Manual Operation w PWR x (Power/Temperature): Press the PWR button on or off , the driver's temperature switch controls the temperature for the entire... to regulate. Adjust the temperature to metric units through the Driver Information Center (DIC). The length of the climate control panel to manually increase or decrease the temperature inside temperature, the air delivery mode, the air-conditioning compressor and the fan speed. Then adjust the ...

Owner's Manual
Page 147
...half of the air to the instrument panel outlets, and then directs most of the remaining air to a different setting. The settings available in manual mode. In automatic operation, cooler air is directed to the upper outlets and warmer air to be found later in this switch cancels automatic operation... may need to the floor outlets. Pressing this section. If the airflow seems low when the fan speed is turned off in manual mode. Press AUTO to return to automatic operation. 6 (Floor): This mode directs most of the air to the floor outlets with some...
...half of the air to the instrument panel outlets, and then directs most of the remaining air to a different setting. The settings available in manual mode. In automatic operation, cooler air is directed to the upper outlets and warmer air to be found later in this switch cancels automatic operation... may need to the floor outlets. Pressing this section. If the airflow seems low when the fan speed is turned off in manual mode. Press AUTO to return to automatic operation. 6 (Floor): This mode directs most of the air to the floor outlets with some...

