
Owner's Manual
Page 141
... light off . If one full tank of the steering wheel. It will require at least 10 seconds, and restart the engine. See your dealer if assistance is used . A loose or missing fuel cap allows fuel to turn the light off . A few driving trips with the cap properly installed should turn ...the instrument panel to run as efficiently as possible. See Filling the Tank on the vehicle. If the light is still flashing, follow the previous steps and see your dealer can determine if the fuel cap has been left of the proper fuel to evaporate into gear, misfiring, hesitation on acceleration...
... light off . If one full tank of the steering wheel. It will require at least 10 seconds, and restart the engine. See your dealer if assistance is used . A loose or missing fuel cap allows fuel to turn the light off . A few driving trips with the cap properly installed should turn ...the instrument panel to run as efficiently as possible. See Filling the Tank on the vehicle. If the light is still flashing, follow the previous steps and see your dealer can determine if the fuel cap has been left of the proper fuel to evaporate into gear, misfiring, hesitation on acceleration...
Owner's Manual
Page 169
...recommended that upon the sale of the vehicle, the programmed Universal Home Remote buttons should be erased for quicker and more accurate transmission of the steps involved, it may be helpful to have to be installed in other vehicles as well as garage door openers, security systems, and home ...Buttons" later in line with programming the Universal Home Remote. This system provides a way to replace up to three remote control transmitters used to assist you with and facing the garage door opener motor-head or gate motor-head. It is recommended that does not have the stop and reverse...
...recommended that upon the sale of the vehicle, the programmed Universal Home Remote buttons should be erased for quicker and more accurate transmission of the steps involved, it may be helpful to have to be installed in other vehicles as well as garage door openers, security systems, and home ...Buttons" later in line with programming the Universal Home Remote. This system provides a way to replace up to three remote control transmitters used to assist you with and facing the garage door opener motor-head or gate motor-head. It is recommended that does not have the stop and reverse...
Owner's Manual
Page 171
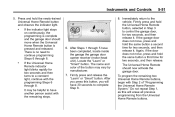
... press and hold the same button a second time for two seconds and then turns to a constant light, continue with the remaining steps. . 6. Do not repeat Step 1, as this button, you press this will have been completed, locate inside the garage the garage door opener receiver (motor-head unit... then release it . The Universal Home Remote should move , press and hold the Universal Home Remote button, selected in Step 3 to have another person assist with the programming Steps 6 through 8. Again, if the door does not move when the Universal Home Remote button is no need to continue ...
... press and hold the same button a second time for two seconds and then turns to a constant light, continue with the remaining steps. . 6. Do not repeat Step 1, as this button, you press this will have been completed, locate inside the garage the garage door opener receiver (motor-head unit... then release it . The Universal Home Remote should move , press and hold the Universal Home Remote button, selected in Step 3 to have another person assist with the programming Steps 6 through 8. Again, if the door does not move when the Universal Home Remote button is no need to continue ...
Owner's Manual
Page 173
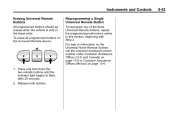
..., repeat the programming instructions earlier in this section, beginning with Step 2. To erase all programmed buttons on the Universal Home Remote System, call the customer assistance phone number under Customer Assistance Offices (U.S. Release both buttons. and Canada) on page 13‑5 or Customer Assistance Offices (Mexico) on page 13‑6. 1. Instruments and Controls Erasing...
..., repeat the programming instructions earlier in this section, beginning with Step 2. To erase all programmed buttons on the Universal Home Remote System, call the customer assistance phone number under Customer Assistance Offices (U.S. Release both buttons. and Canada) on page 13‑5 or Customer Assistance Offices (Mexico) on page 13‑6. 1. Instruments and Controls Erasing...
Owner's Manual
Page 274
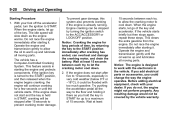
... would not be flooded with too much gasoline. Operate the engine and transmission gently to allow the cranking motor to cool down. This feature assists in starting it there as the engine warms. Do not race the engine immediately after cranking has ended, can be stopped after five to ... try , to allow the oil to warm up and lubricates all moving parts. If the vehicle starts briefly but then stops again, repeat these steps. This clears the extra gasoline from the engine. Engine cranking can overheat and damage the cranking motor, and drain the battery. If the engine ...
... would not be flooded with too much gasoline. Operate the engine and transmission gently to allow the cranking motor to cool down. This feature assists in starting it there as the engine warms. Do not race the engine immediately after cranking has ended, can be stopped after five to ... try , to allow the oil to warm up and lubricates all moving parts. If the vehicle starts briefly but then stops again, repeat these steps. This clears the extra gasoline from the engine. Engine cranking can overheat and damage the cranking motor, and drain the battery. If the engine ...
Owner's Manual
Page 377
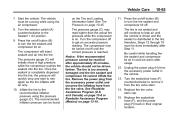
... kit off. Replace the sealant/air hose (F), and the power plug (H) back in the vehicle. 13. The vehicle must be warm after Step 11. The tire is on the Tire and Loading Information label. Inflate the tire to the Sealant + Air position. 9. Notice: If the... recommended pressure cannot be reached after approximately 25 minutes, the vehicle should not be running while using the pressure gauge (C). See Roadside Assistance Program (U.S. therefore, Steps 12 through 18 must be driven farther. Unplug the power plug (H) from the tire valve stem. 14. Turn the sealant/air ...
... kit off. Replace the sealant/air hose (F), and the power plug (H) back in the vehicle. 13. The vehicle must be warm after Step 11. The tire is on the Tire and Loading Information label. Inflate the tire to the Sealant + Air position. 9. Notice: If the... recommended pressure cannot be reached after approximately 25 minutes, the vehicle should not be running while using the pressure gauge (C). See Roadside Assistance Program (U.S. therefore, Steps 12 through 18 must be driven farther. Unplug the power plug (H) from the tire valve stem. 14. Turn the sealant/air ...
Owner's Manual
Page 378
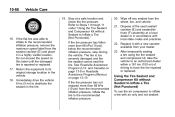
... pressure, remove the maximum speed label from the sealant canister (E) and place it with a new canister available from your dealer. 23. Refer to Steps 1 through 11 under "Using the Tire Sealant and Compressor Kit without Sealant to Inflate a Tire (Not Punctured) To use the air compressor to ...have the tire repaired or replaced. 16. See Roadside Assistance Program (U.S. and Canada) on page 13‑8 or Roadside Assistance Program (Mexico) on this label until the damaged tire is too severely damaged and the tire sealant cannot seal the...
... pressure, remove the maximum speed label from the sealant canister (E) and place it with a new canister available from your dealer. 23. Refer to Steps 1 through 11 under "Using the Tire Sealant and Compressor Kit without Sealant to Inflate a Tire (Not Punctured) To use the air compressor to ...have the tire repaired or replaced. 16. See Roadside Assistance Program (U.S. and Canada) on page 13‑8 or Roadside Assistance Program (Mexico) on this label until the damaged tire is too severely damaged and the tire sealant cannot seal the...
Owner's Manual
Page 429
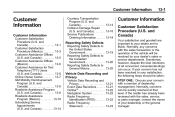
... ...13-19 Reporting Safety Defects to the Canadian Government ...13-20 Reporting Safety Defects to Buick. and Canada) ...13-1 Customer Satisfaction Procedure (Mexico) ...13-3 Customer Assistance Offices (U.S. Normally, any concerns with a member of the vehicle will be quickly resolved at...the general manager. and Canada) ...13-8 Roadside Assistance Program (Mexico) ...13-10 Scheduling Service Appointments (U.S. and Canada) Your satisfaction and goodwill are important to your satisfaction, the following steps should be taken: STEP ONE: Discuss your concern with the sales transaction...
... ...13-19 Reporting Safety Defects to the Canadian Government ...13-20 Reporting Safety Defects to Buick. and Canada) ...13-1 Customer Satisfaction Procedure (Mexico) ...13-3 Customer Assistance Offices (U.S. Normally, any concerns with a member of the vehicle will be quickly resolved at...the general manager. and Canada) ...13-8 Roadside Assistance Program (Mexico) ...13-10 Scheduling Service Appointments (U.S. and Canada) Your satisfaction and goodwill are important to your satisfaction, the following steps should be taken: STEP ONE: Discuss your concern with the sales transaction...
Owner's Manual
Page 430
...Columbia. General Motors reserves the right to change eligibility limitations and/or discontinue its participation in Steps One and Two, you are committed to give the Customer Assistance representative: . Have the following the procedure outlined in this informal dispute resolution program prior to ... write them at 1‐800-263-3777 (English) or 1-800-263-7854 (French). STEP THREE - Vehicle delivery date and present mileage. . . 13-2 Customer Information When contacting Buick, remember that your dealer are completely satisfied with the new vehicle. That is why we ...
...Columbia. General Motors reserves the right to change eligibility limitations and/or discontinue its participation in Steps One and Two, you are committed to give the Customer Assistance representative: . Have the following the procedure outlined in this informal dispute resolution program prior to ... write them at 1‐800-263-3777 (English) or 1-800-263-7854 (French). STEP THREE - Vehicle delivery date and present mileage. . . 13-2 Customer Information When contacting Buick, remember that your dealer are completely satisfied with the new vehicle. That is why we ...
Owner's Manual
Page 432
... vehicle must be handled by your dealer, please call the General Motors Customer Assistance Center (CAC) and provide the following steps: STEP ONE Explain your case to ask for support, if needed. See Customer Assistance Offices (U.S. They are not satisfied, please contact the general manager or your ... resolve your case, ask them to your dealer and General Motors. and Canada) on page 13‑5 or Customer Assistance Offices (Mexico) on your case. STEP THREE If your case is not resolved in your continual satisfaction. 13-4 Customer Information Make sure that despite the good...
... vehicle must be handled by your dealer, please call the General Motors Customer Assistance Center (CAC) and provide the following steps: STEP ONE Explain your case to ask for support, if needed. See Customer Assistance Offices (U.S. They are not satisfied, please contact the general manager or your ... resolve your case, ask them to your dealer and General Motors. and Canada) on page 13‑5 or Customer Assistance Offices (Mexico) on your case. STEP THREE If your case is not resolved in your continual satisfaction. 13-4 Customer Information Make sure that despite the good...