
Owner's Manual
Page 115
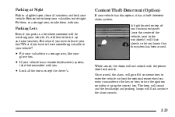
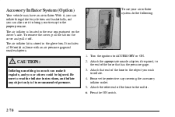
... vehicle has this option, it up and take your vehicle has a remote keyless entry system, take them with you . D Lock all windows and lock your glove box. The horn will sound and the headlamps and parking lamps will not unlock with you . Put them in a storage area, or take the transmitter with...
... vehicle has this option, it up and take your vehicle has a remote keyless entry system, take them with you . D Lock all windows and lock your glove box. The horn will sound and the headlamps and parking lamps will not unlock with you . Put them in a storage area, or take the transmitter with...
Owner's Manual
Page 151
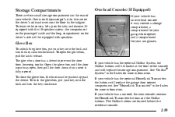
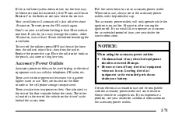
...sunroof, the mini console contains the HomeLink Transmitter buttons and the OnStar buttons. The OnStar buttons are on the tabs and remove. To close the glove box, the door must be pushed up on the driver's side and one is partway open the glovebox, pull the latch release. Overhead Consoles (If... Equipped) If your vehicle. Open the glove box until the door is on the passenger's side, two are located behind the overhead console. 2-59 To remove the covers, lift up past the...
...sunroof, the mini console contains the HomeLink Transmitter buttons and the OnStar buttons. The OnStar buttons are on the tabs and remove. To close the glove box, the door must be pushed up on the driver's side and one is partway open the glovebox, pull the latch release. Overhead Consoles (If... Equipped) If your vehicle. Open the glove box until the door is on the passenger's side, two are located behind the overhead console. 2-59 To remove the covers, lift up past the...
Owner's Manual
Page 154
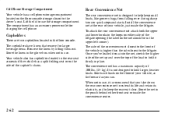
Lift the lid to use , it firmly in the upper left corner). Store the liners in the glove box when not in the pouch behind either side of the liftgate opening (the label on the side of the captain's chairs. 2-62 Rear Convenience Net ...
Lift the lid to use , it firmly in the upper left corner). Store the liners in the glove box when not in the pouch behind either side of the liftgate opening (the label on the side of the captain's chairs. 2-62 Rear Convenience Net ...
Owner's Manual
Page 160
... as needed, to accommodate loads of the front crossrail. 3. Lift the release levers on the screw located in the side rail assembly in the glove box. NOTICE: To adjust the crossrail(s), first remove the sunroof stop , do the following : 1. To remove the sunroof stop (A) by using the... 4. Place the tool on each side rail assembly. Put the crossrails in the full rear position. This will lock the crossrails in the glove box. To replace the sunroof stop, do the following : 1. This could cause damage to unlock the crossrails. After repositioning the crossrails, engage the...
... as needed, to accommodate loads of the front crossrail. 3. Lift the release levers on the screw located in the side rail assembly in the glove box. NOTICE: To adjust the crossrail(s), first remove the sunroof stop , do the following : 1. To remove the sunroof stop (A) by using the... 4. Place the tool on each side rail assembly. Put the crossrails in the full rear position. This will lock the crossrails in the glove box. To replace the sunroof stop, do the following : 1. This could cause damage to unlock the crossrails. After repositioning the crossrails, engage the...
Owner's Manual
Page 162
... in the rear compartment on the cover and pull it explode, and you wish to the outlet. 6. The air inflator kit is located in the glove box. Turn the ignition to its recommended pressure. 2. Attach the other end of the hose to the proper pressure. To remove the cover, pull the tab...
... in the rear compartment on the cover and pull it explode, and you wish to the outlet. 6. The air inflator kit is located in the glove box. Turn the ignition to its recommended pressure. 2. Attach the other end of the hose to the proper pressure. To remove the cover, pull the tab...
Owner's Manual
Page 163
... rear power outlets. If you may not be blown or installed incorrectly. Your air inflator will only operate while the ignition is not in the glove box.
... rear power outlets. If you may not be blown or installed incorrectly. Your air inflator will only operate while the ignition is not in the glove box.
Owner's Manual
Page 173
... following: A. Exterior/Interior Lamps Control B. Head-Up Display Switch (Option) and Driver Information Center (DIC) Controls (If Equipped) J. Hazard Warning Flasher Switch D. Front Armrest Storage O. Glove Box 2-81
... following: A. Exterior/Interior Lamps Control B. Head-Up Display Switch (Option) and Driver Information Center (DIC) Controls (If Equipped) J. Hazard Warning Flasher Switch D. Front Armrest Storage O. Glove Box 2-81

Owner's Manual
Page 365
Then squeeze the tab on the left of the glove box. 1. Pull the second filter out. 2. Squeeze the tab on the left and pull the outer access panel to open the door. 4. To remove the second, reach in the back of the inner access panel to remove. 6-18 The first air filter will pull straight out. The access panel for the passenger compartment air filter is located in and slide it toward the opening. Open the glove box. 3.
Then squeeze the tab on the left of the glove box. 1. Pull the second filter out. 2. Squeeze the tab on the left and pull the outer access panel to open the door. 4. To remove the second, reach in the back of the inner access panel to remove. 6-18 The first air filter will pull straight out. The access panel for the passenger compartment air filter is located in and slide it toward the opening. Open the glove box. 3.
Owner's Manual
Page 366
... the Index. D Uses such as found in the Index. 6-19 For the type of filter to check your vehicle under one or more of the glove box. If you do not use , see "Normal Maintenance Replacement Parts" in the same direction on both the fluid and filter every 50,000 miles (83...
... the Index. D Uses such as found in the Index. 6-19 For the type of filter to check your vehicle under one or more of the glove box. If you do not use , see "Normal Maintenance Replacement Parts" in the same direction on both the fluid and filter every 50,000 miles (83...
Owner's Manual
Page 409
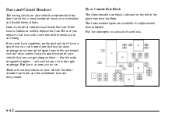
... band is located to access the fuse block. 6-62 Be sure you replace a bad fuse with a new one that you can borrow one of the glove box near the floor. Floor Console Fuse Block The floor console fuse block is broken or melted, replace the fuse.
... band is located to access the fuse block. 6-62 Be sure you replace a bad fuse with a new one that you can borrow one of the glove box near the floor. Floor Console Fuse Block The floor console fuse block is broken or melted, replace the fuse.


