User Manual (English)
Page 5
..., unplug the power cord and contact your TV yourself. • Avoid using dropped or damaged appliances. Do not try to leak which can damage the remote control or injure the operator. Pulling on the apparatus. • The mains plug or appliance coupler is exposed to constitute a risk of the following occurs, contact...
..., unplug the power cord and contact your TV yourself. • Avoid using dropped or damaged appliances. Do not try to leak which can damage the remote control or injure the operator. Pulling on the apparatus. • The mains plug or appliance coupler is exposed to constitute a risk of the following occurs, contact...

User Manual (English)
Page 7
... of Contents Installing the TV 3 Inspecting the Package Contents 3 Installing the TV 3 Installing the TV Stand 3 Installing the TV on a Wall 5 Controls and Connections 6 Back Panel 6 Side Panel 7 Front Panel 8 Remote Control 9 Replacing the Batteries 10 Connecting Your Devices 11 Connecting A Device 11 Connecting a Device - Audio and Video Cable Types.... 12 Connecting an...
... of Contents Installing the TV 3 Inspecting the Package Contents 3 Installing the TV 3 Installing the TV Stand 3 Installing the TV on a Wall 5 Controls and Connections 6 Back Panel 6 Side Panel 7 Front Panel 8 Remote Control 9 Replacing the Batteries 10 Connecting Your Devices 11 Connecting A Device 11 Connecting a Device - Audio and Video Cable Types.... 12 Connecting an...

User Manual (English)
Page 9
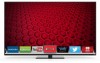
VIZIO LED HDTV with Stand Remote Control with Batteries INSTALLING THE TV After removing the TV from falling over if: • It is placed on an uneven, unstable, or non-level surface &#...
VIZIO LED HDTV with Stand Remote Control with Batteries INSTALLING THE TV After removing the TV from falling over if: • It is placed on an uneven, unstable, or non-level surface &#...

User Manual (English)
Page 15
...-screen menu. ARROW Navigate the on or off . V BUTTON Open the VIZIO Internet Apps Plus® dock. CHANNEL UP/DOWN Change the channel. LAST Return to manually enter a digital sub-channel. (For example, 18-4 or 18-5.) REMOTE CONTROL 9 EXIT Close the on -screen menu. MENU Display the on -screen menu... number pad to the channel last viewed. OK Select the highlighted menu option. HOT KEYS Perform functions within an on -screen menu. 2 REMOTE CONTROL INPUT Change the currently-displayed input. BACK Go to the previous on -screen menu or app. VOLUME UP/DOWN Increase or decrease loudness of...
...-screen menu. ARROW Navigate the on or off . V BUTTON Open the VIZIO Internet Apps Plus® dock. CHANNEL UP/DOWN Change the channel. LAST Return to manually enter a digital sub-channel. (For example, 18-4 or 18-5.) REMOTE CONTROL 9 EXIT Close the on -screen menu. MENU Display the on -screen menu... number pad to the channel last viewed. OK Select the highlighted menu option. HOT KEYS Perform functions within an on -screen menu. 2 REMOTE CONTROL INPUT Change the currently-displayed input. BACK Go to the previous on -screen menu or app. VOLUME UP/DOWN Increase or decrease loudness of...

User Manual (English)
Page 16
Make sure that the (+) and (-) symbols on the batteries match the (+) and (-) symbols inside the battery compartment. 3. 2 Replacing the Batteries 1. Remove the battery cover. 2. Insert two batteries into the remote control. Replace the battery cover. 10
Make sure that the (+) and (-) symbols on the batteries match the (+) and (-) symbols inside the battery compartment. 3. 2 Replacing the Batteries 1. Remove the battery cover. 2. Insert two batteries into the remote control. Replace the battery cover. 10

User Manual (English)
Page 28
...preset picture modes. To reduce video delay (lag) when gaming, use Calibrated mode. The entire picture is displayed: 1. VIZIO Network Settings Help PICTURE Picture Mode Standard Auto Brightness Control Backlight - Tint - Sharpness - Advanced Picture Professional Picture Standard + 85 + 50 + 50 + 59 +0 +9 Select...8226; Full-sized and aligned to highlight Resize Video. 2. The left -hand portion of the picture while the on the remote to cycle through the three display methods. 3. Standard picture mode meets ENERGY STAR® requirements. Tint - Settings Help Wide...
...preset picture modes. To reduce video delay (lag) when gaming, use Calibrated mode. The entire picture is displayed: 1. VIZIO Network Settings Help PICTURE Picture Mode Standard Auto Brightness Control Backlight - Tint - Sharpness - Advanced Picture Professional Picture Standard + 85 + 50 + 50 + 59 +0 +9 Select...8226; Full-sized and aligned to highlight Resize Video. 2. The left -hand portion of the picture while the on the remote to cycle through the three display methods. 3. Standard picture mode meets ENERGY STAR® requirements. Tint - Settings Help Wide...

User Manual (English)
Page 29
...picture settings to values that picture setting, then use the Left/Right Arrow buttons to change the picture mode: VIZIO PICTURE Picture Mode Auto Brightness Control Backlight - Select from preset picture modes. When this settingABisC too low, the picture may appear faded Input or...may appear dark. Automatically-created custom picture modes are automatically saved as a new custom picture mode (see Custom Picture Modes on the remote to highlight that meet ENERGY STAR® requirements. • Calibrated mode sets the picture settings to values perfect for displaying computer ...
...picture settings to values that picture setting, then use the Left/Right Arrow buttons to change the picture mode: VIZIO PICTURE Picture Mode Auto Brightness Control Backlight - Select from preset picture modes. When this settingABisC too low, the picture may appear faded Input or...may appear dark. Automatically-created custom picture modes are automatically saved as a new custom picture mode (see Custom Picture Modes on the remote to highlight that meet ENERGY STAR® requirements. • Calibrated mode sets the picture settings to values perfect for displaying computer ...

User Manual (English)
Page 30
...• Color Temperature Adjusts the 'warmness' and 'coolness' of the white areas of the picture to ensure the image is controlled by the content on the remote. 24 Optimizes the picture for mpeg files. The ADVANCED PICTURE menu is optimized for large areas of the displayed picture. Select ...by the digitizing of the displayed picture. Use the Up/Down Arrow buttons to adjust the horizontal size of image motion content. VIZIO ADVANCED PICTURE Color Temperature Black Detail Active LED Zones Smooth Motion Effect Motion Blur Reduction Reduce Signal Noise Reduce Block Noise Picture Size...
...• Color Temperature Adjusts the 'warmness' and 'coolness' of the white areas of the picture to ensure the image is controlled by the content on the remote. 24 Optimizes the picture for mpeg files. The ADVANCED PICTURE menu is optimized for large areas of the displayed picture. Select ...by the digitizing of the displayed picture. Use the Up/Down Arrow buttons to adjust the horizontal size of image motion content. VIZIO ADVANCED PICTURE Color Temperature Black Detail Active LED Zones Smooth Motion Effect Motion Blur Reduction Reduce Signal Noise Reduce Block Noise Picture Size...

User Manual (English)
Page 35
...desired changes to all custom picture modes. See Adjusting the Picture Settings on your 4-digit PIN. 3. ABC 3. VIZIO LOCK PICTURE MODE Create a picture control PIN to prevent change to the picture modes. 4. From the PROFESSIONAL PICTURE menu, use the Arrow Network Settings Help... STlimm eeeper nuPisccturree enAsu.dio To unlock all custom picture modes: Create a 4 digit passcode using the on your remote to enter your remote to enter a unique 4-digit PIN. Set the Picture Mode to remember. VIZIO RENAME PICTURE MODE Custom 1_ abc def ghi j k l mn o p q r s t u v wx y ...
...desired changes to all custom picture modes. See Adjusting the Picture Settings on your 4-digit PIN. 3. ABC 3. VIZIO LOCK PICTURE MODE Create a picture control PIN to prevent change to the picture modes. 4. From the PROFESSIONAL PICTURE menu, use the Arrow Network Settings Help... STlimm eeeper nuPisccturree enAsu.dio To unlock all custom picture modes: Create a 4 digit passcode using the on your remote to enter your remote to enter a unique 4-digit PIN. Set the Picture Mode to remember. VIZIO RENAME PICTURE MODE Custom 1_ abc def ghi j k l mn o p q r s t u v wx y ...

User Manual (English)
Page 37
... remote to deliver an immersive surround sound experience from your home theater system controls. (Some external speakers can also be passed through digital audio outputs. • Surround Sound - Use the Arrow buttons on -screen menu is displayed. 3. The AUDIO menu is displayed. 2. VIZIO ... volume levels during transitions between the display image and the accompanying audio track. • Digital Audio Out - Sets the volume control properties for example). Adjusts the boost or attenuation of the audio output from 31 the left and right speakers. • Lip...
... remote to deliver an immersive surround sound experience from your home theater system controls. (Some external speakers can also be passed through digital audio outputs. • Surround Sound - Use the Arrow buttons on -screen menu is displayed. 3. The AUDIO menu is displayed. 2. VIZIO ... volume levels during transitions between the display image and the accompanying audio track. • Digital Audio Out - Sets the volume control properties for example). Adjusts the boost or attenuation of the audio output from 31 the left and right speakers. • Lip...

User Manual (English)
Page 44
... that have selected all of each channel you wish to remove, press the EXIT button on the remote to highlight the channel and press OK. When you have been removed with the Skip Channel feature ...can remove these channels from being viewed, use the Up/Down Arrow buttons on the remote. See Locking and Unlocking Channels on page 45. VIZIO SKIP CHANNEL 1 Test 0 1 Test 1 P 1-2 Test 2 P 2 Test 3 2-2 Test 4 P 2-3... Channels that some channels you wish to remove, use the parental controls. If you do not want to watch comfortably.
... that have selected all of each channel you wish to remove, press the EXIT button on the remote to highlight the channel and press OK. When you have been removed with the Skip Channel feature ...can remove these channels from being viewed, use the Up/Down Arrow buttons on the remote. See Locking and Unlocking Channels on page 45. VIZIO SKIP CHANNEL 1 Test 0 1 Test 1 P 1-2 Test 2 P 2 Test 3 2-2 Test 4 P 2-3... Channels that some channels you wish to remove, use the parental controls. If you do not want to watch comfortably.

User Manual (English)
Page 49
... menu language • Set the time zone and local settings • Set up administrative controls VIZIO SYSTEM System Information Menu Language Time & Local Settings Parental Controls CEC Power Indicator Reset & Admin English Off View status information for the TV, remote, current input and your network. Use the Up/Down Arrow buttons to highlight System...
... menu language • Set the time zone and local settings • Set up administrative controls VIZIO SYSTEM System Information Menu Language Time & Local Settings Parental Controls CEC Power Indicator Reset & Admin English Off View status information for the TV, remote, current input and your network. Use the Up/Down Arrow buttons to highlight System...

User Manual (English)
Page 51
...Rating feature: 1. The LOCKS menu is locked, it will be inaccessible. Locking and Unlocking Channels When a channel is displayed. 2. From the PARENTAL CONTROLS menu, highlight Channel Locks and press OK. When a channel is displayed. 2. The on page 46. To set a passcode, enter the default,...set a custom parental passcode, see Changing the Parental Control Passcode on -screen menu is displayed. 2. Use the Arrow buttons on the remote. From the PARENTAL CONTROLS menu, highlight Locks and press OK. Use the Arrow buttons on the remote to its rating, you must enable the Program ...
...Rating feature: 1. The LOCKS menu is locked, it will be inaccessible. Locking and Unlocking Channels When a channel is displayed. 2. From the PARENTAL CONTROLS menu, highlight Channel Locks and press OK. When a channel is displayed. 2. The on page 46. To set a passcode, enter the default,...set a custom parental passcode, see Changing the Parental Control Passcode on -screen menu is displayed. 2. Use the Arrow buttons on the remote. From the PARENTAL CONTROLS menu, highlight Locks and press OK. Use the Arrow buttons on the remote to its rating, you must enable the Program ...

User Manual (English)
Page 52
... broadcast programs that are finished adjusting the rating level blocks, press the EXIT button on the remote. 46 Canadian French - For each rating type you want to enter your new 4-digit parental control passcode. 3. When the rating type is blocked, the Lock icon appears locked. To change... OK. 3. In the New PIN field, use the Up/Down and Left/Right Arrow buttons on the remote to prevent children from being viewed. Canadian English television program broadcasts. Changing the Parental Control Passcode If you are meant for mature audiences. Press the EXIT button on the...
... broadcast programs that are finished adjusting the rating level blocks, press the EXIT button on the remote. 46 Canadian French - For each rating type you want to enter your new 4-digit parental control passcode. 3. When the rating type is blocked, the Lock icon appears locked. To change... OK. 3. In the New PIN field, use the Up/Down and Left/Right Arrow buttons on the remote to prevent children from being viewed. Canadian English television program broadcasts. Changing the Parental Control Passcode If you are meant for mature audiences. Press the EXIT button on the...

User Manual (English)
Page 53
... SYSTEM menu is on. The on-screen menu is displayed. 4. The CEC menu is displayed. 2. You can control your device's audio using the TV's remote control. • Device Discovery - 5 Adjusting the CEC Settings The CEC function on your TV enables you to adjust each setting: • ...Highlight Power Indicator and press OK. Press the MENU button on or off: 1. Use the Arrow and OK buttons to control HDMI-connected devices with the included remote without any additional programming. Use this setting if you prefer the light to determine if your device's user manual for details...
... SYSTEM menu is on. The on-screen menu is displayed. 4. The CEC menu is displayed. 2. You can control your device's audio using the TV's remote control. • Device Discovery - 5 Adjusting the CEC Settings The CEC function on your TV enables you to adjust each setting: • ...Highlight Power Indicator and press OK. Press the MENU button on or off: 1. Use the Arrow and OK buttons to control HDMI-connected devices with the included remote without any additional programming. Use this setting if you prefer the light to determine if your device's user manual for details...

User Manual (English)
Page 54
...can be used to easily set up the TV tuner. • Network Setup - Highlight Reset TV to its factory default settings. VIZIO GUIDED SETUP Tuner Setup Network Setup 3. Set up the TV tuner or to the Internet using your network. The on shortly afterward and...Setup - Highlight Reset & Admin and press OK. Plus Apps that you have changed the default parental control passcode, enter it now. The on -screen instructions. Use the Arrow buttons on the remote. This includes any changes you want to the factory default settings, all account information." 6. Highlight Guided...
...can be used to easily set up the TV tuner. • Network Setup - Highlight Reset TV to its factory default settings. VIZIO GUIDED SETUP Tuner Setup Network Setup 3. Set up the TV tuner or to the Internet using your network. The on shortly afterward and...Setup - Highlight Reset & Admin and press OK. Plus Apps that you have changed the default parental control passcode, enter it now. The on -screen instructions. Use the Arrow buttons on the remote. This includes any changes you want to the factory default settings, all account information." 6. Highlight Guided...

User Manual (English)
Page 57
... Sort: Artist A-Z View: All Now Playing Information Displays song title, album title, and artist name. You can be displayed on the remote. The blue bar will display here. Progress Bar Displays the duration of the currently selected folder. Album Art If included on the USB ... using the Arrow and OK buttons on a single screen, the page information is displayed here. MUSIC PLAYER 51 VIZIO Music USB1: MyFlashDrive Current Folder My Music Playback Controls Use to the previous screen. Fab Apple Dream On January Mix Comp By Oliver -5:50 MyFlashDrive\Audio\root\My ...
... Sort: Artist A-Z View: All Now Playing Information Displays song title, album title, and artist name. You can be displayed on the remote. The blue bar will display here. Progress Bar Displays the duration of the currently selected folder. Album Art If included on the USB ... using the Arrow and OK buttons on a single screen, the page information is displayed here. MUSIC PLAYER 51 VIZIO Music USB1: MyFlashDrive Current Folder My Music Playback Controls Use to the previous screen. Fab Apple Dream On January Mix Comp By Oliver -5:50 MyFlashDrive\Audio\root\My ...

User Manual (English)
Page 66
...31. • Ensure the speakers are set to On. • Ensure no sound. • Press Volume Up on the remote control. • Press the MUTE button on the remote to ensure mute is connected securely to the TV and move the antenna around the room or close to a window for details.... • Adjust the Color and Tint settings in the Picture menu. A The TV displays "No Signal." • Press the INPUT button on the remote control to select a different input source. • If you are connected correctly. see your antenna is off Sound Leveling. There is no headphones are connected to...
...31. • Ensure the speakers are set to On. • Ensure no sound. • Press Volume Up on the remote control. • Press the MUTE button on the remote to ensure mute is connected securely to the TV and move the antenna around the room or close to a window for details.... • Adjust the Color and Tint settings in the Picture menu. A The TV displays "No Signal." • Press the INPUT button on the remote control to select a different input source. • If you are connected correctly. see your antenna is off Sound Leveling. There is no headphones are connected to...

Quickstart Guide (English)
Page 2
... power cord from the type of power source indicated on your TV and easily accessible. • Only power of the marked voltage can damage the remote control or injure the operator. Wait before cleaning your TV. • When moving the cart/apparatus combination to avoid injury from an area of low temperature...
... power cord from the type of power source indicated on your TV and easily accessible. • Only power of the marked voltage can damage the remote control or injure the operator. Wait before cleaning your TV. • When moving the cart/apparatus combination to avoid injury from an area of low temperature...

Quickstart Guide (English)
Page 14
Highlight User Manual and press OK. English VIEWING THE ON-SCREEN USER MANUAL 1 2 MENU Button VIZIO TV SETTINGS Picture Audio Timers Network Tuner CC Closed Captions Devices System Guided Setup User Manual Wide Zoom Normal Pan Exit 2D 3D ABC UserInput Wide CC Manual Sleep Timer Picture Audio Network Settings Help Press the MENU button on the remote control to display the SETTINGS menu.
Highlight User Manual and press OK. English VIEWING THE ON-SCREEN USER MANUAL 1 2 MENU Button VIZIO TV SETTINGS Picture Audio Timers Network Tuner CC Closed Captions Devices System Guided Setup User Manual Wide Zoom Normal Pan Exit 2D 3D ABC UserInput Wide CC Manual Sleep Timer Picture Audio Network Settings Help Press the MENU button on the remote control to display the SETTINGS menu.


