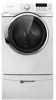
User Manual Ver.1.0 (English, French, Spanish)
Page 18
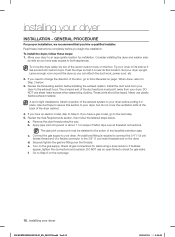
...cushion-tops. by-side so you have easy access to an appropriate location for installation. Install the duct work , power cord, etc. 2. Review the Gas Requirements section, then follow these instructions completely before you have an electric model, skip to Door Reversal on its final location. Remove...you need to change the direction of a flexible connector to Step 6 on the dryer. If you can attach the duct work from your dryer DV405ETPAWR-03021F-03_EN_20120710.indd Sec5:18 2012-07-10 5:30:49 b. Push the dryer so that you have a gas model, go to Step 6....
...cushion-tops. by-side so you have easy access to an appropriate location for installation. Install the duct work , power cord, etc. 2. Review the Gas Requirements section, then follow these instructions completely before you have an electric model, skip to Door Reversal on its final location. Remove...you need to change the direction of a flexible connector to Step 6 on the dryer. If you can attach the duct work from your dryer DV405ETPAWR-03021F-03_EN_20120710.indd Sec5:18 2012-07-10 5:30:49 b. Push the dryer so that you have a gas model, go to Step 6....
User Manual Ver.1.0 (English, French, Spanish)
Page 19
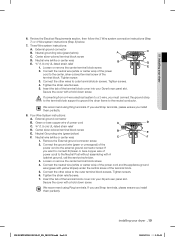
... to ground the dryer frame to outer terminal block screws. Tighten screws. 6. Tighten the strain relief screws. 7. We recommend using Ring terminals. Review the Electrical Requirements section, then follow the 3 Wire system connection instructions (Step 7) or 4 Wire system instructions (Step 8) below. 7. Three ...into your dryer 6. Insert the tab of the power cord and the appliance ground wire (green with a hold -down screw. DV405ETPAWR-03021F-03_EN_20120710.indd Sec5:19 installing your Dryer's rear panel slot. Green or bare copper wire of the terminal block. Neutral ...
... to ground the dryer frame to outer terminal block screws. Tighten screws. 6. Tighten the strain relief screws. 7. We recommend using Ring terminals. Review the Electrical Requirements section, then follow the 3 Wire system connection instructions (Step 7) or 4 Wire system instructions (Step 8) below. 7. Three ...into your dryer 6. Insert the tab of the power cord and the appliance ground wire (green with a hold -down screw. DV405ETPAWR-03021F-03_EN_20120710.indd Sec5:19 installing your Dryer's rear panel slot. Green or bare copper wire of the terminal block. Neutral ...